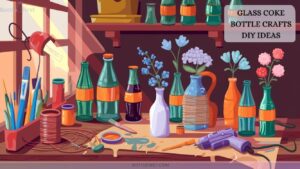
10 Mesmerizing Mini Glass Bottle Crafts With Resin for Jewelry Lovers
Transform mini glass bottles into stunning jewelry by pressing flowers and sealing them with resin for floral pendants. Create sparkly earrings with glitter and sequins, or make beach-inspired charms with seashells. Try ombre resin necklaces, or whimsical floating charm bracelets.
Craft marbled teardrop earrings, and layered cylindrical vials. Design colorful sphere pendants and translucent rectangle charms. Start creating, and you’ll discover enchanting techniques to elevate your jewelry-making skills to the next level.

1. Nature-Inspired Dried Flower Pendants

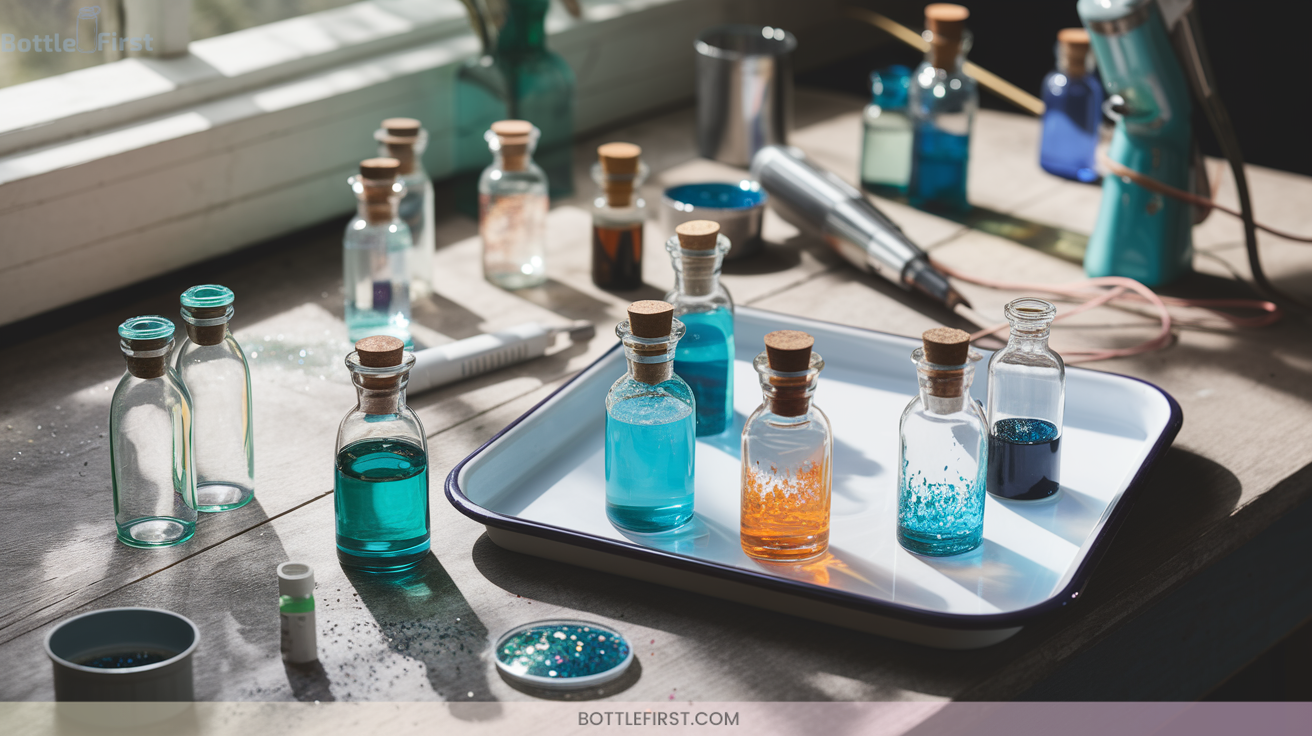
Creating nature-inspired dried flower pendants is a delightful way to preserve the beauty of blooms in charming glass keepsakes. Start by selecting small, flat flowers, pressing them in book pages for 2-4 weeks. Air-dry delicate blooms like baby’s breath.
Once dried, seal with clear acrylic spray. Trim to fit mini glass bottles. Pour UV or epoxy resin into bottles, filling them one-third. Use tweezers to place flowers, then add more resin, avoiding air bubbles. A toothpick helps with positioning. Cure each layer with UV light.
Sand edges smooth, attach jewelry findings, and you’ve crafted a unique, artistic pendant
2. Sparkly Glitter and Sequin Earrings
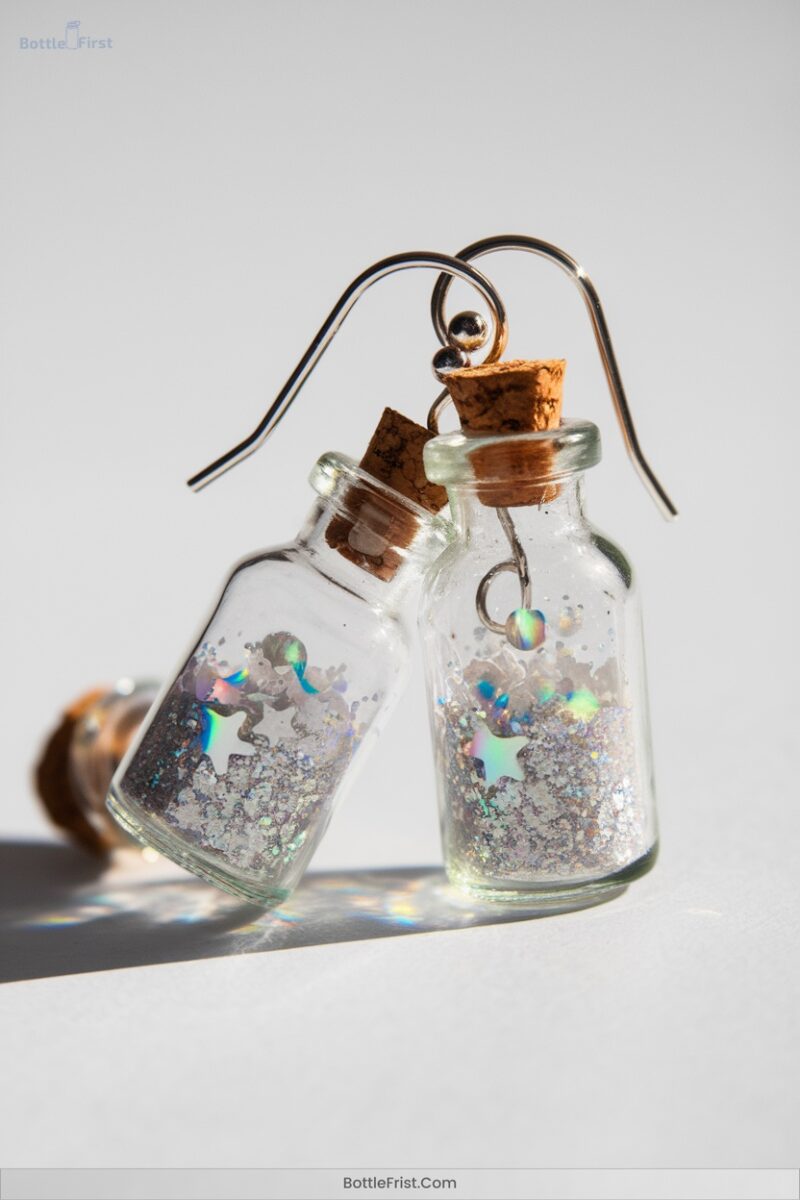
Transform your crafting skills by diving into the vibrant world of sparkly glitter and sequin earrings. Start by preparing your workspace with wax paper and gather UV or epoxy resin, silicone molds, assorted glitters, and more.
Mix resin meticulously, pour a thin layer into molds, and sprinkle glitters sparingly. Use a toothpick to swirl them into magical patterns. Encapsulate your creation with a second resin layer. Allow it to cure fully, then carefully demold.
Smooth any rough edges and drill for hooks. Experiment with ombre, geometric shapes, or layered looks. Seal with a UV-resistant coat for a dazzling, innovative finish.
3. Beach-Themed Miniature Seashell Charms
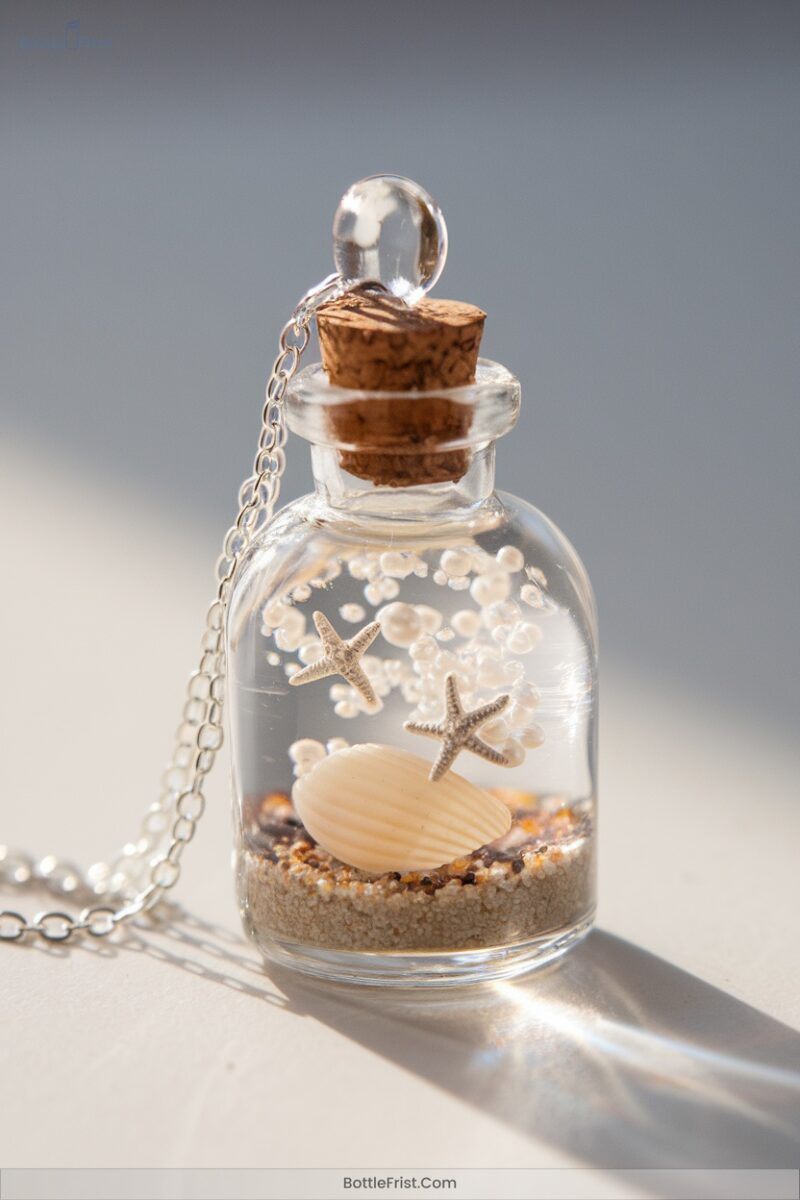
Plunge into the enchanting world of beach-themed miniature seashell charms, where the ocean’s beauty is encapsulated in tiny glass bottles.
Discover the ocean’s charm, captured in delicate mini glass bottles with beach-themed seashell treasures.
- Materials: Mini glass bottles, UV or epoxy resin, tiny seashells, beach sand, micro pearls, glitter, and jewelry findings.
- Preparation: Clean bottles thoroughly, sort seashells, mix resin, and set up a non-stick work area.
- Filling Techniques: Layer sand and shells meticulously, use tweezers for precision, and add resin incrementally to avoid bubbles.
Seal each bottle, attach findings, and transform them into pendants or earrings. Package them beautifully for a truly special gift.
4. Ombre Layered Resin Necklaces
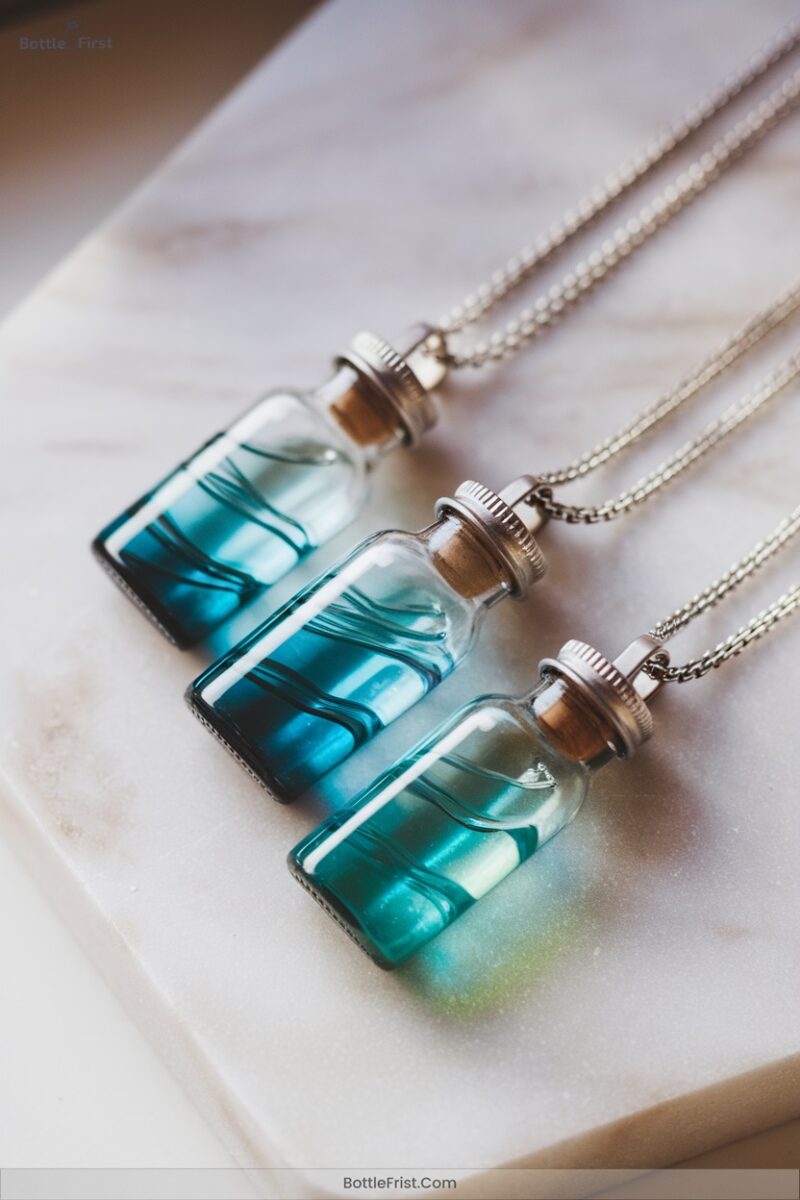
Ever wondered how those stunning ombre layered resin necklaces are crafted? Start by gathering clear epoxy resin, silicone molds, and vibrant colorants. Mix resin with hardener, then divide into cups for coloring.
Pour the lightest hue into one-third of the mold, letting it partially cure for 15-30 minutes. Add a medium shade, then the darkest. Tilt molds for dynamic layers, and sprinkle glitter for sparkle. Use a toothpick for swirls, and embed charms for flair.
After curing for 24-48 hours, gently sand edges, drill for a pendant bail, and attach to a chain. Store away from sunlight to preserve vibrancy.
5. Whimsical Floating Charm Bracelets
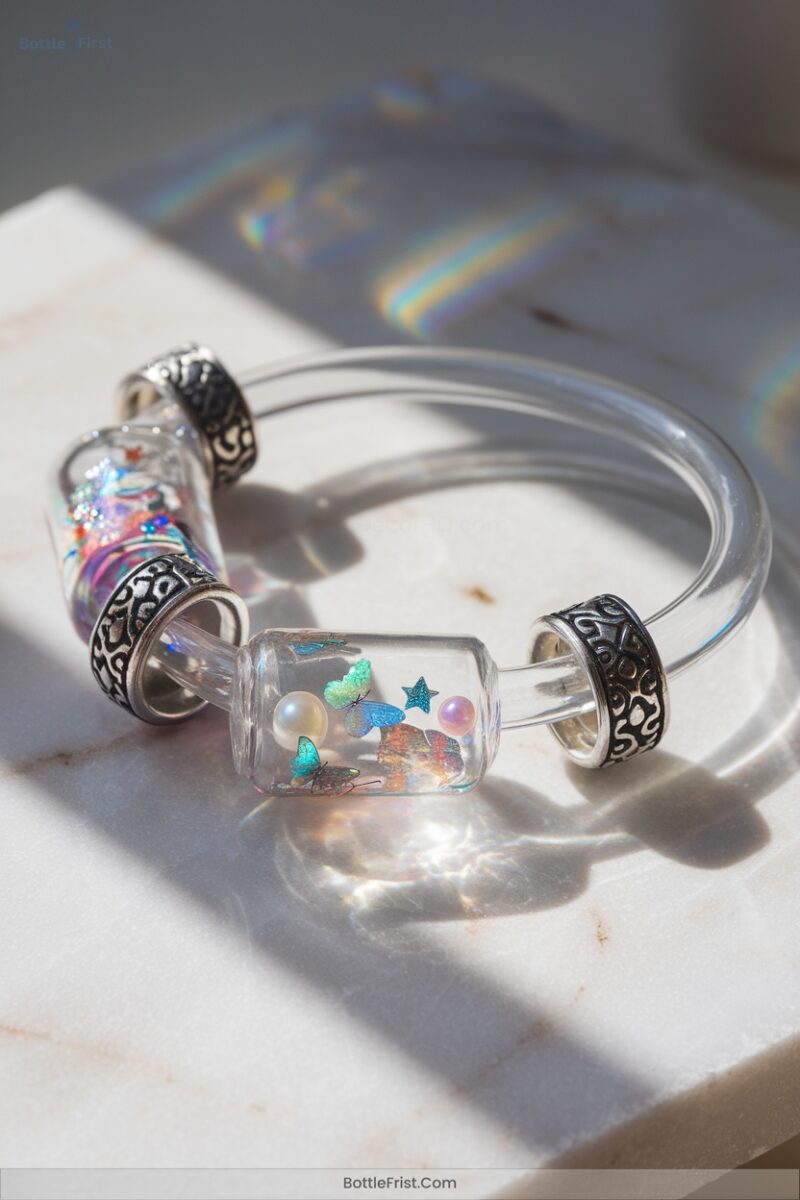
Amidst the sphere of crafting, creating whimsical floating charm bracelets offers a delightful opportunity for self-expression and artistry. Start by selecting floating lockets or mini glass bottles. Fill them using UV resin or clear epoxy resin, ensuring a secure seal. For a splash of color and movement, add colored shaker water and clear shaker oil, leaving a tiny air bubble for effect.
Customization Ideas:
- Mix glitter and mica powder for dazzling hues.
- Incorporate themed elements like miniature food or nature-inspired charms.
- Attach charms to bracelets using jump rings or sliding knots for an adjustable fit.
Unleash your creativity with these detailed steps
6. Romantic Heart-Shaped Resin Bottles

For a touch of romance and creativity, crafting heart-shaped resin bottles can be a charming project that doubles as a heartfelt gift.
Start by cleaning your silicone molds thoroughly. Mix your resin as directed, ensuring your workspace is well-ventilated. Fill the mold halfway with resin, then add tiny charms or dried flowers for a romantic flourish. Complete the pour, removing air bubbles with a toothpick.
Once cured, gently sand edges and drill a hole for jewelry findings. Attach a chain or hook, and finish with a clear topcoat for shine. Package your creation in a gift box with a personalized note.
7. Marbled Teardrop Resin Earrings
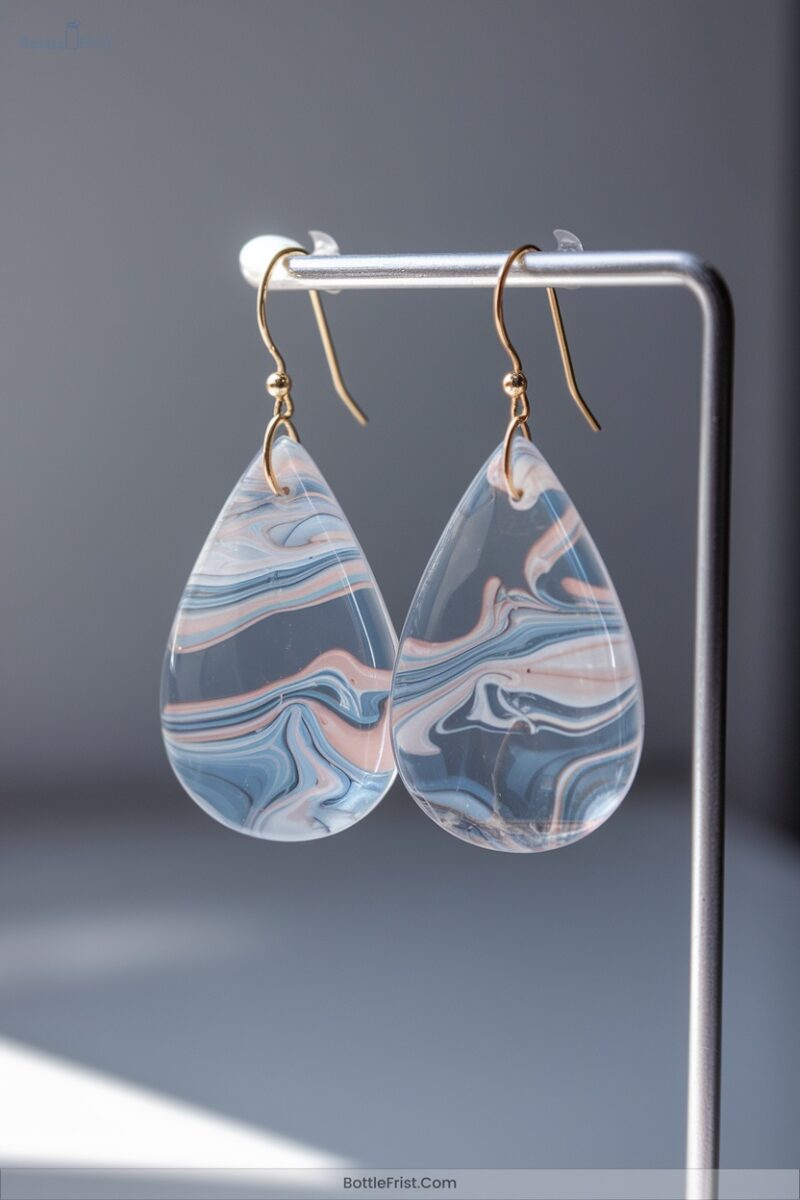
Creating marbled teardrop resin earrings combines artistry and technique to produce stunning, wearable pieces. Start by gathering your materials: UV or epoxy resin, teardrop-shaped silicone molds, alcohol inks, metallic powder pigments, and basic tools.
Follow these steps to craft your masterpiece:
- Preparation: Clean molds, mix resin, and color with inks and pigments.
- Marbling: Pour colored resins into molds, swirl with a toothpick, and tap to release bubbles.
- Curing and Finishing: Cure resin, remove pieces, sand edges, drill holes, and apply clear resin for shine.
Experiment with vibrant colors, ensuring your creations captivate and dazzle.
8. Layered Resin Cylindrical Vials
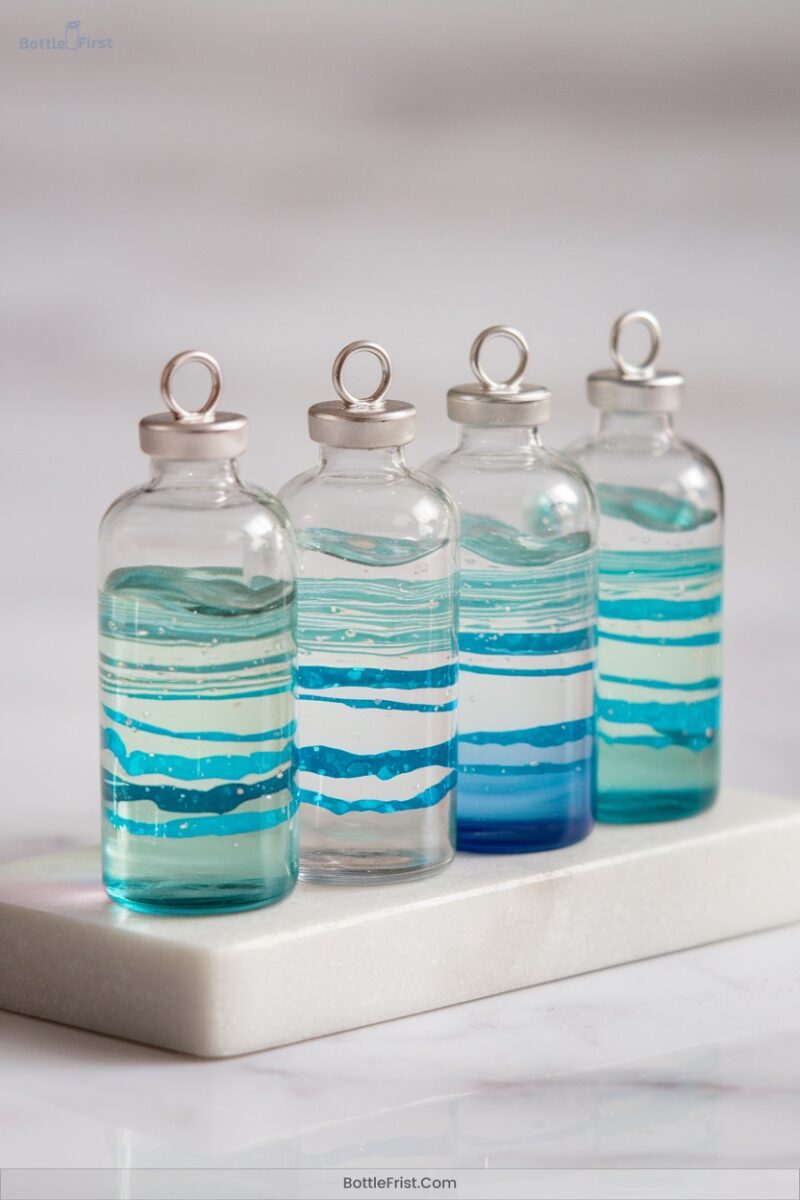
Explore the enchanting world of layered resin cylindrical vials, where creativity meets craftsmanship. Begin by cleaning your glass vials with alcohol, ensuring a pristine canvas.
Mix clear epoxy resin in small batches, dividing it for color customization. Pour thin layers of colored resin, letting each set partially. Tilt the vial for dynamic layers or swirl with a toothpick for a marbled look.
Add glitter or mica between layers for depth. Once cured, attach jewelry findings with strong adhesive. Wrap with decorative wire for a personalized touch. Your innovative vial creation is ready to dazzle and inspire.
9. Colorful Round Sphere Pendants
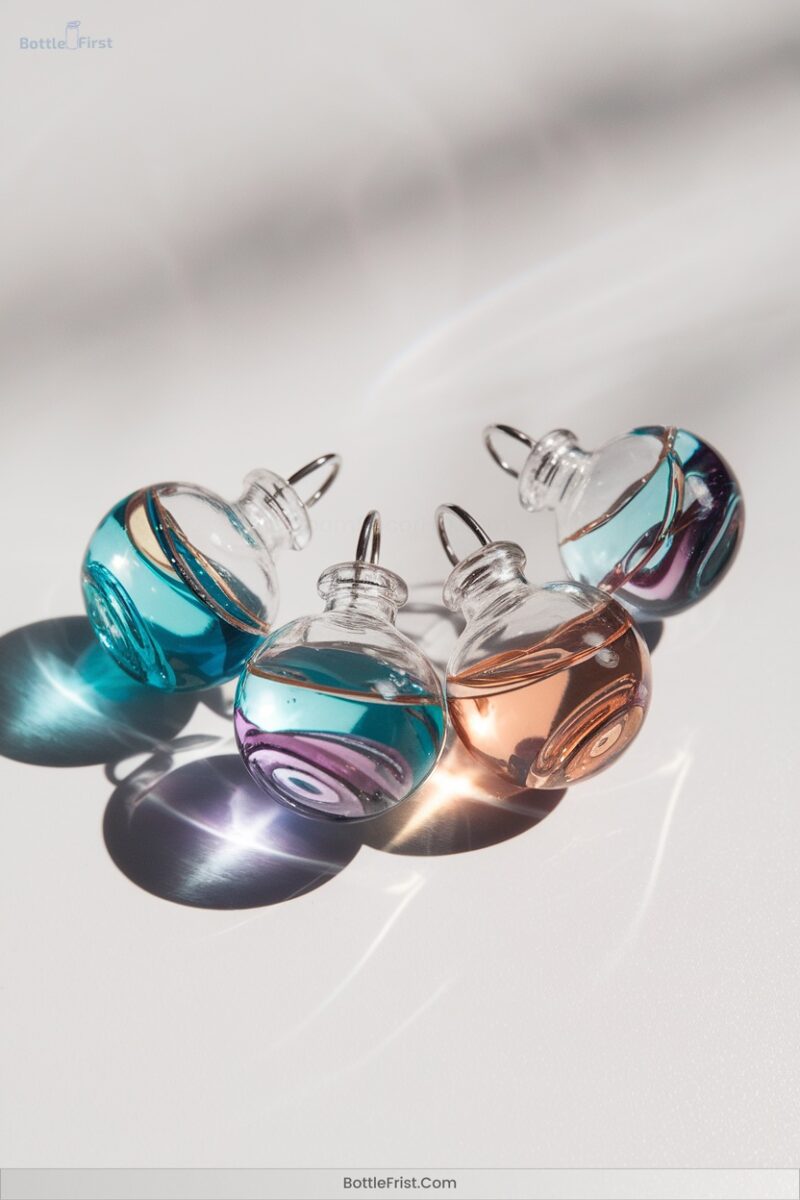
After exploring the elegance of layered resin vials, let’s turn our attention to crafting colorful round sphere pendants. Begin by gathering your materials: clear epoxy resin, silicone molds, and vivid mica powders.
Here’s how you can create stunning pendants:
- Preparation: Mix resin and hardener, then divide into containers. Add colorants sparingly for your desired hue.
- Pouring: For a marbled effect, swirl colors with a toothpick. Use a heat gun to eliminate bubbles.
- Curing: Allow spheres to cure for 24-48 hours, then sand and polish for a flawless finish.
Attach jewelry findings and showcase your innovative designs
10. Translucent Rectangular Resin Charms
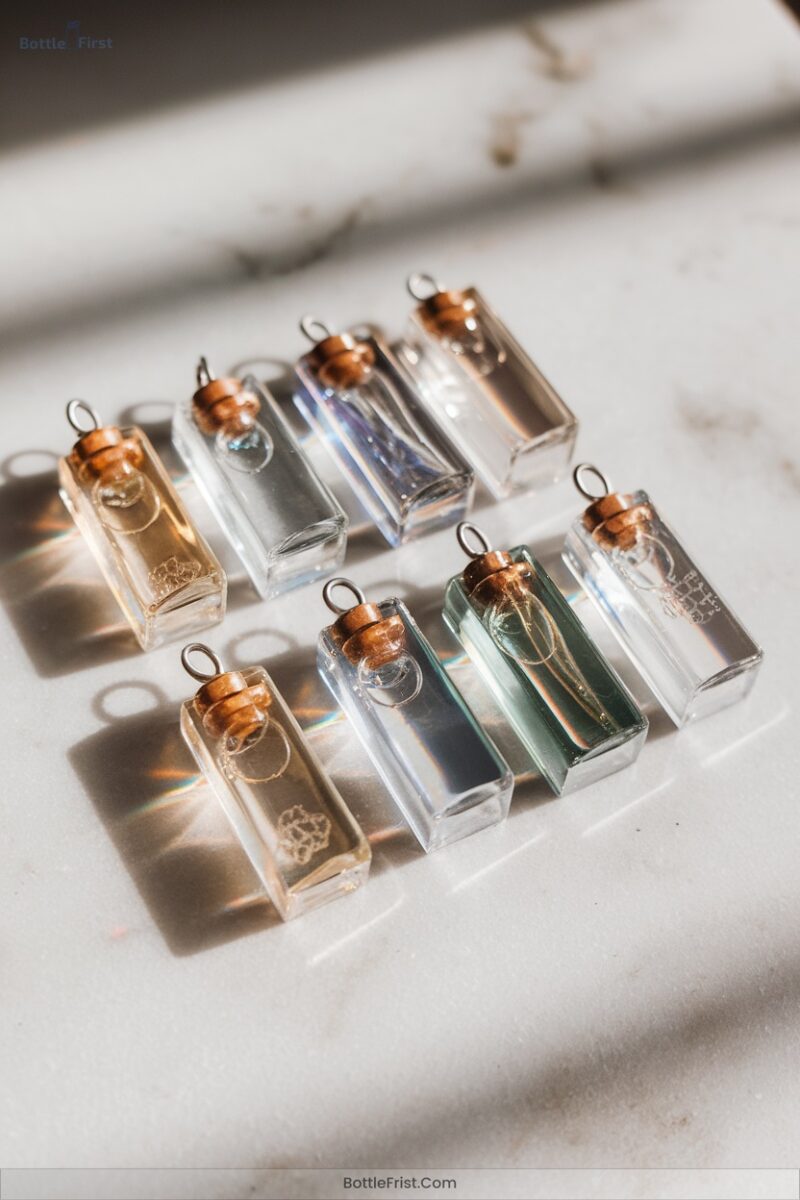
Imagine transforming everyday natural elements into stunning translucent rectangular resin charms that capture both light and imagination. Start by cleaning your molds with rubbing alcohol. Mix your clear epoxy resin, pouring a thin layer into the mold.
Use tweezers to place dried flowers or natural elements, adding glitter or mica for sparkle. Pour another resin layer to fill the mold. Banish bubbles with a heat gun.
Cure for 24-48 hours, then gently pop out your charm. Sand edges if needed, and seal with UV resin for shine. Try layering flowers or adding gold leaf for depth and elegance. Innovate boldly
Frequently Asked Questions
How Do You Prevent Resin From Sticking to Molds?
Apply a thin coat of silicone oil to molds, ensuring it’s even and not excessive. Use genuine silicone molds and maintain ideal curing temperatures. Opt for heat guns over torches to manage bubbles, preventing resin from sticking.
Can You Mix Different Resin Types Together?
Mixing resins can be tricky—75% of crafters report unexpected results. You should test small batches, follow manufacturer guidelines, and document outcomes. Creativity thrives when you experiment, but guarantee safety with proper gear and ventilation.
What Is the Best Way to Store Resin Supplies?
You’ll want to store resin supplies in a cool, dry, well-ventilated spot. Use original containers, label them, and keep lids tight. Organize with clear plastic bins, color-code types, and maximize space with vertical solutions.
How Do You Fix Resin Bubbles After Curing?
You can fix cured resin bubbles by sanding lightly, cleaning with acetone, and recoating. Drill and fill stubborn spots with matching resin, then use a heat gun to pop remaining bubbles. Achieve a smooth, innovative finish.
Is It Safe to Use Resin Around Children and Pets?
Secure safety by keeping kids and pets away and using proper ventilation. Always wear gloves and masks. Opt for non-toxic resins or pre-cured options. Educate your family about resin risks and practice thorough cleanup.
Conclusion
You’ve journeyed through a world where nature meets artistry, where glitter dances with elegance, and where the ocean’s whispers are captured in glass. As you craft these mesmerizing mini glass bottle creations, let your imagination soar.
Contrast the bold with the serene, the vibrant with the subtle. Each piece tells a story, a tiny universe of creativity and charm. Step into this enchanting dimension, and let your jewelry reflect the beautiful paradoxes of life and art.