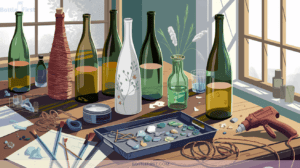
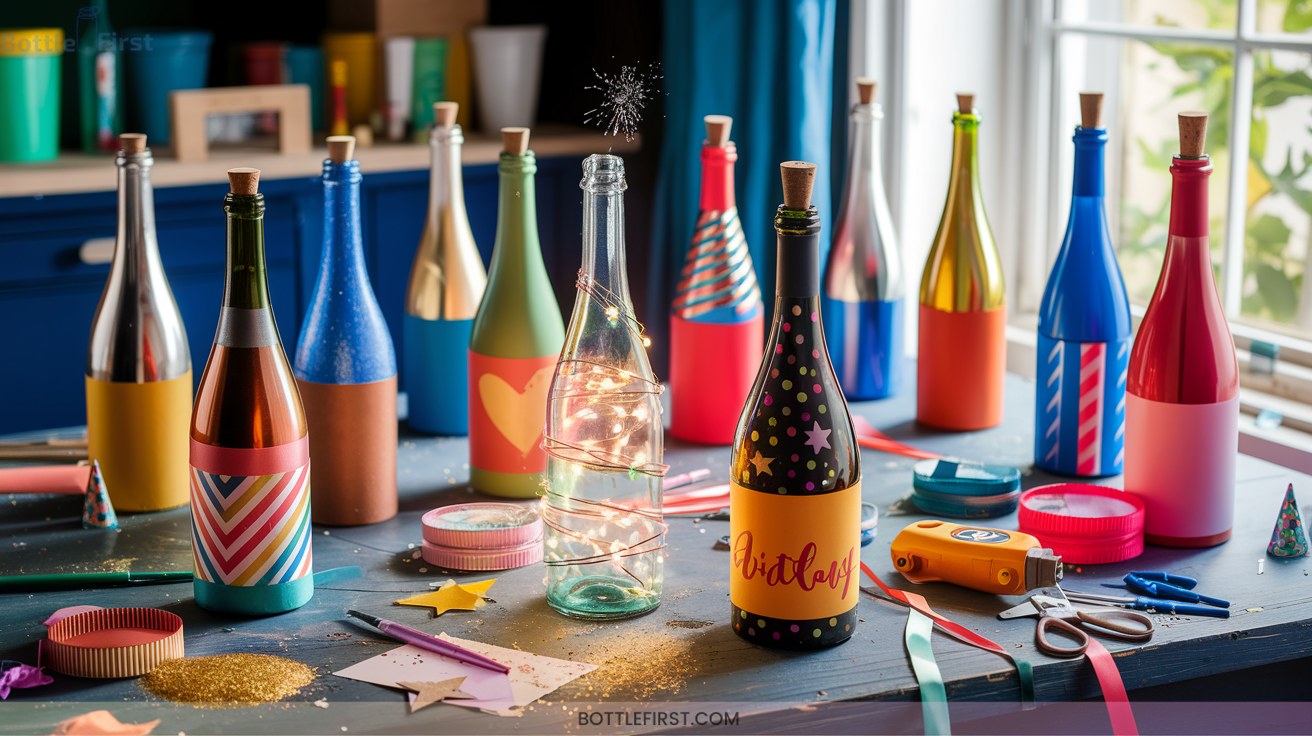
12 Festive Wine Bottle Crafts for Birthday Celebrations
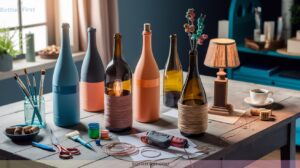
Transform wine bottles into vibrant birthday art with these festive crafts! Remove labels for a blank canvas, then use vinyl cutouts for personalized designs. Add LED fairy lights for a magical glow. Enhance with spray paint or chalkboard markers for creative flair.
Wrap with ribbon and twine for a polished finish. Showcase metallic or splattered accents to impress. Craft unique gifts with embellishments that delight. Reveal more inspired ideas to make celebrations memorable.

1. Removing Labels for a Clean Start
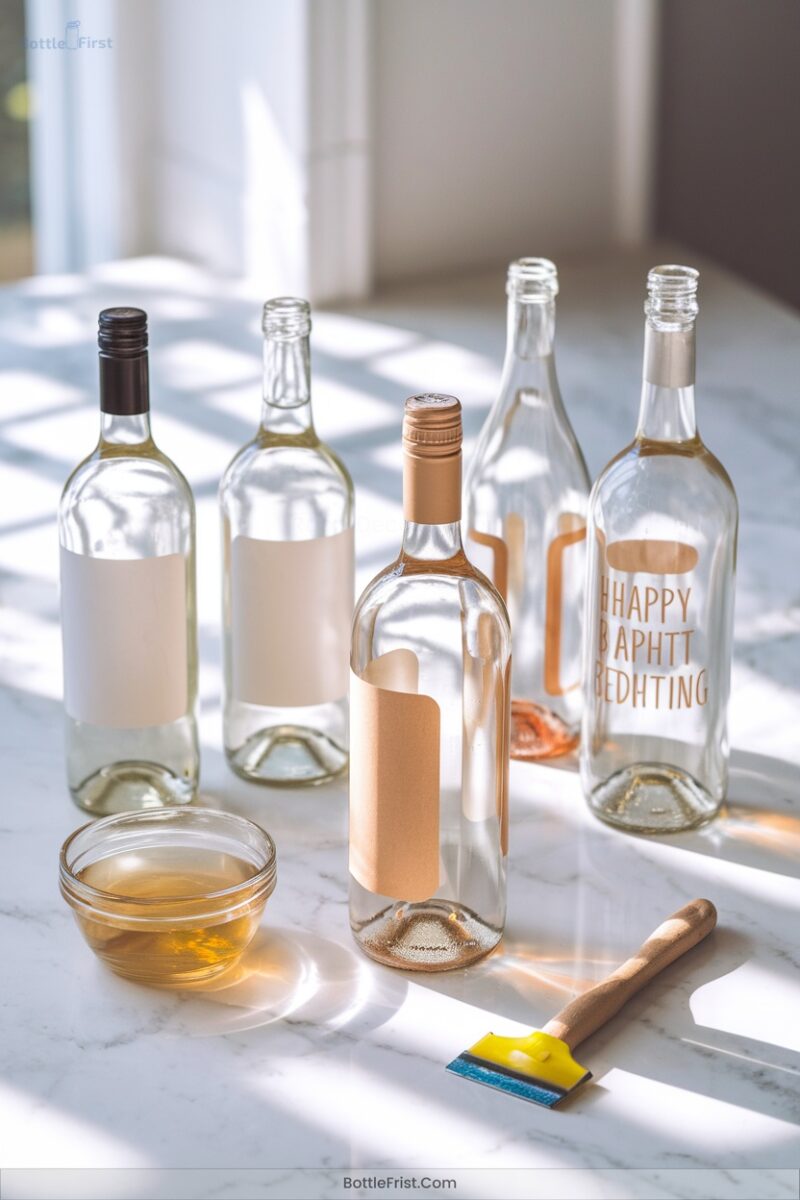
Transforming wine bottles into stunning birthday crafts starts with a clean slate, and that means removing those pesky labels. Immerse yourself in the world of wet heat: soak your bottles in hot water (126°F+) or a baking soda solution for 10-15 minutes—watch as labels float away.
For stubborn adhesives, an ammonia solution (ventilate well) or a vinegar soak works wonders. Once labels are gone, tackle sticky residues with alcohol or mineral spirits and a gentle scrub.
Want to conserve those labels? Try drying them between book pages. Embrace eco-friendly tactics by reusing bottles, reducing waste, and releasing your creative genius!
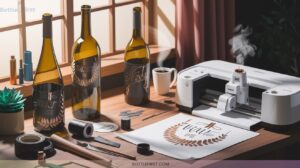
2. Crafting With Vinyl Cutouts
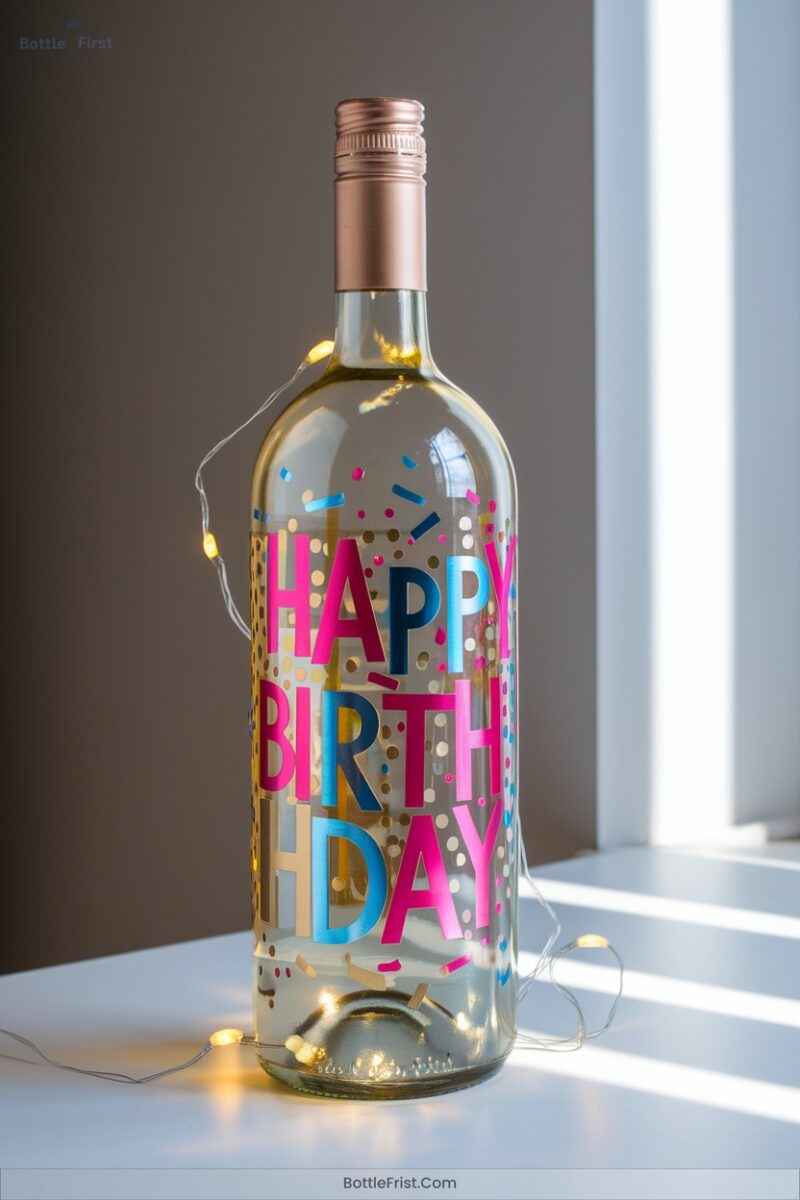
When it comes to elevating your wine bottle crafts to a new level, vinyl cutouts offer a world of vibrant, customizable possibilities.
Start by selecting Cricut-compatible vinyl—permanent 651 works wonders for lasting adhesion. Experiment with holographic finishes or printed gradients for that festive shimmer.
Choose Cricut-compatible vinyl, such as permanent 651, for enduring adhesion and explore holographic finishes for a festive touch.
Use Cricut Design Space to create custom shapes and weld cursive fonts for flawless designs. Align your decals with transfer tape, smoothing them from the center to avoid creases.
Personalize with bold text, themed symbols, or embellishments like ribbons and gems. Coordinate colors with the glass or event theme, transforming your bottles into stunning centerpieces.
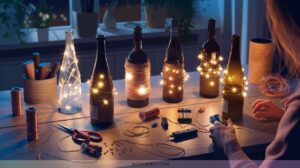
3. Illuminating With LED Fairy Lights
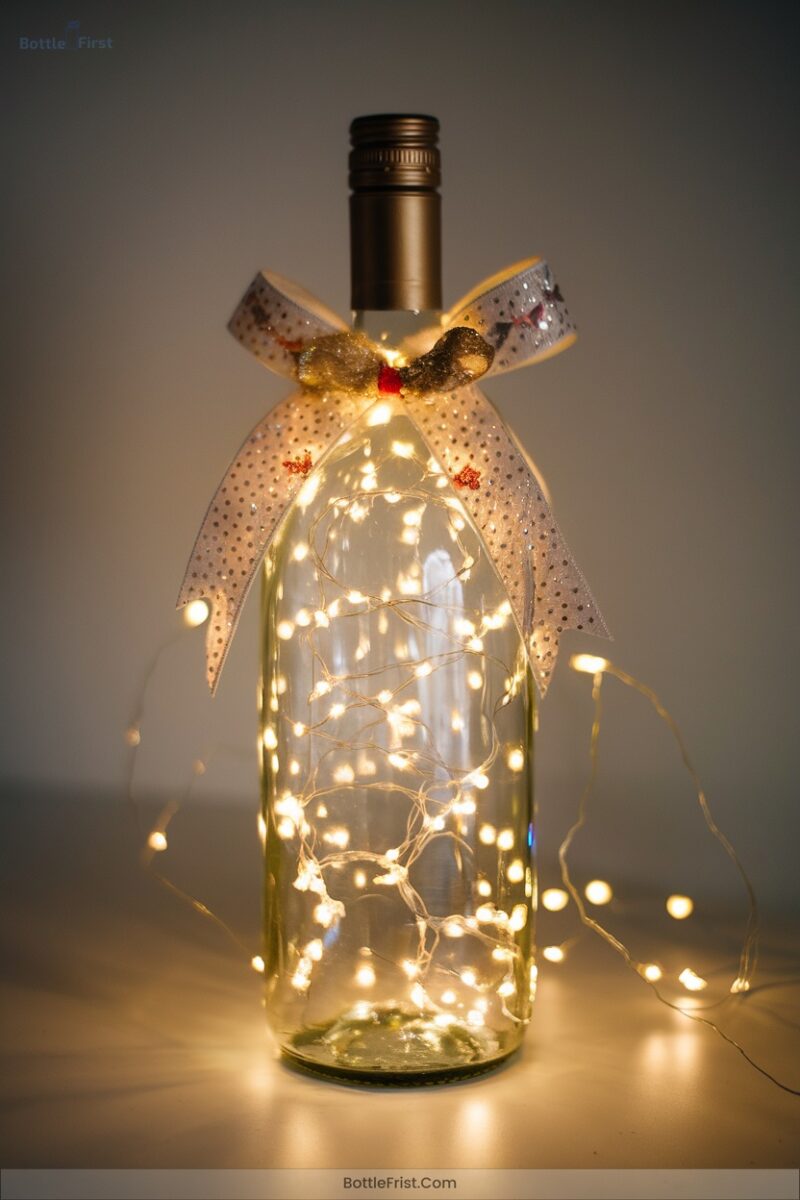
While vinyl cutouts add visual flair, incorporating LED fairy lights into your wine bottle crafts brings them to life with a magical glow.
Imagine a rainbow of twinkling lights dancing inside variously shaped bottles, casting vibrant colors across your celebration space.
With a diamond tile drill bit, create an entry hole at the base or neck of the bottle. Gently feed battery-operated LED strands, ensuring even distribution. Secure the compact battery pack using twine or jute for a seamless look.
Use a dowel to artfully arrange lights, complementing them with gems to enhance the enchanting effect. Illuminate your party with sparkling creativity!
4. Adding a Touch of Spray Paint
Spray painting wine bottles opens a world of creative possibilities, turning ordinary glass into stunning pieces of art for your birthday celebrations.
Begin by removing labels and residue using Goo Gone or warm water.
Shake your spray cans vigorously for a seamless finish.
Use painter’s tape or rubber bands to craft bold stripes or patterns.
Opt for metallic, chalkboard, or acrylic paints for diverse textures.
Spray in a well-ventilated area, starting off-surface and sweeping across for even layers.
Avoid heavy coats to prevent drips.
Let your bottles dry for 24 hours before handling, ensuring your vibrant designs remain flawless.
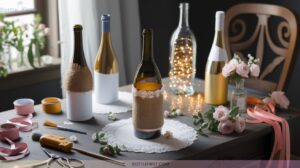
5. Personalizing With Embellishments
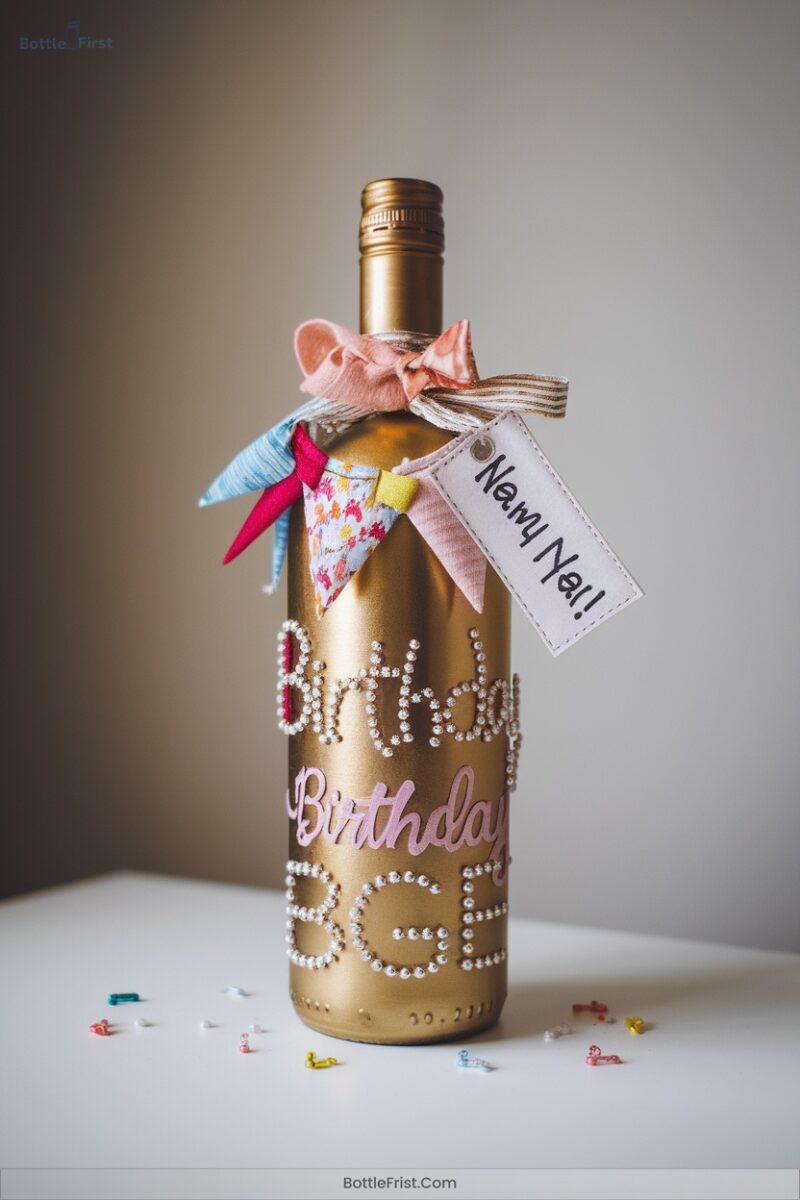
Transforming your wine bottles with personalized embellishments can elevate your birthday crafts to new heights of creativity and charm.
Start by designing die-cut labels in unique shapes using digital tools for precision. Choose durable polypropylene for labels that withstand repeated handling. Upload your custom designs or logos in editable files like PDF or AI for high-quality printing.
Experiment with 3D virtual previews to perfect label placement. Wrap your bottles in festive tea towels or faux fur, secured with ribbons or twine.
Add glitter accents or seasonal toppers for that extra wow factor. Let your imagination run wild and create unforgettable celebratory masterpieces!
6. Creating Writable Chalkboard Surfaces
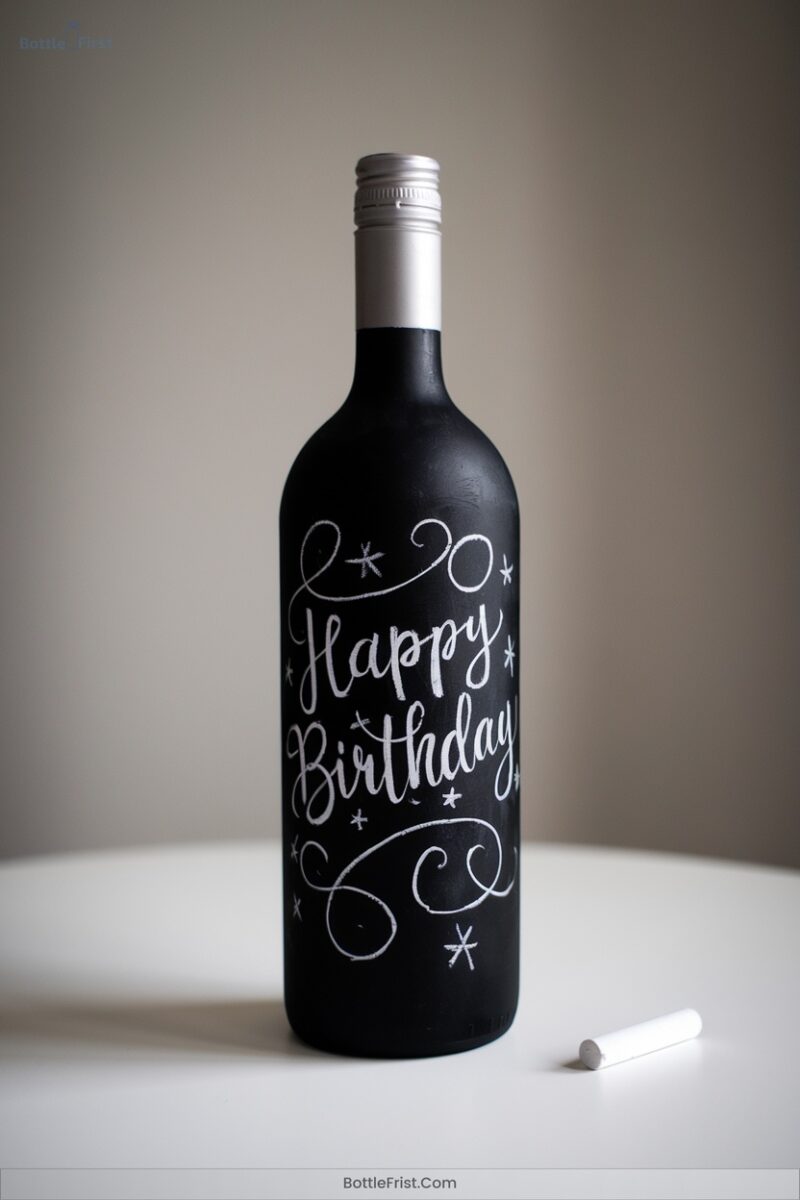
Creating writable chalkboard surfaces on wine bottles is an exciting way to add a personal touch to your birthday crafts.
Start by removing labels with oven heat and cleaning the surface for best paint adhesion. Apply chalkboard spray paint in thin, even coats, rotating the bottle for smooth coverage.
Mix acrylics with chalkboard paint if you want multiple colors. Allow 2-3 days for curing before writing. Lightly sand between layers to achieve a sleek finish and wipe away dust.
7. Designing With Hand-Painted Patterns
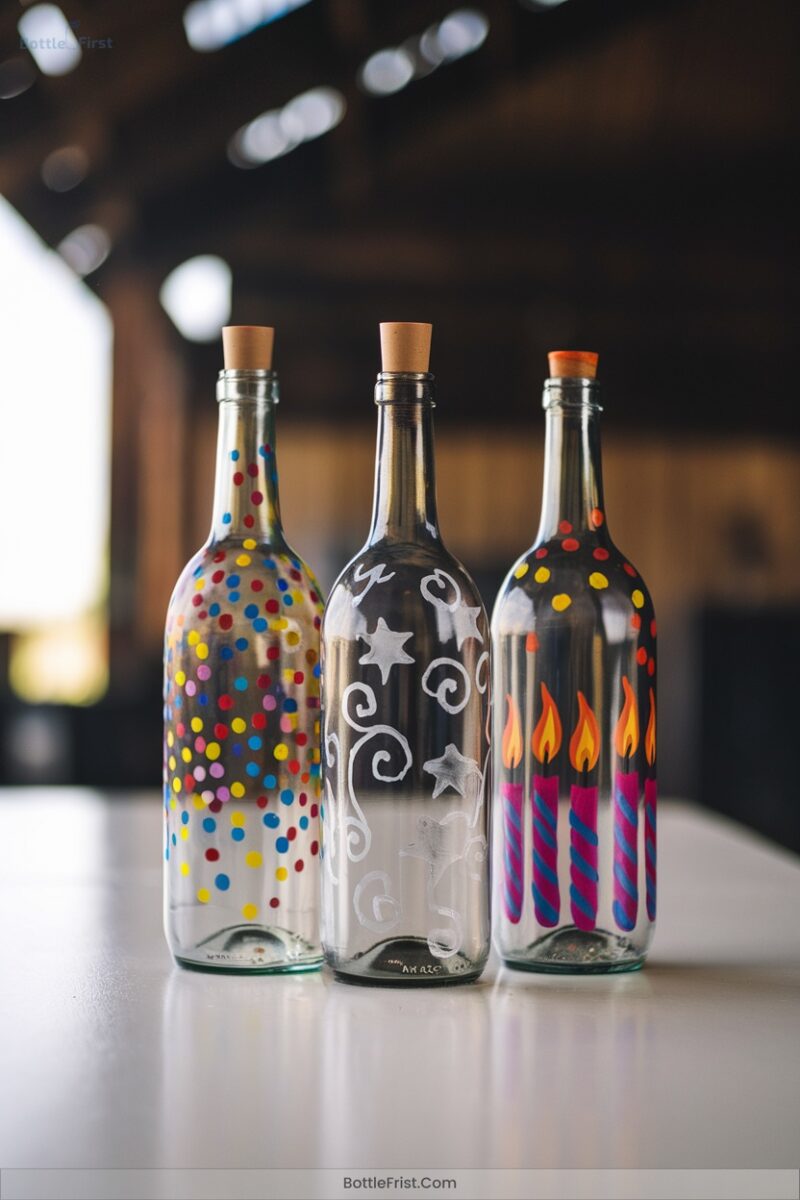
When it comes to designing with hand-painted patterns, your imagination truly sets the limits. Start by prepping your wine bottles with isopropyl alcohol for the best paint adhesion.
Use acrylic or ceramic paints, applying thin coats and letting them dry completely between applications. Sketch light pencil lines to guide your brushwork, and distress surfaces with sandpaper for a vintage look.
Don’t forget metallic accents for a celebratory touch or layered motifs for depth. Seal your masterpiece with a heat-resistant varnish or bake ceramic paints to guarantee durability.
Let your creativity flow, crafting unique birthday centerpieces that captivate and inspire!
8. Achieving Ombre Gradients
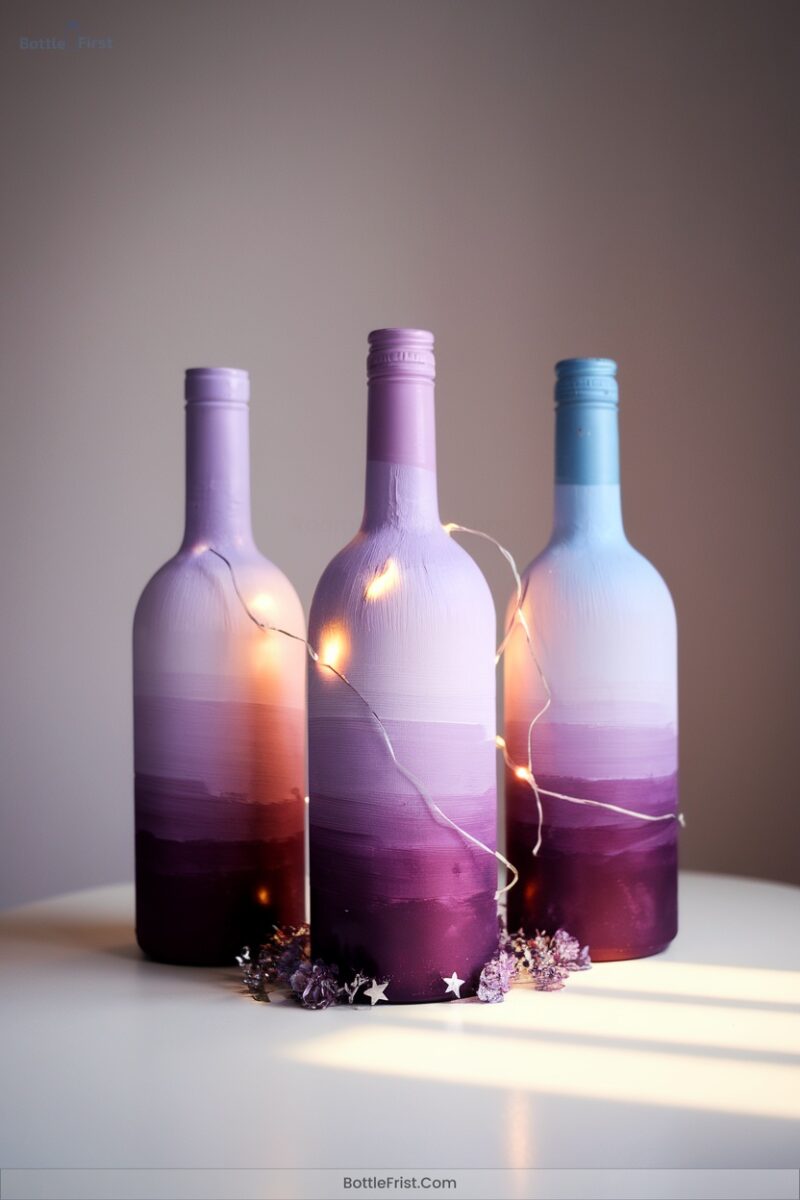
Immerse yourself in the art of achieving stunning ombre gradients on your wine bottle crafts, where a seamless blend of colors can truly elevate your birthday decor.
Start by dabbing a base color at the bottle’s bottom using a cosmetic sponge.
Spray paint from the darkest hue at the base, angling upward for mid-tones.
Use dry sponges to blend shifts, maintaining smooth gradients.
Gradually lighten colors by mixing in white, and feather edges during a 30-second wet window.
Rotate the bottle 45 degrees while spraying to prevent lines.
Finish with a translucent white frost spray for a unified look.
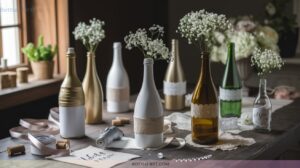
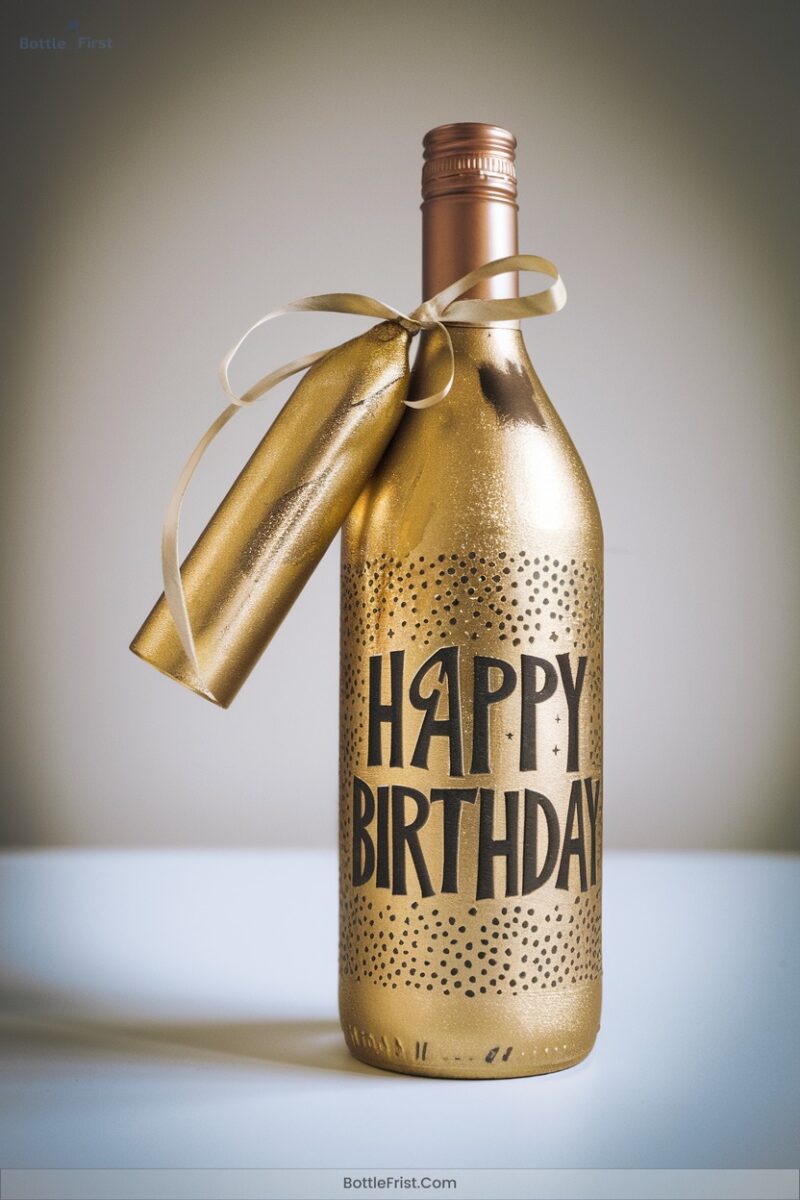
9. Highlighting With Metallic Accents

To elevate your wine bottle crafts with metallic accents, start by selecting complementary metallic hues like gold, silver, and copper.
Opt for harmonious metallic tones such as gold, silver, and copper to enhance your wine bottle crafts.
Prime your bottles to guarantee smooth paint adhesion, preventing any peeling disasters. Spray from a distance of over three feet, using high-quality metallic spray paint for a drip-free finish.
Layer the bottles with multiple cans for stunning multi-tone designs, applying light coats for consistency. Seal your masterpiece with matte varnish to protect its gleaming finish.
Highlight raised edges with dry-brushed metallic paints, and use antiquing paste for a vintage touch, maintaining sharp boundaries between zones for visual clarity.
10. Experimenting With Splattered Finishes
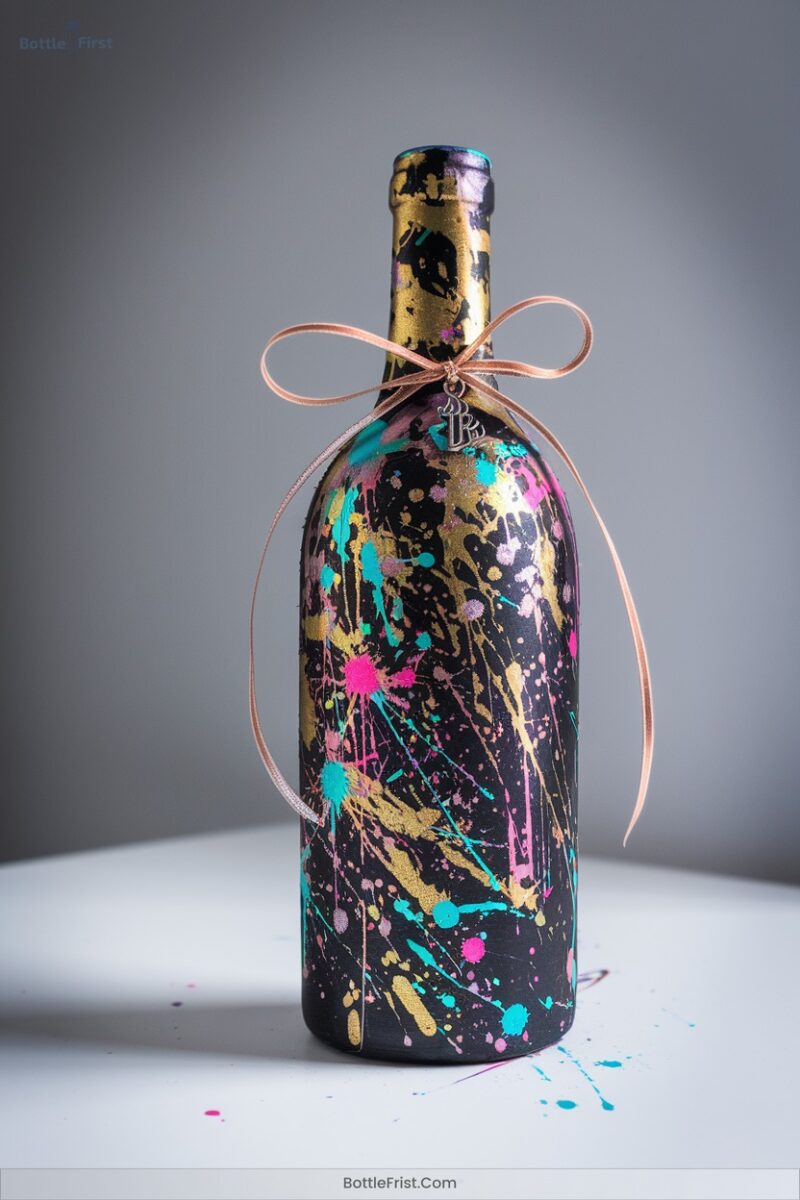
Immerse yourself in the exciting world of splattered finishes, where creativity knows no bounds and each flick of paint transforms your wine bottle into a vibrant masterpiece.
Begin by removing labels and prepping surfaces for ideal paint adhesion. Use toothbrushes or flicking tools to create dynamic splatter patterns. Play with layers—imagine metallic gold dancing over a matte black base for dimension.
For added flair, spray Krylon Glitter Blast, rotating bottles for even coverage. Experiment with drips by tilting bottles at 45° angles.
Seal your artwork with UV-resistant spray to protect against wear. Your innovative wine bottle becomes a birthday celebration centerpiece!
11. Customizing With Chalkboard Markers
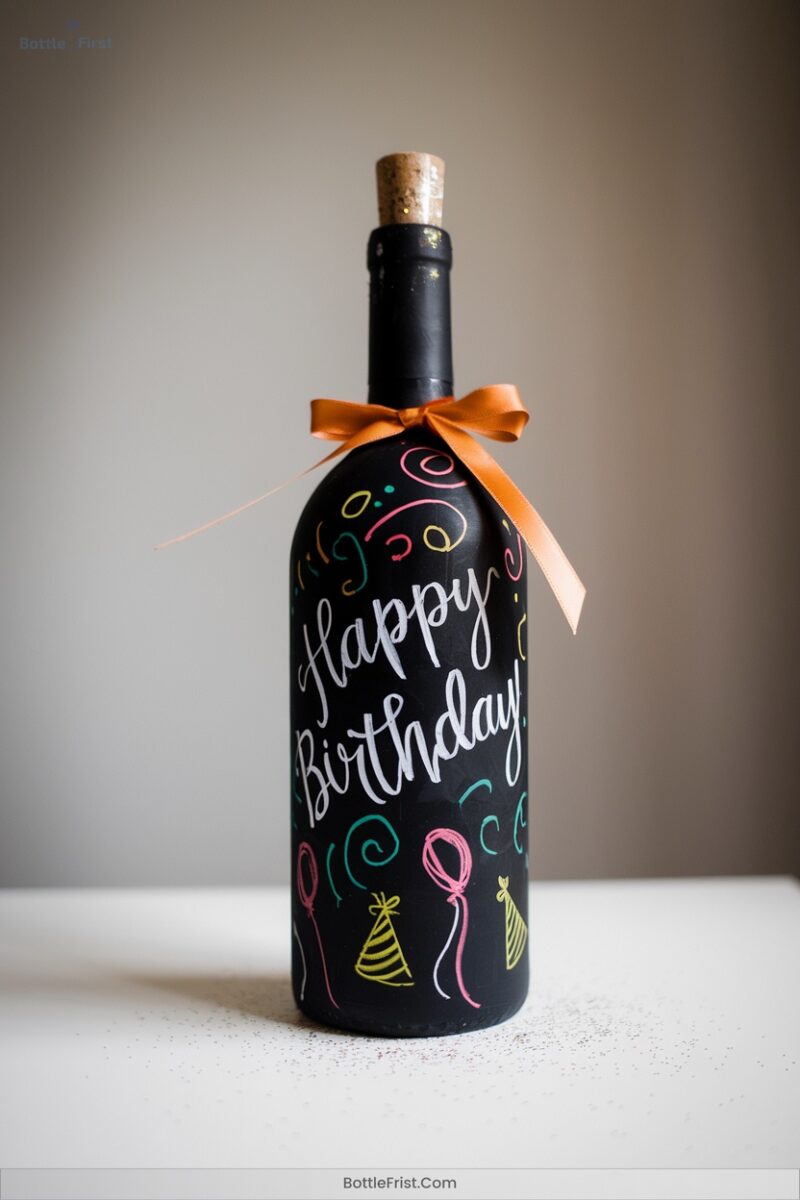
When it comes to customizing wine bottles with chalkboard markers, reveal your artistic flair with endless possibilities. Start by transforming bottles into reusable canvases with chalkboard paint—opt for spray for a seamless finish, or liquid for precision. Spin bottles while spraying for even 360° coverage, and apply thin, even coats.
Peel labels by soaking or baking, ensuring surfaces are clean and dry for ideal adhesion. Sand any rough spots away.
Once your bottles are ready, release your creativity with chalkboard markers—write messages, draw designs, or doodle whimsical patterns. Reimagine birthdays with personalized, artistic wine crafts that truly stand out!
12. Wrapping With Ribbon and Twine

While unwrapping a gift can be exciting, the art of wrapping with ribbon and twine adds an extra layer of allure that can’t be ignored.
Begin by choosing satin, grosgrain, or glitter ribbon for a polished look, or natural twine for rustic charm. Use double-sided tape to invisibly anchor ribbon ends, then wrap twine around the bottle neck 6-8 times for a stable structure.
Fold paper edges inward by 1.5cm before applying ribbon for a tidy finish. Secure overlapping layers with discreet glue dots every 5cm. Your creative touch transforms a simple wine bottle into a sophisticated birthday masterpiece!
Frequently Asked Questions
How Do I Safely Clean Bottles After Decorating Them?
After decorating, gently wash bottles with lukewarm, soapy water using a microfiber cloth. Use a vinegar-water mix to dissolve adhesive, and clean intricate areas with cotton swabs. Rinse thoroughly and air-dry upside-down for spotless results.
Can These Crafts Be Made With Recyclable Materials?
Crafting with recyclable materials is like painting a masterpiece with nature’s palette. You can transform glass bottles, cotton twine, and wood into stunning art, reducing waste while embracing innovation and sustainable creativity. Let your imagination soar!
What Type of Wine Bottles Work Best for Crafts?
You’ll love using Bordeaux bottles for crafts—they’re durable and flat-bottomed, making them perfect for creative designs. Choose green glass for visibility and unique shapes for character. Embrace colored bottles to enhance your project’s aesthetic flair!
How Do I Ensure the LED Lights Last Through the Event?
Imagine your lights flickering out mid-celebration. To prevent this, use lithium batteries, check them 12 hours before the event, activate battery preservation, and guarantee ideal conditions. Your creativity deserves illumination that lasts all night!
Are There Eco-Friendly Alternatives to Spray Paint?
You’re in luck! Opt for water-based paints. They emit fewer VOCs and use water instead of petroleum solvents. Pair them with zero-VOC primers for a creative, eco-friendly alternative that keeps your projects innovative and sustainable!
Conclusion
As you initiate your crafting journey, think of each wine bottle as a blank canvas, waiting for the artist in you to awaken. Like a magical transformation, your creativity will breathe life into glass, turning the ordinary into extraordinary.
With every label peeled and embellishment added, you’re the alchemist, weaving a tapestry of celebration. So, gather your materials, release your imagination, and let each bottle tell its unique story, sparkling with joy and festivity!