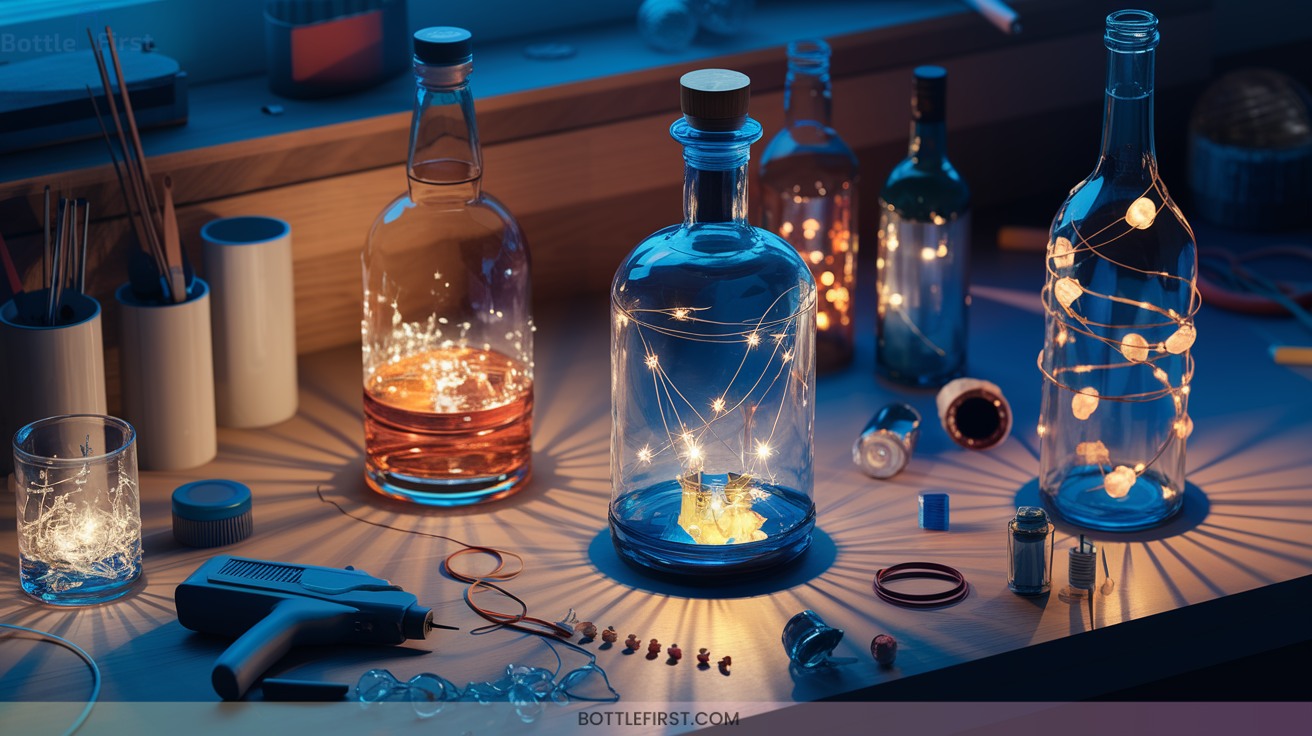
10 Illuminating Liquor Bottle Crafts: Lights Edition
Transform liquor bottles into enchanting illuminated crafts in simple steps! First, select your bottle and drill a hole; insert a rubber grommet to protect wires. Wrap LED strips around a dowel and secure with hot glue.
Consider frosted glass for soft diffusion and add decorative touches like beads or vinyl accents. Use battery-operated lights for flexibility, ensuring cords are protected with grommets. Explore unique designs to brighten decor—you won’t want to miss the next steps!

1. Crafting a Simple LED Bottle Lamp
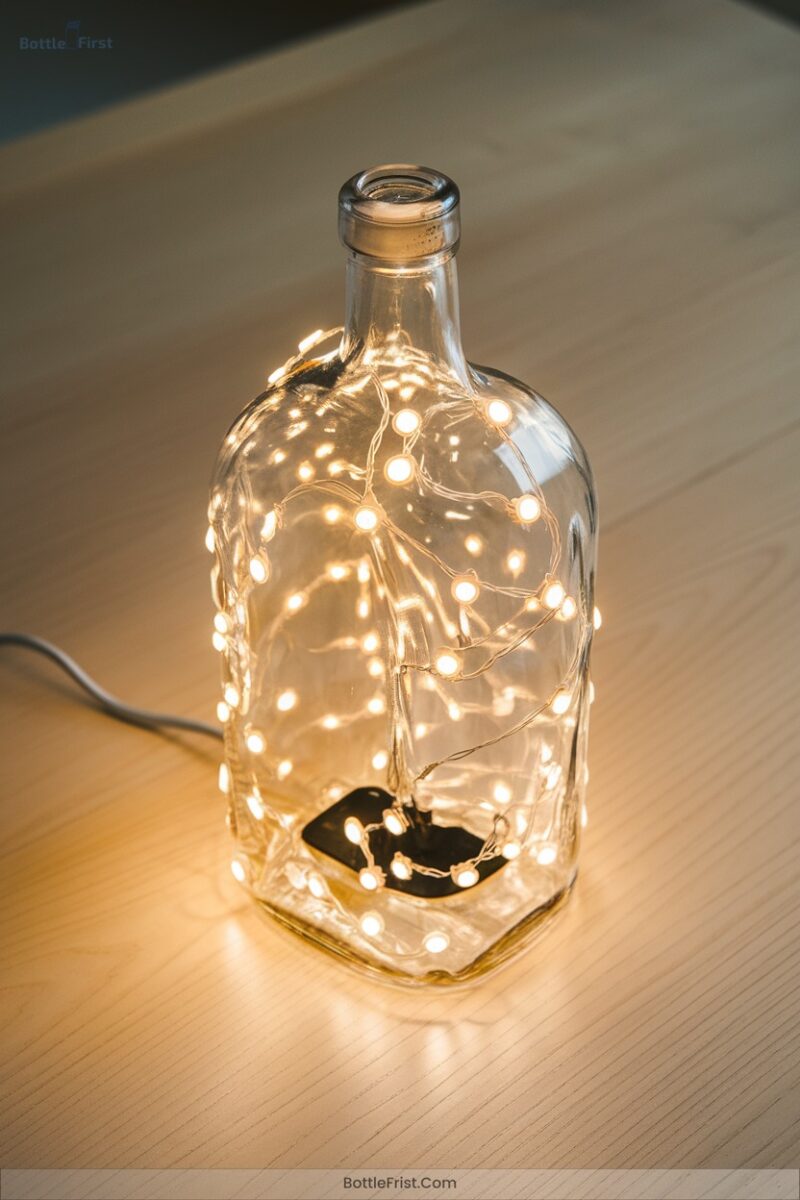
When you’re ready to transform an ordinary glass bottle into a dazzling LED lamp, start by gathering your crafting materials.
First, select your bottle. Drill a hole at the bottom or middle with a diamond-coated bit, using water to cool and prevent cracks.
Insert a rubber grommet to protect wires. Wrap LED strips around a dowel, and feed them through the hole.
Secure with a hot glue gun. Connect wires with a soldering iron for safety. Add gel inside for enhanced light dispersion.
Embellish with jute rope or decorative elements. Finally, craft a wooden base to showcase your innovative creation.
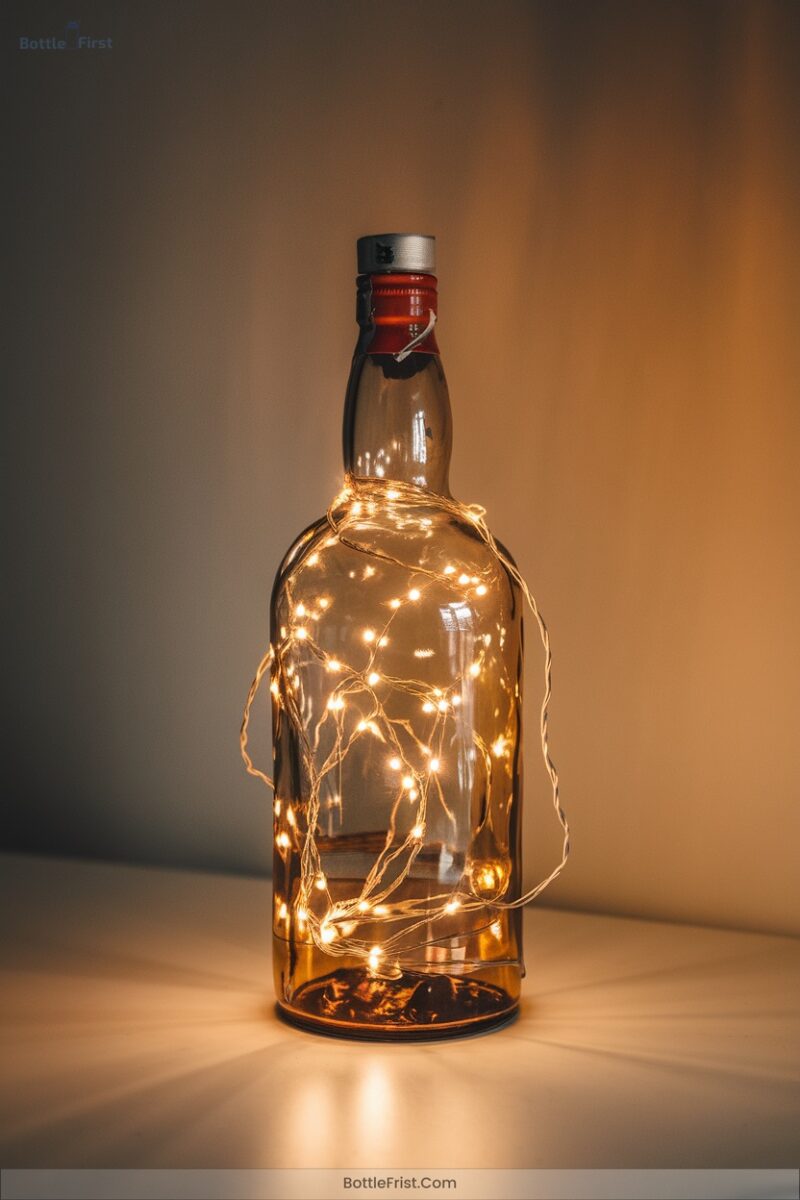
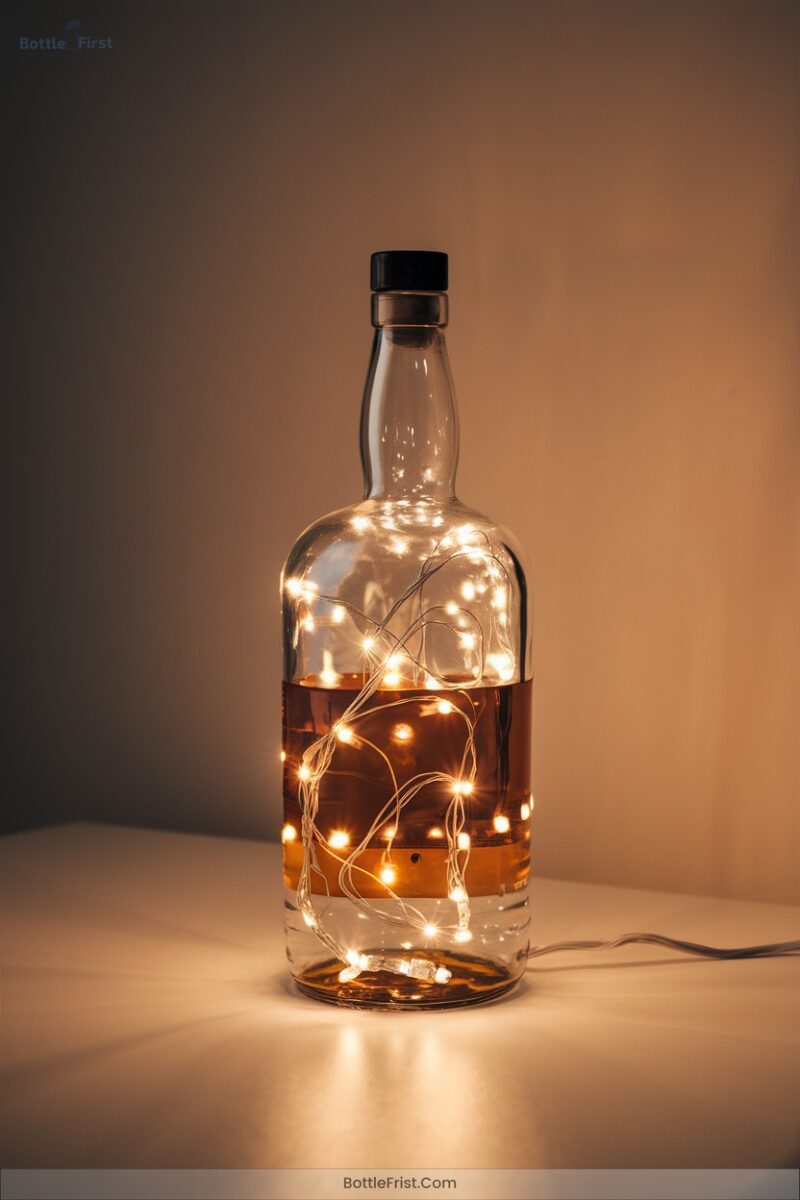
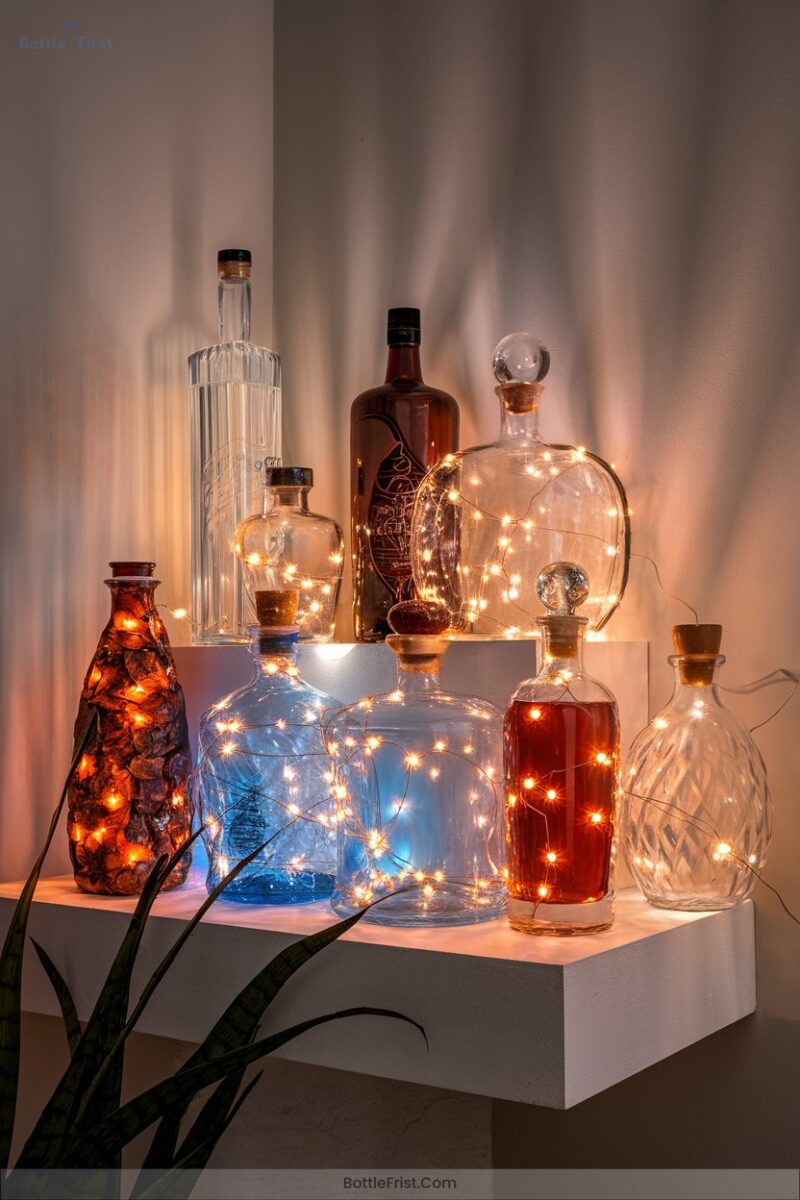
2. Creating a Fairy Light Bottle Display
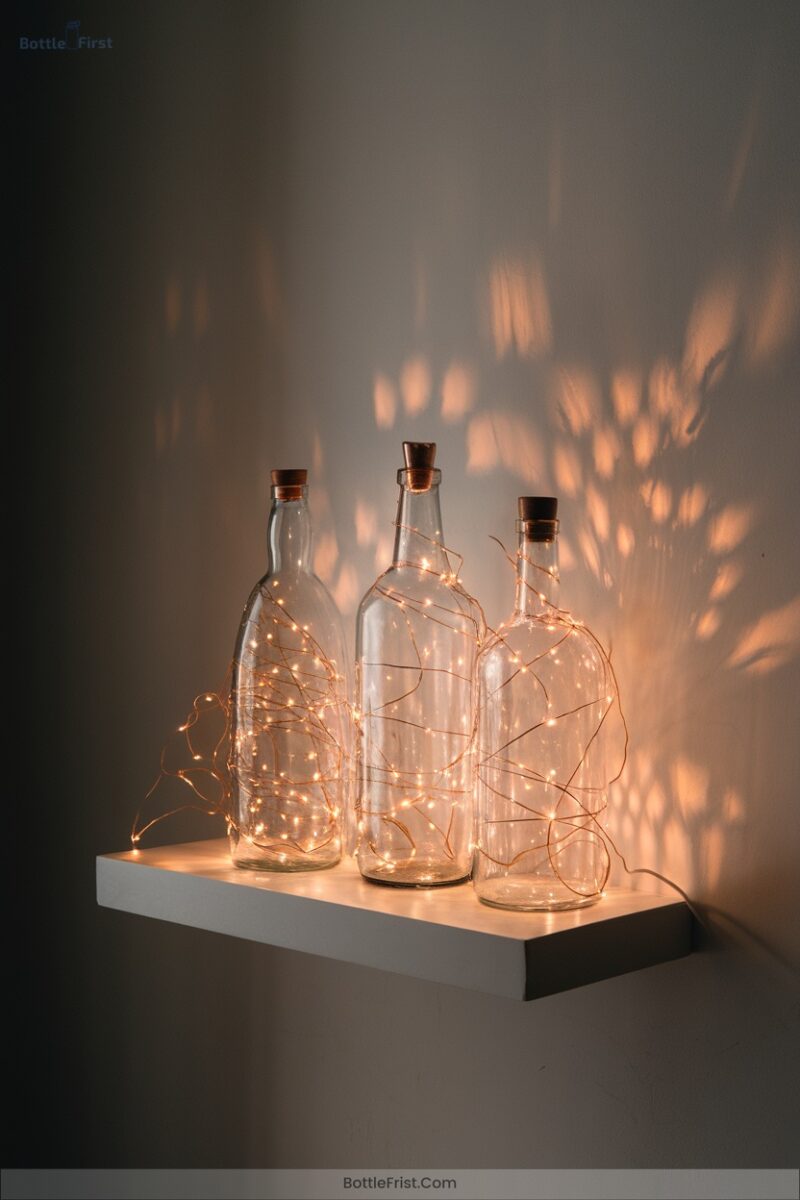
Although crafting might seem intimidating, creating a fairy light bottle display is surprisingly simple and rewarding.
Creating a fairy light bottle display is both easy and gratifying.
Start by gathering these essentials:
- Bottles: Clean empty wine or liquor bottles, removing labels and residue.
- Fairy Lights: Choose battery-operated string lights for flexibility and safety.
- Drilling Tools: Use a ceramic or diamond drill bit to carefully make a 1/2 inch hole.
- Cord Management: Protect the cord with rubber grommets or stoppers.
After drilling, feed the lights through the hole and secure with corks.
Experiment with gems or twine for a personal touch.
Enjoy your innovative, ambient creation!
3. Designing Custom Bottle Lanterns
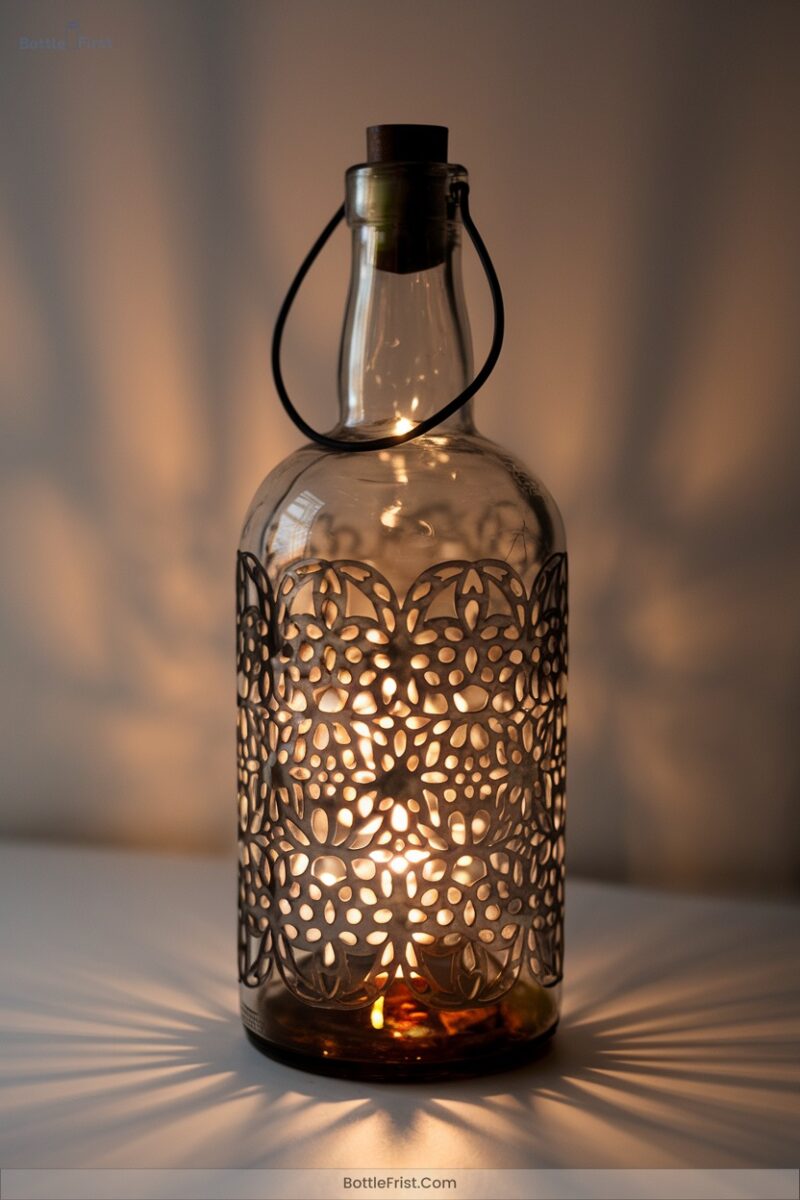
Having mastered the art of fairy light displays within bottles, you’re ready to explore the enchanting world of custom bottle lanterns.
Start by gathering wine or liquor bottles, wire, decorative items, and LED candles.
Wear safety gloves and carefully cut the bottles to your desired shape. Form wire supports and handles for easy hanging.
Release your creativity with paint, beads, or ribbons. Guarantee stability and safety by smoothing sharp edges and avoiding candle overheating.
Personalize your lanterns with engravings or themed designs, and embrace eco-friendly crafting by repurposing old bottles.
Illuminate your space with these unique, innovative creations.
4. Incorporating Battery Packs for Easy Lighting
Transform your liquor bottle crafts into luminous works of art by incorporating battery packs for easy lighting.
Illuminate your liquor bottle crafts with battery packs for effortlessly stunning lighting effects.
Start by choosing battery-powered fairy lights. They’re budget-friendly and widely available, costing just £2-£3 for a set of 40 lights.
Next, opt for LED lights due to their low heat output, ensuring safety and enhancing durability.
Here’s your step-by-step guide:
- Drilling: Use specialized glass drill bits at low speed. Remember safety gear!
- Batteries: Use 3 LR44 batteries for up to 48 hours of light.
- Sealing: Seal holes with hot glue for a polished finish.
- Customization: Experiment with different bottle shapes and light styles.
5. Mastering Cable Management for Clean Aesthetics
When you master cable management, your liquor bottle crafts become not only vibrant but also visually appealing.
Start by crafting a cable plan: pinpoint your power sources and label each cable for easy access. Use cable clips and sleeves to bundle wires neatly, reducing visual clutter.
For ideal aesthetics, select the right cable length and route them consistently behind obstacles. Employ zip ties to prevent tangling and minimize distractions.
Consider permanent solutions like drilling cable hooks or adhesive strips for a sleek look. Regularly maintain your setup, replacing damaged cables and updating labels to keep everything organized and efficient.
6. Experimenting With Colored LEDS for Mood Lighting
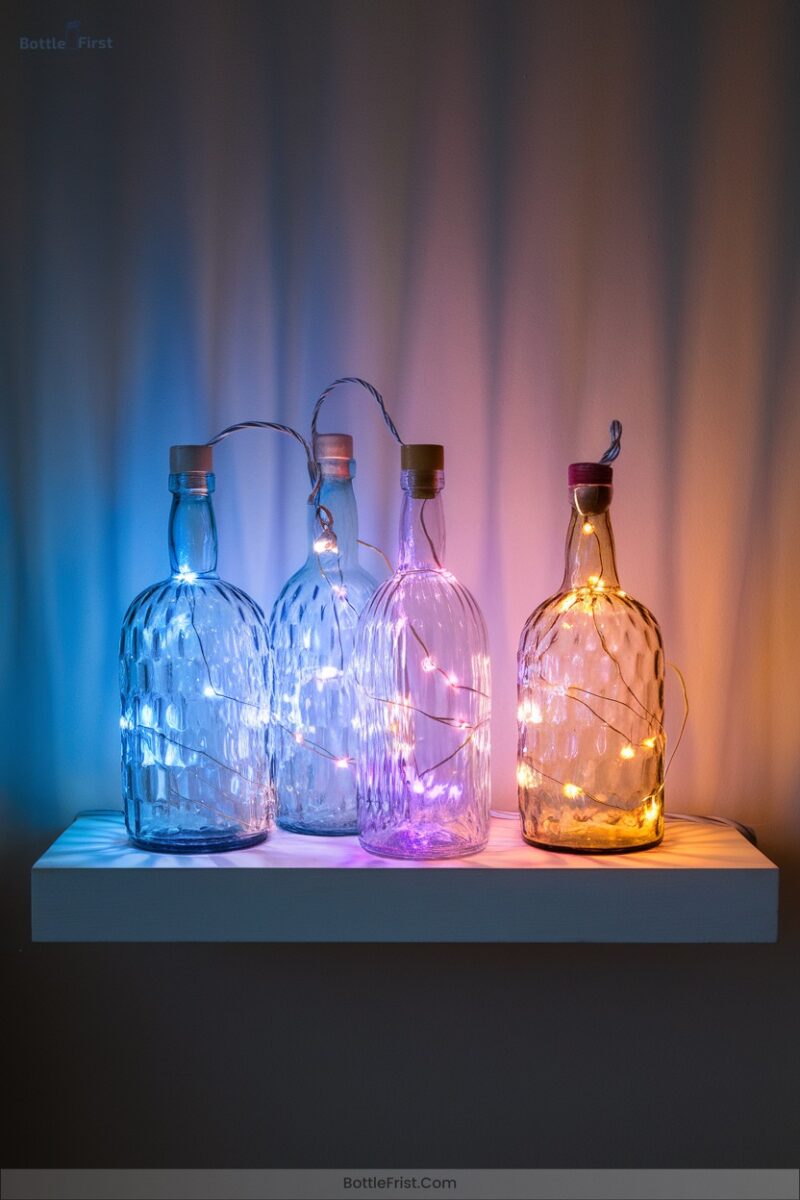
If you’re ready to elevate your liquor bottle crafts with a splash of creativity, experimenting with colored LEDs for mood lighting is your next step.
Immerse yourself in a world of vibrant hues that transform your space and mood:
- Blue Light: Create calming environments with serene blues that mimic the night sky, perfect for relaxation.
- Green Light: Enhance focus and productivity in workspaces by adding invigorating green tones.
- Red Light: Infuse energy and excitement; ideal for dining areas or workout spaces.
- Yellow/Orange Light: Brighten kitchens and creative zones with sunny vibes, inducing happiness.
Experiment boldly and revolutionize your lighting!
7. Using Frosted Glass for Enhanced Light Diffusion
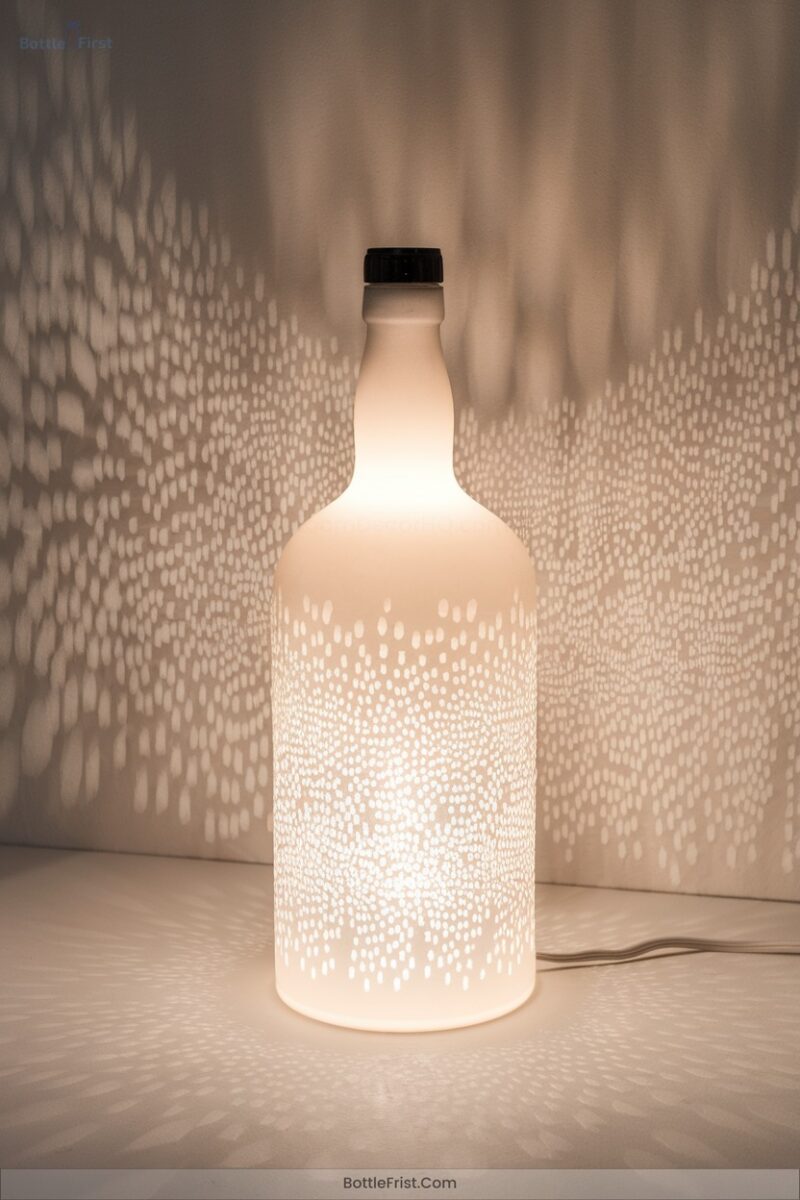
As you embrace the vibrant glow of colored LEDs, consider enhancing your liquor bottle crafts with the magic of frosted glass.
Start by transforming ordinary glass through sandblasting or chemical etching. This creates a rough texture, diffusing light softly, and eliminating harsh glare. Incorporate this translucent beauty into your design for a cozy ambiance and reduced visual strain.
Frosted glass scatters light, creating uniform illumination without hotspots. It’s perfect for crafting unique decorative pieces like illuminated vases. Not only does it protect against scratches, but it also adds an innovative touch to your creations.
Let frosted glass elevate your lighting designs.
8. Assembling Sophisticated Lamp Parts
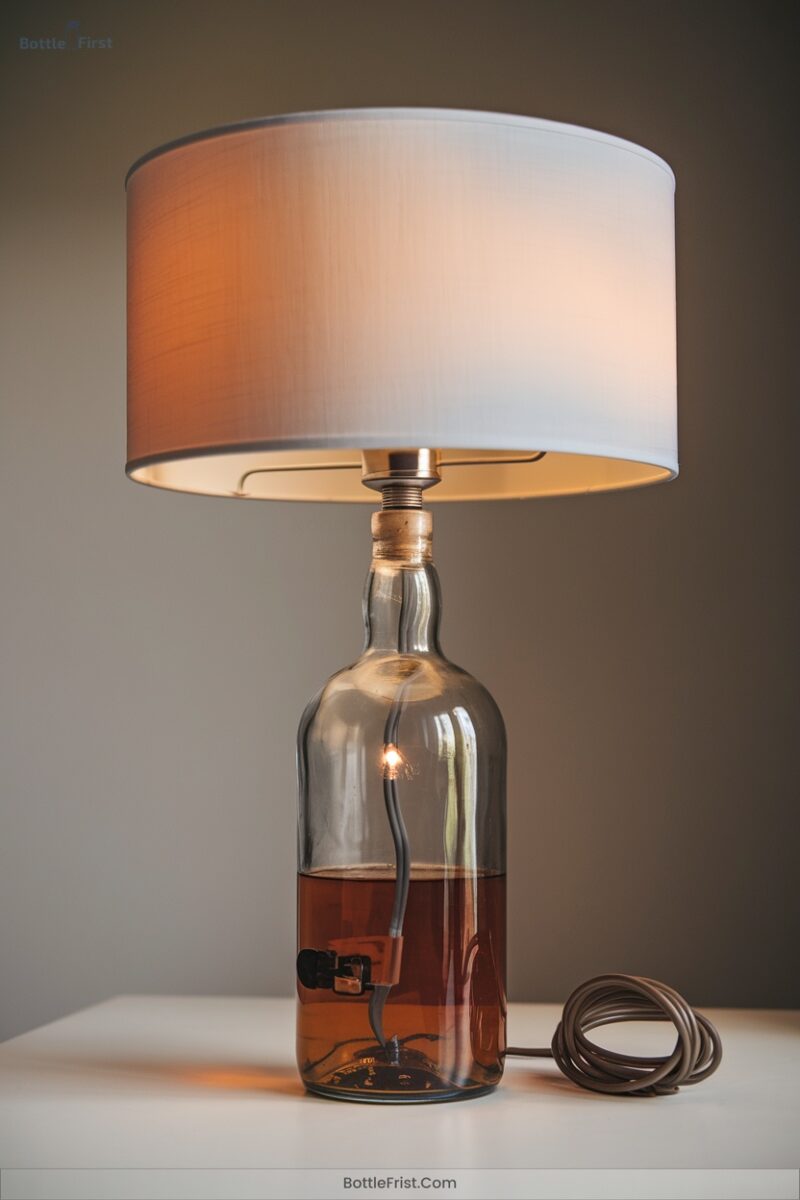
- Base Building: Utilize plywood discs for unique lamp designs.
- Wiring Mastery: Install lamp sockets and manage cords neatly.
- Holder Assembly: Use bayonet or threaded fittings for secure bulb connections.
- Design Finishing: Apply high-gloss enamel and choose custom shades for elegance.
With these steps, you’ll transform ideas into illuminated art.
9. Adding Decorative Vinyl Accents
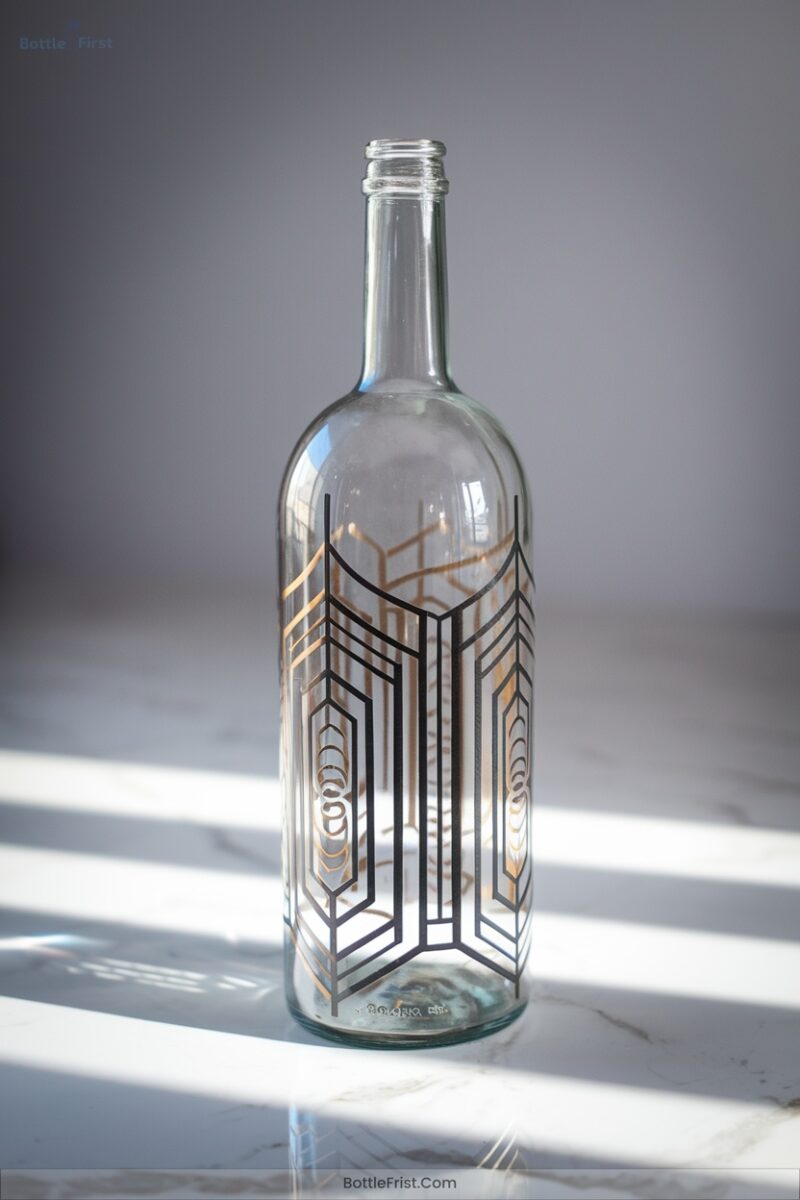
When you’re ready to add a touch of personalized flair to your liquor bottle crafts, decorative vinyl accents are a fantastic option.
Start by measuring your bottle’s diameter, adding an inch for overlap. With a Cricut machine, cut vibrant geometric or floral patterns.
Position the vinyl carefully, smoothing from the center out to banish bubbles. Use a burnishing tool for a flawless seal.
Combine vinyl with scrapbook paper or twine for extra texture and depth.
Remember, proper cleaning and adhesion techniques guarantee your design stays put.
Avoid extreme conditions to maintain the vinyl’s charm and, if desired, remove effortlessly.
10. Exploring Unique Bottle Shapes and Sizes
Bottle shapes and sizes aren’t just about looks—they’re a canvas for creativity and functionality. Immerse yourself in innovative designs like guitars or dragons, each telling a unique story.
When crafting your bottle lights, consider:
- Shape: Choose a bottle that speaks to your aesthetic—perhaps a skull for a bold statement or a heart for warmth.
- Size: Opt for a 750ml for a centerpiece or miniatures for a twinkling array.
- Material: Select clear glass for brilliant illumination or frosted for a softer glow.
- Ergonomics: Guarantee ease of handling when assembling and displaying your creations.
Illuminate your world beyond traditional bounds!
Frequently Asked Questions
How Do You Safely Cut a Glass Bottle for DIY Projects?
Start by wearing safety gear. Choose a method: string, glass cutter, or bottle cutter. Score the bottle, apply thermal stress using heat and cold. Carefully break it, then sand sharp edges for a smooth, innovative finish.
What Are the Best Tools for Drilling Into Glass Bottles?
To transform your glass bottles into masterpieces, use diamond bits for finesse or carbide bits for precision. Keep your pace leisurely, apply gentle pressure, and guarantee a steady water flow to avoid any unexpected surprises.
How Do You Smooth Edges After Cutting a Bottle?
You’ve cut the bottle, now smooth those edges! Start with wet 80 grit sandpaper, moving in circles. Upgrade to finer grits like 220, 400, and 1000 for a polished finish. Keep it wet, and watch magic happen!
How Can You Prevent Glass Bottles From Shattering During Crafting?
By Jove, you’ve got this! Wear protective gear, score smoothly, control temperature, and support the bottle. Avoid over-pressure and use proper tools. Follow these steps, and you’ll prevent shattering, creating masterpieces that dazzle the eyes.
What Are the Environmental Benefits of Using Recycled Bottles in Crafts?
You can save the planet step-by-step by transforming recycled bottles into crafts. Reduce waste, conserve energy, and inspire creative reuse. Each bottle you repurpose keeps landfills emptier and ecosystems healthier, showcasing your innovative eco-friendly spirit.
Conclusion
You’ve mastered the art of turning simple bottles into glowing masterpieces with LED lamps, fairy lights, and custom lanterns. You’ve embraced battery packs for easy lighting and perfected cable management for clean aesthetics.
You’ve experimented with frosted glass for light diffusion and assembled sophisticated lamp parts. You’ve added decorative vinyl accents and explored unique bottle shapes and sizes. Now, let your creativity shine, and illuminate your space with your dazzling, handcrafted creations.
