20 Innovative DIY Plastic Bottle Cap Craft Ideas You’ll Love
Transform plastic bottle caps into magical gaming tokens, charades prompts, and sticker counters. Craft Rock-Paper-Scissors cap sets or create decorative hat accessories. Use caps as garden markers, and design whimsical bottle cap magnets or colorful coasters.
Try making keychains, personalized pins, and vibrant wind chimes, while exploring bottle cap mosaic art and inventive candle holders. Each crafty project opens up a world of creativity and adds flair to your home, games, or wardrobe. Discover even more imaginative possibilities ahead!

1. Magic Tokens for Gaming
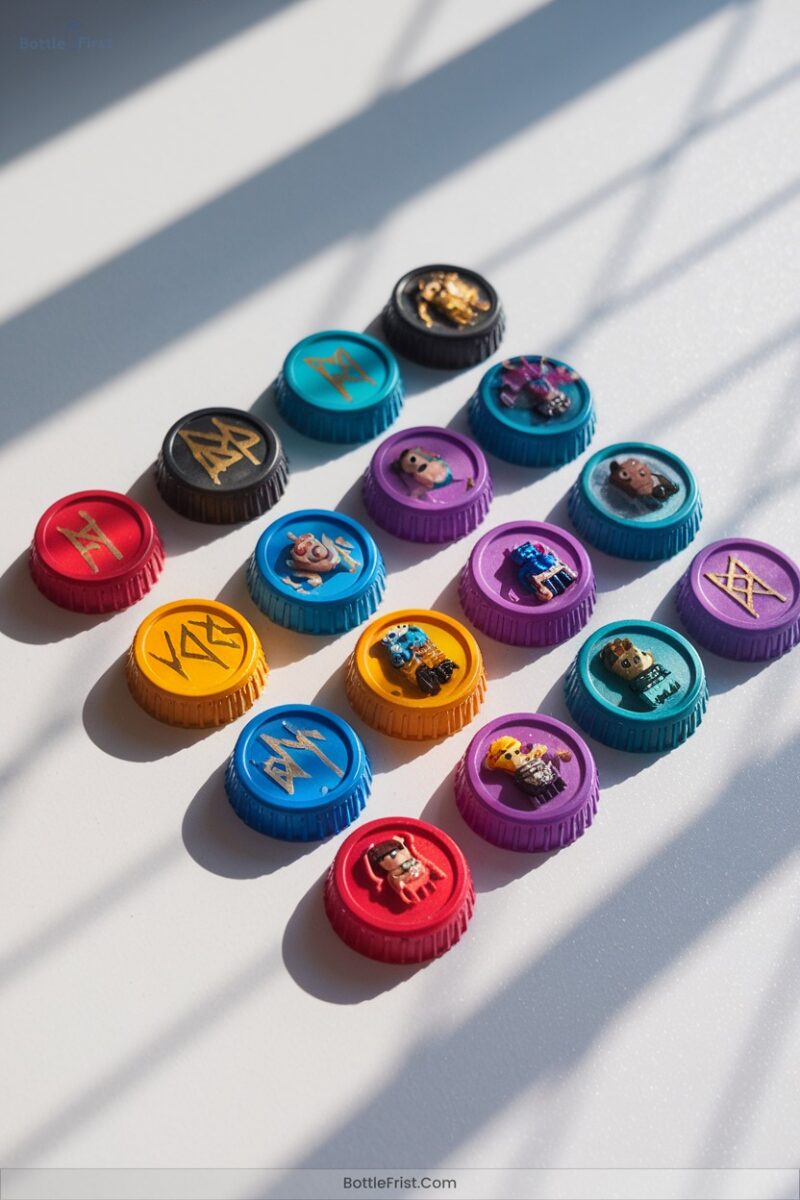
Transforming plastic bottle caps into magical gaming tokens is an inventive way to enhance your tabletop experience while being eco-friendly.
Start by collecting and cleaning caps to provide a sturdy base. Use circular craft punches to cut uniform discs from cardstock or event tickets.
Gather and clean bottle caps, then punch out uniform discs from cardstock or event tickets for a sturdy foundation.
Choose enchanting images, like creatures from Magic: The Gathering, to add personality. Secure them inside the cap’s threaded interior, eliminating the need for extra glue.
Test their compatibility with your game system, ensuring they fit perfectly as creature tokens, resource counters, or status markers.
Customize with color-coding and embellishments for a truly unique gaming accessory.
2. Charades Prompts With Bottle Caps
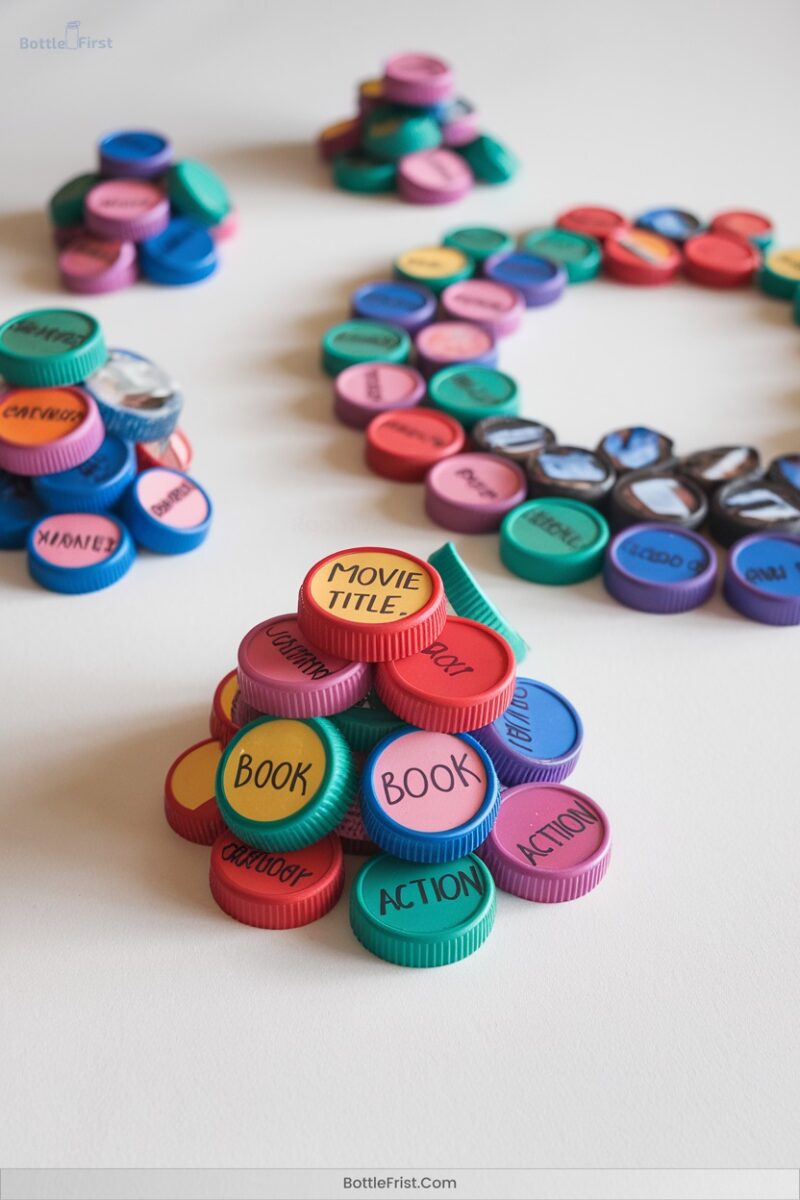
After you’ve crafted your magical gaming tokens, it’s time to explore how plastic bottle caps can enhance your charades game night with unique prompts and props.
Start by painting caps to symbolize items like “gemstones” or “magic potions.” Label them with letters or symbols: “D” for poison, “T” for treasure—adding glitter or stickers for flair.
Use caps as “bullets” or “coins” in spy or pirate themes. Layer them for textured objects, like a rainbow unicorn in “Fairy tale” prompts.
Arrange colored caps to create scene markers or direct actors’ movements. Let your imagination soar, transforming a simple game into an immersive adventure!
3. Sticker Counters for Board Games
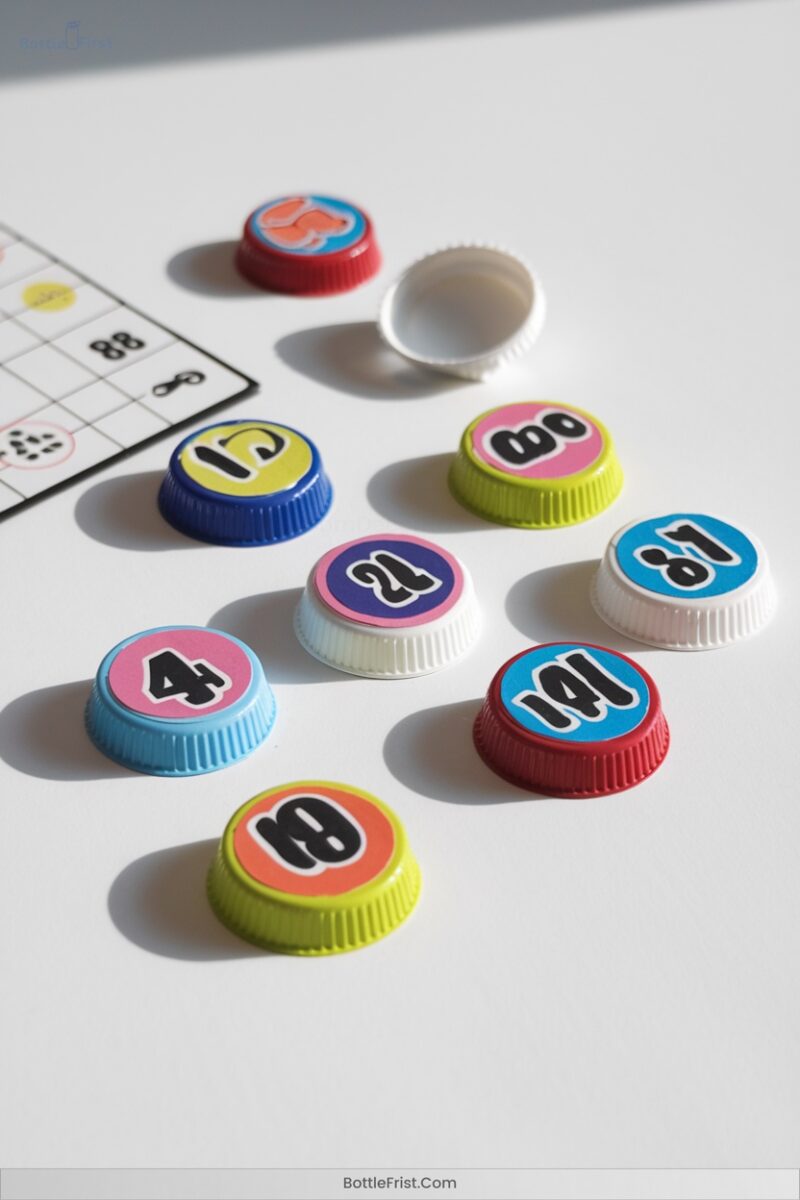
When it comes to jazzing up your board games, sticker counters made from plastic bottle caps offer a world of creative possibilities.
Start by distinguishing teams or categories with vibrant washi tape or enamel paint. Use permanent markers or adhesive stickers for specific symbols like numbers or icons.
Add texture through sanding or embossing for a tactile feel. Layer removable stickers to adapt counters for different games.
Opt for larger caps to signify special roles, like kings or bosses. Enhance durability with resin coatings and guarantee stability with magnetic attachments.
With these innovative tweaks, your board games will never be the same!
4. Rock-Paper-Scissors Cap Sets
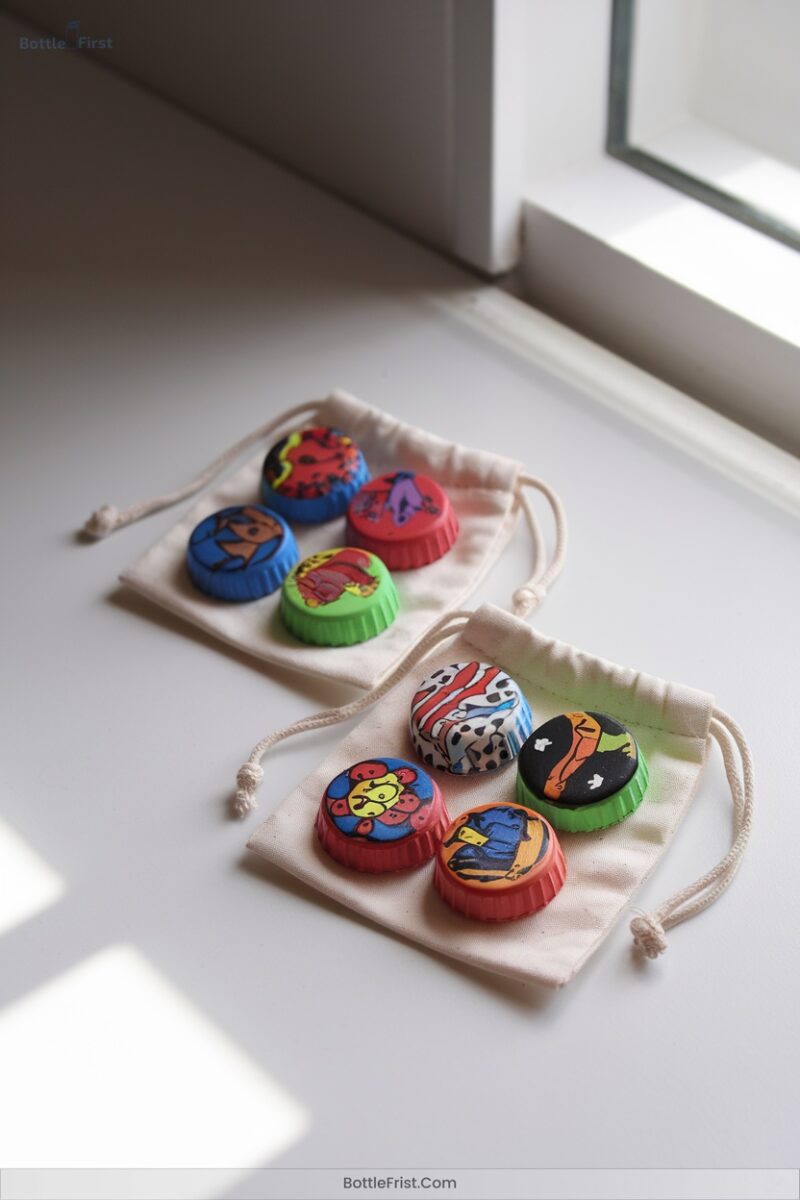
Imagine your board games not only looking vibrant but also feeling more interactive with a simple twist of Rock-Paper-Scissors magic.
Transform bottle caps into engaging game pieces by crafting distinct symbols with cardstock:
- Rock: Use gray paint and a circular punch for uniformity.
- Paper: Apply white paint, add texture with lace or fabric scraps.
- Scissors: Opt for red or blue, creating angular crosses.
Secure everything with a glue gun, and magnetize caps for easy stacking.
Customize further with embellishments like pearl beads. Your RPS sets will boast unbeatable charm and bring a tactile twist to game nights!
5. Bottle Cap Spinners for Games

Transform your game nights with the innovative flair of bottle cap spinners, adding excitement and a touch of DIY charm to your favorite games.
Start by drilling holes in your caps, threading string or wire to create dynamic thread spinners. For flick-based fun, add handles or targets, enhancing grip and precision.
Stack caps for multi-cap challenges, or decorate them with stickers and paint for unique player identifiers. Draw temporary targets with sidewalk chalk, creating engaging outdoor competitions.
Test spin durations or flick accuracy, awarding points for the longest spins or precise hits. Release creativity and competitive spirit with these inventive spinners!
6. Decorative Hat Accessories
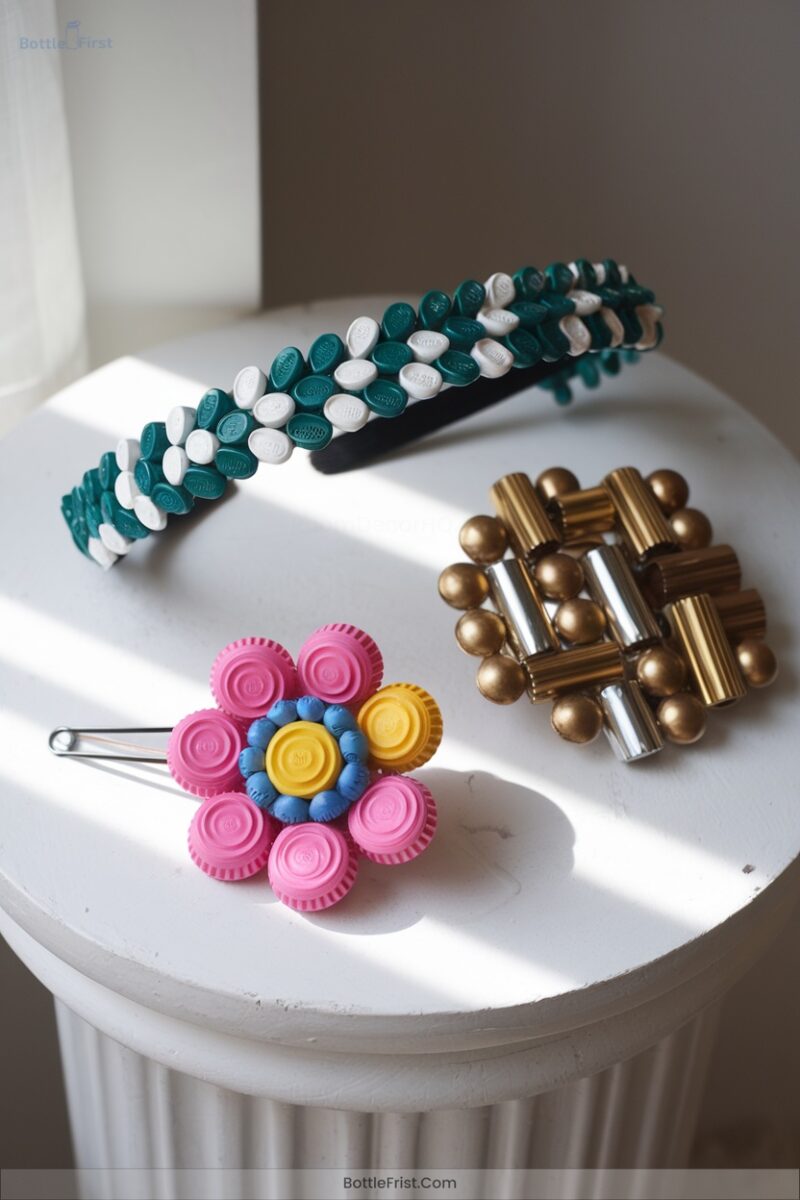
With a dash of creativity, you can transform ordinary plastic bottle caps into stunning decorative hat accessories that add a playful touch to any ensemble.
Use fabric glue to affix caps onto clips or headbands, crafting whimsical mini hats or Chinese lantern designs.
Want something more textured? Pair caps with fabric swatches or beads for unique earring charms.
Consider these ideas:
- Stack caps for a layered look, then attach to hair accessories.
- Design themed hats like chefs or pilgrims for cohesive sets.
- Add buttons or stitching for detailed brims or bands.
- Mix metallic and matte for contrasting styles.
Unleash your innovative spirit!
7. Brooch Charms With Decoupage
Although overlooked, plastic bottle caps hold the potential to become charming brooches through the art of decoupage.
Start by choosing your caps—plastic for a lightweight feel or tin for elegance. Select a decoupage theme using scrapbook paper, floral motifs, or vintage images. Layer these with a decoupage medium like Mod Podge, ensuring each coat dries thoroughly.
Choose caps—plastic for lightweight, tin for elegance. Use scrapbook paper or vintage images, layering with Mod Podge.
Personalize with markers or stickers for unique flair. Secure safety pins with hot glue for wearable wonders. Consider adding rhinestones or microbeads for extra pizzazz.
Finally, seal with clear resin for durability. Showcase your eco-friendly creations on coats or bags, or gift them as personalized treasures.
8. Geometric Earring Accents
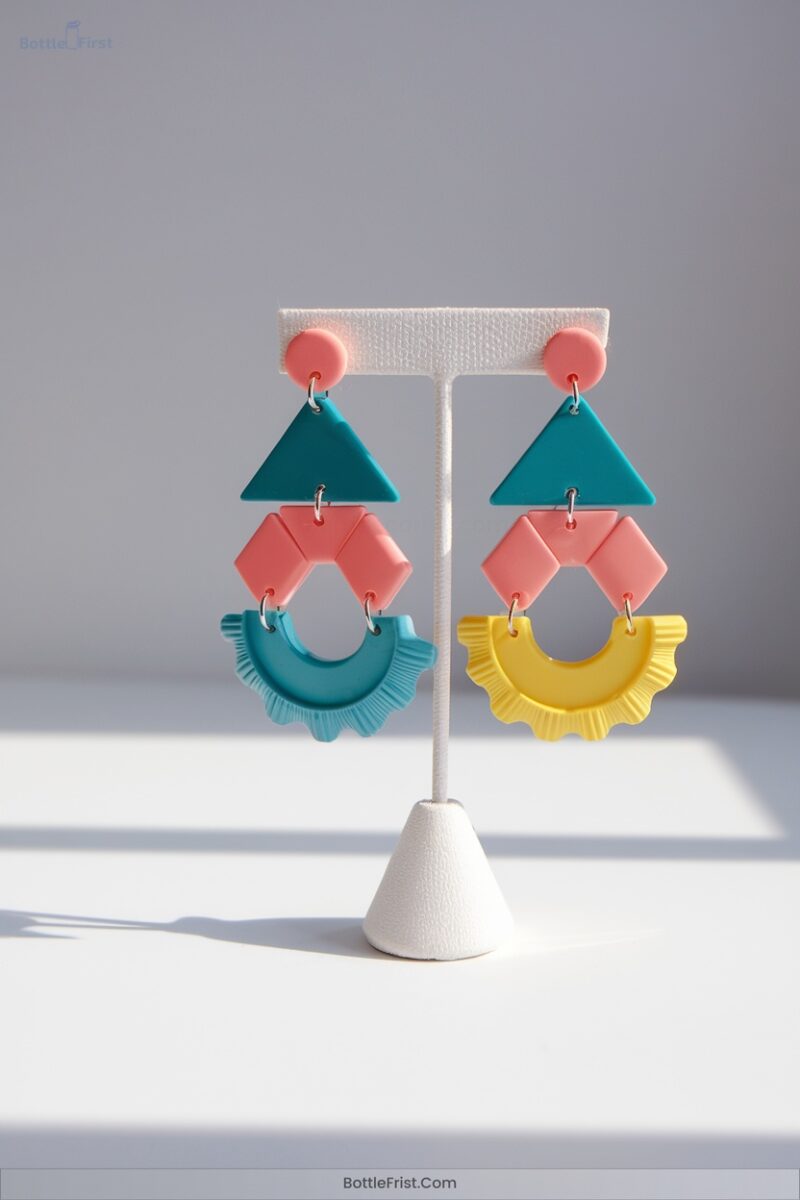
Crafting geometric earring accents from plastic bottle caps is an innovative way to transform everyday waste into eye-catching jewelry.
Start by precision-cutting shapes like triangles or hexagons using scissors and templates for perfect dimensions. Flattened caps make ideal bases, ready for layered designs and customizable lengths.
Add dimension with:
- Heat warping: Gently curve shapes with candle heat.
- Color application: Decorate with Sharpies or paint markers.
- Epoxy sticker overlays: Apply geometric stickers for texture.
- Layered wire work: Create dynamic designs with wire.
Secure your masterpiece using jump rings and French hooks, or explore wire wrapping for added flair.
9. Bracelet Dangles From Caps
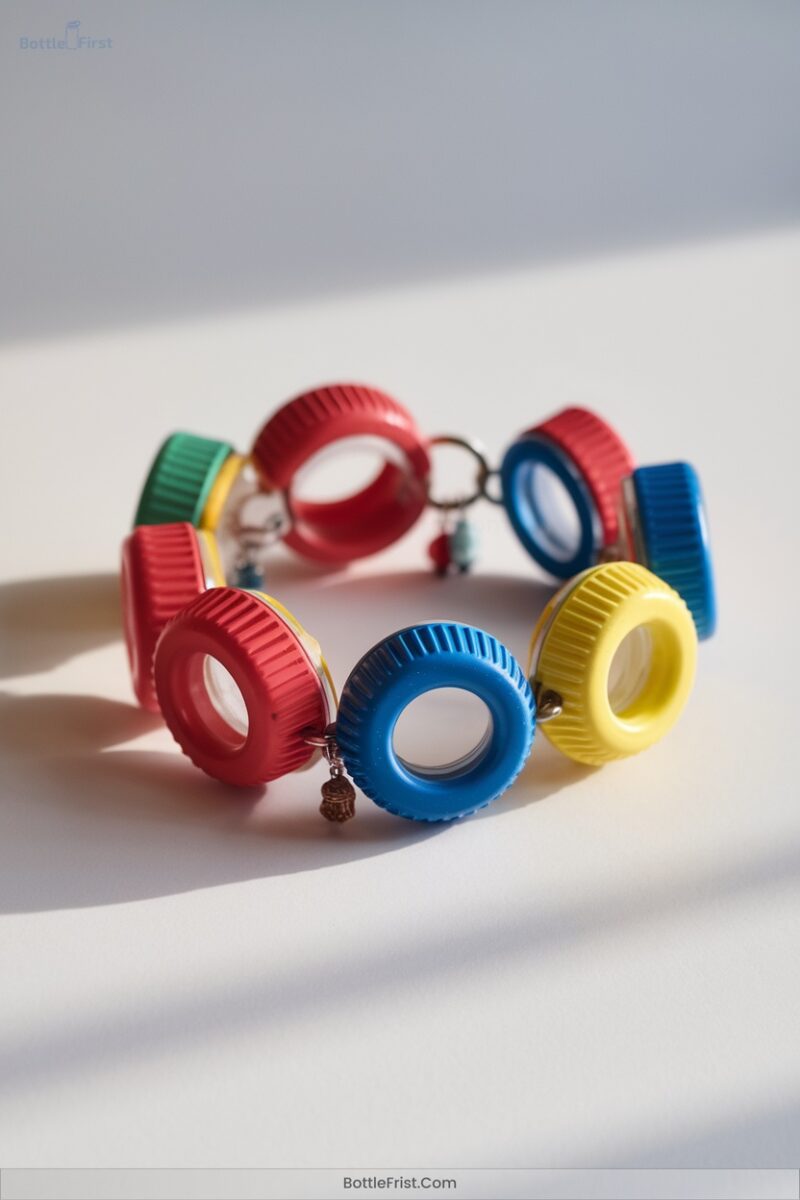
Building on the geometric flair of earring accents, you can transform plastic bottle caps into enchanting bracelet dangles. Start by selecting washed and dried caps. Use a jewelry punch to make holes on opposing sides.
Choose cultural imagery from magazines and seal it inside with Mod Podge. Add flair with paints or markers, then embellish with rhinestones for texture. Attach each cap to your bracelet using jump rings and needle-nose pliers, ensuring a secure fit.
Thread elastic bands for a loom-free, innovative bracelet base. Experiment with color schemes and mixed-media accents to craft dangles that truly express your creative spirit.
10. Creative Bottle Cap Necklaces
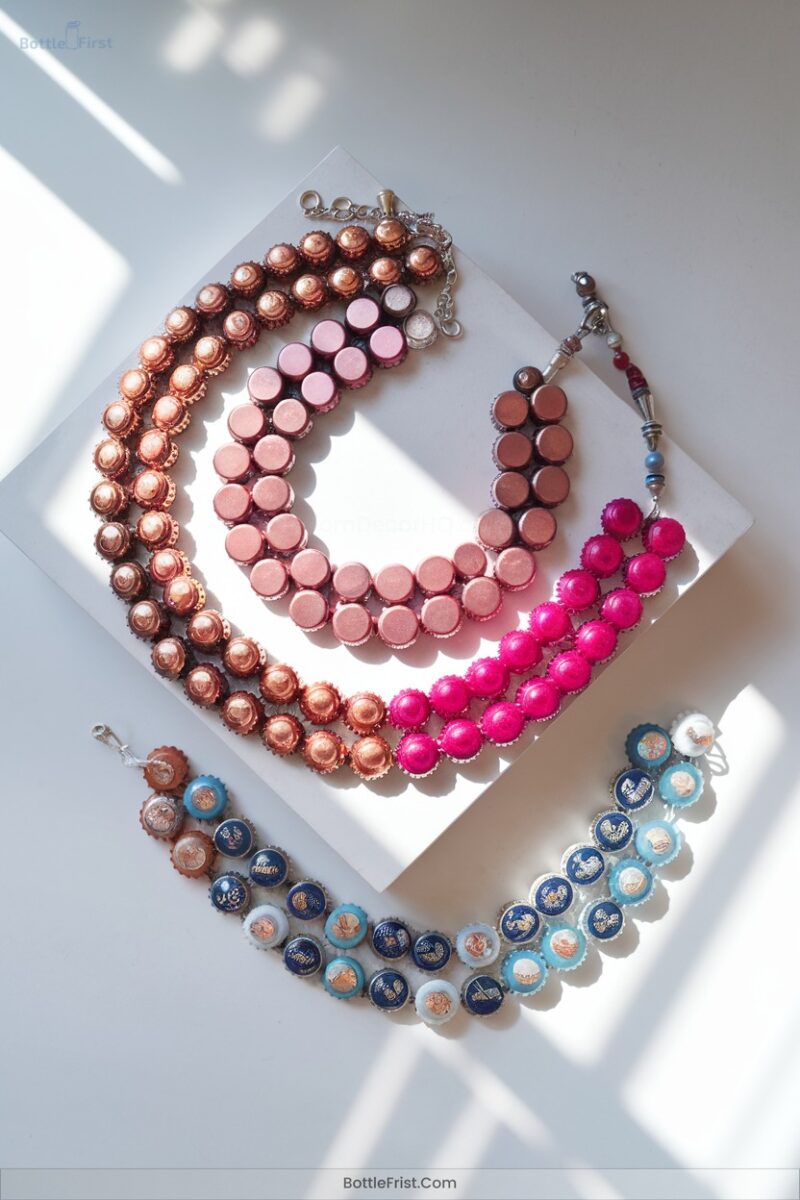
When creativity meets sustainability, bottle cap necklaces become a canvas for artistic expression. Immerse yourself in design with these innovative approaches:
- Painted multicolor patterns: Create vibrant nature-themed looks with alternating light blue and leaf green.
- Custom imagery with epoxy stickers: Preserve photos or graphics under a glossy resin coating for a lasting impression.
- Layered CD inserts: Use curved CD fragments inside caps for a unique, shell-like sheen.
- Mixed-media combinations: Pair painted caps with beads or charms for added texture and flair.
You’ll need flattened bottle caps, a 3/16″ drill bit, jump rings, and chains to bring your vision to life.
11. Bottle Cap Magnets
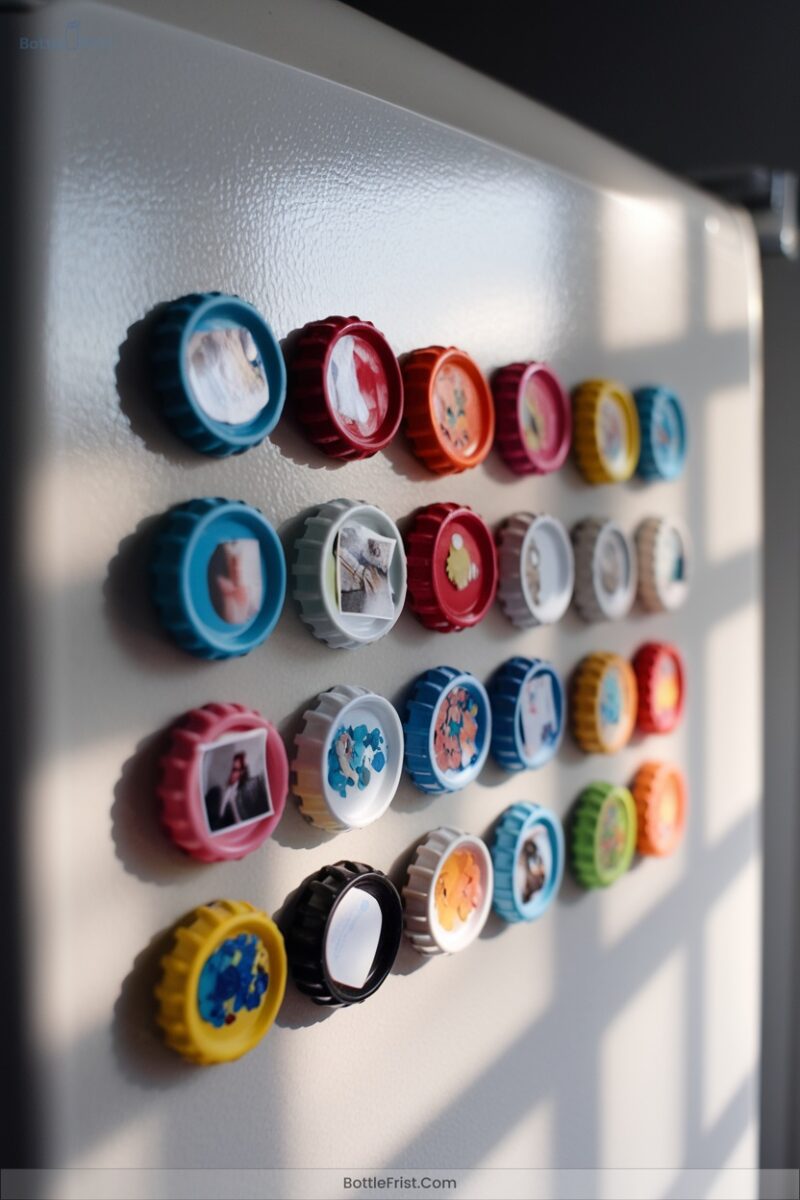
Transform your collection of bottle caps into magnetic masterpieces with just a few thoughtful steps.
Start by sanding the cap liners for better adhesion. Choose vibrant caps and add embellishments like beads or resin-like fills to craft miniature stories.
Secure a 1/2″ button magnet using two-part epoxy for a strong hold. Consider adding 1/4″ hex nuts as spacers to protect surfaces from scratches.
For visual flair, apply glitter glue or clear embossing powder. Pre-arrange your design, then glue with precision.
Confirm bonds are secure, and let cure for 24 hours. Voilà, you’ve created unique, enchanting bottle cap magnets!
12. Colorful Bottle Cap Coasters

While your bottle cap magnets have added charm to your fridge, you might be itching to explore more creative uses for your bottle cap collection.
Transform them into colorful coasters with these innovative ideas.
- Arrange caps in geometric patterns, like triangles or circles, for eye-catching designs.
- Use cork or coaster molds as a sturdy base; adhere caps with hot glue or epoxy resin.
- Dip caps in resin beforehand to prevent bubbles, then pour thin layers over for a glossy finish.
- Trim with a craft knife and sand edges smooth for a polished look.
These vibrant coasters won’t only protect surfaces but also spark conversations.
13. Bottle Cap Keychains
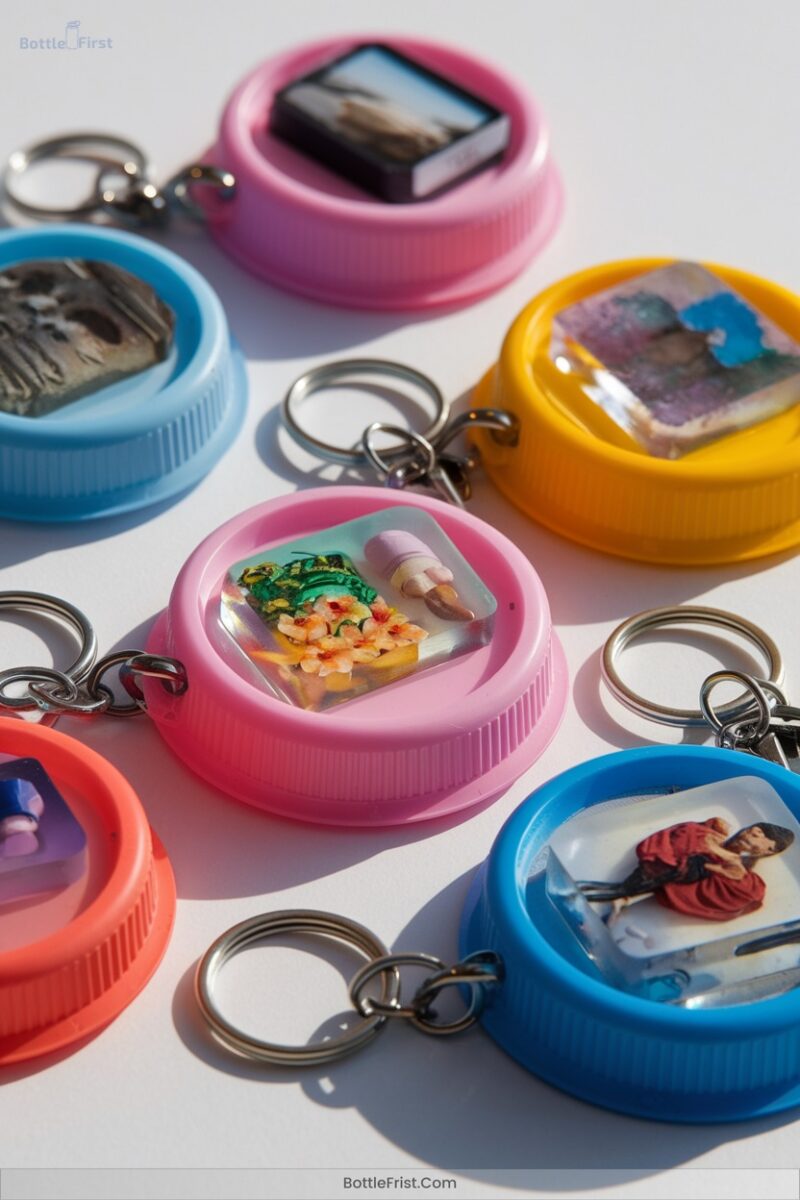
Open a world of creativity with bottle cap keychains that are as functional as they’re fun.
Start by grabbing pre-made split ring bottle caps for safety and ease. Use a 1-inch circle punch to cut cardstock or glossy paper for your designs.
Decorate with colored pencils or fine-tip markers, and protect with epoxy dots for a glossy finish. Integrate beads or charms for extra flair, and add some sparkle with glitter.
Secure everything with E6000 for durability or hot glue for speed. Your keychain will be a unique blend of art and function, ready to jazz up any set of keys!
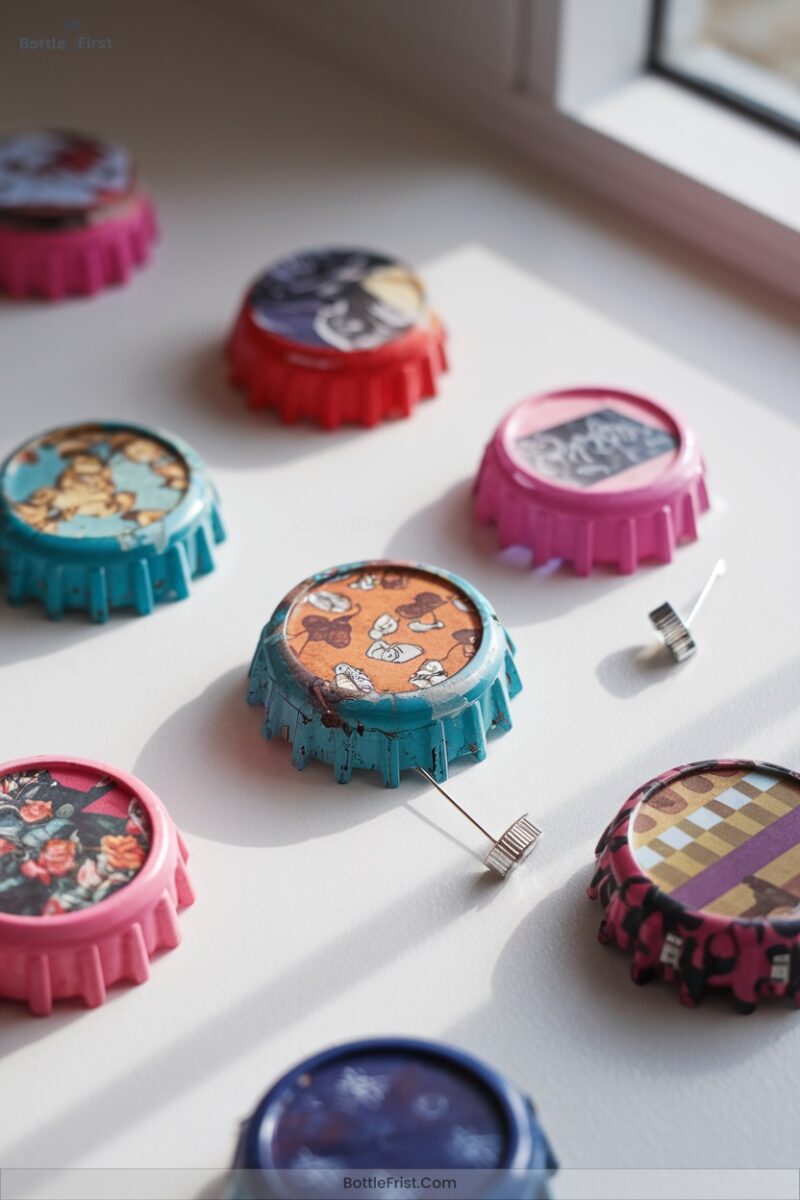
14. Personalized Bottle Cap Pins

Keychains aren’t the only way to repurpose bottle caps into statement pieces. Immerse yourself in creating personalized bottle cap pins that showcase your unique flair.
Start by collecting caps from local bars and prepare them with:
- Image transfer: Snip custom designs to fit perfectly inside each cap.
- Resin pouring: Fill halfway, adjusting images quickly for a flawless finish.
- Metal prep: Sand cap backs, ensuring strong adhesion for safety pins.
- Solder attachment: Use solder or hammer nails for simple pin attachments.
Personalize with movie themes, vivid colors, or seasonal motifs.
Let your creativity spark, and transform simple caps into wearable art!
15. Bottle Cap Photo Frames
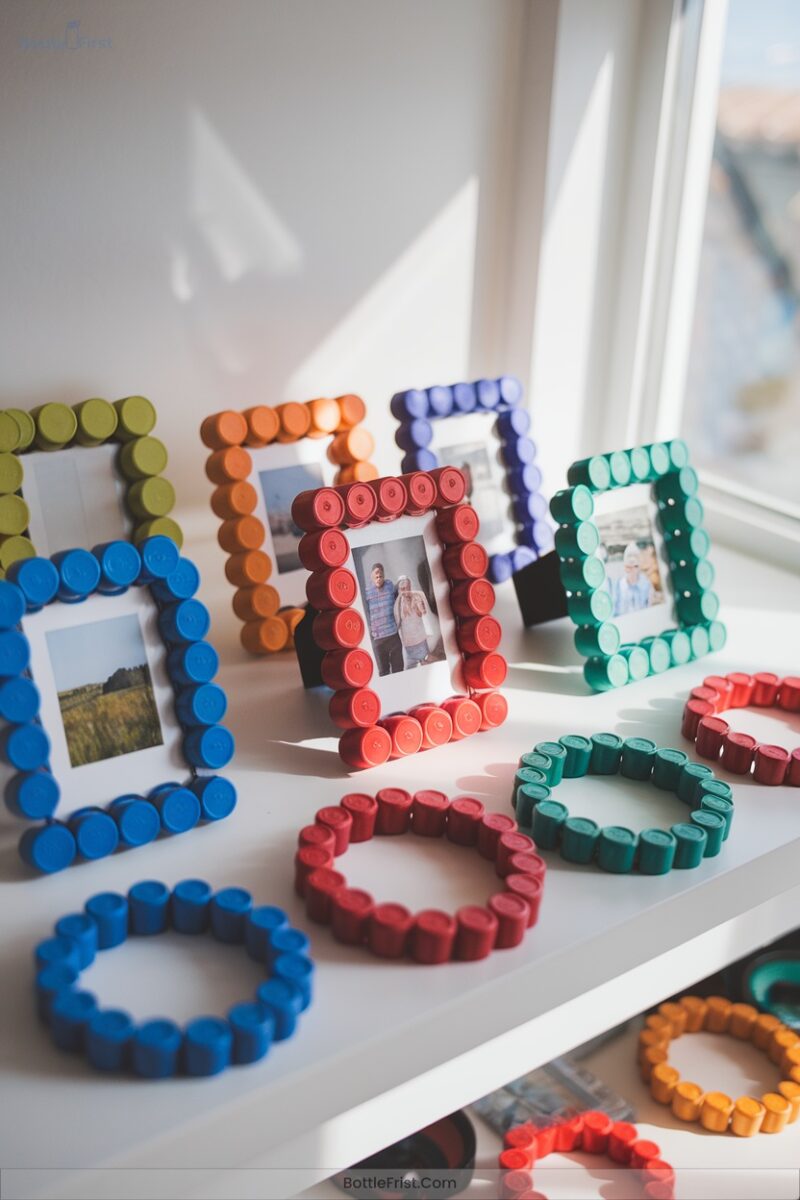
Transform your collection of bottle caps into stunning photo frames that are both eco-friendly and visually enchanting.
Begin with a plain frame as your structure. Flatten caps on cardboard, then spray paint them for a cohesive look. Arrange them using templates, securing each cap with hot glue along the edges.
Add a protective layer like mod podge for durability. Customize by painting caps with contrasting colors or incorporating logos.
Experiment with layouts—overlapping for depth or spacing for texture. Each cap tells a story, showcasing your creativity while reducing waste.
Your unique frame is a symbol of innovation and sustainability.
16. Bottle Cap Wall Art
When you’re ready to turn your bottle cap collection into eye-catching wall art, start by gathering caps of the same size and cleaning them thoroughly.
Use software like Photoshop to plan your grid layout for pixel-perfect designs. For a permanent piece, attach caps to a wooden base with hot glue.
Consider these creative techniques:
- Pixel Art: Transform digital images into color-coded grids.
- Pop Art Stylization: Employ bold, vibrant colors like red and yellow.
- Geometric Patterns: Form abstract shapes or tessellations.
- Gradient Effects: Blend colors for dynamic depth.
Innovate with bottle caps, transforming ordinary walls into extraordinary art!
17. Bottle Cap Garden Markers
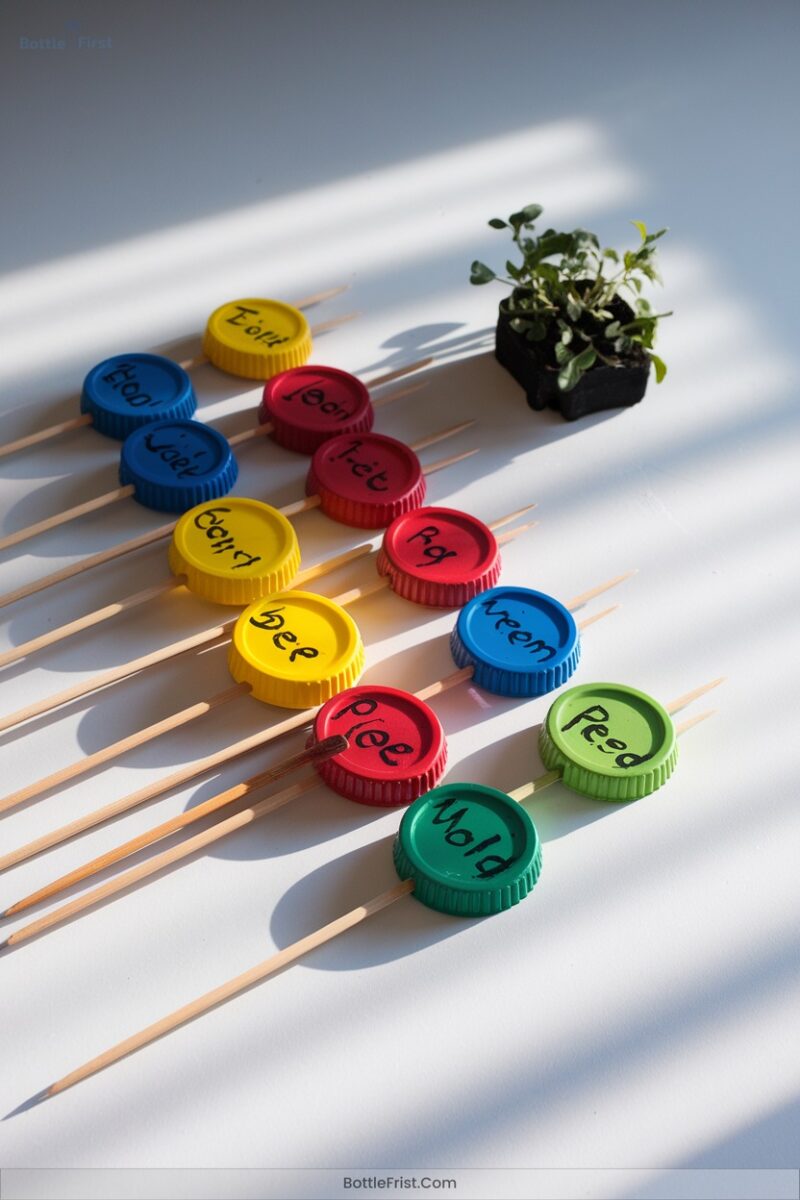
Immerse yourself in the colorful world of bottle cap garden markers and elevate your gardening game with a splash of creativity! Start by collecting bottle caps and customizing them with vibrant acrylic paints.
Attach them to dowel rods or sturdy wire using a hot glue gun, reinforcing for durability. Seal your artwork with decoupage medium for weatherproofing. Experiment with designs like floral arrangements or geometric patterns.
Stamp plant names or care instructions on the caps for practical use. Consider modular designs for swapping or stacking.
Use color coding to organize your garden by plant species or growth stages, adding innovative flair.
18. Bottle Cap Wind Chimes
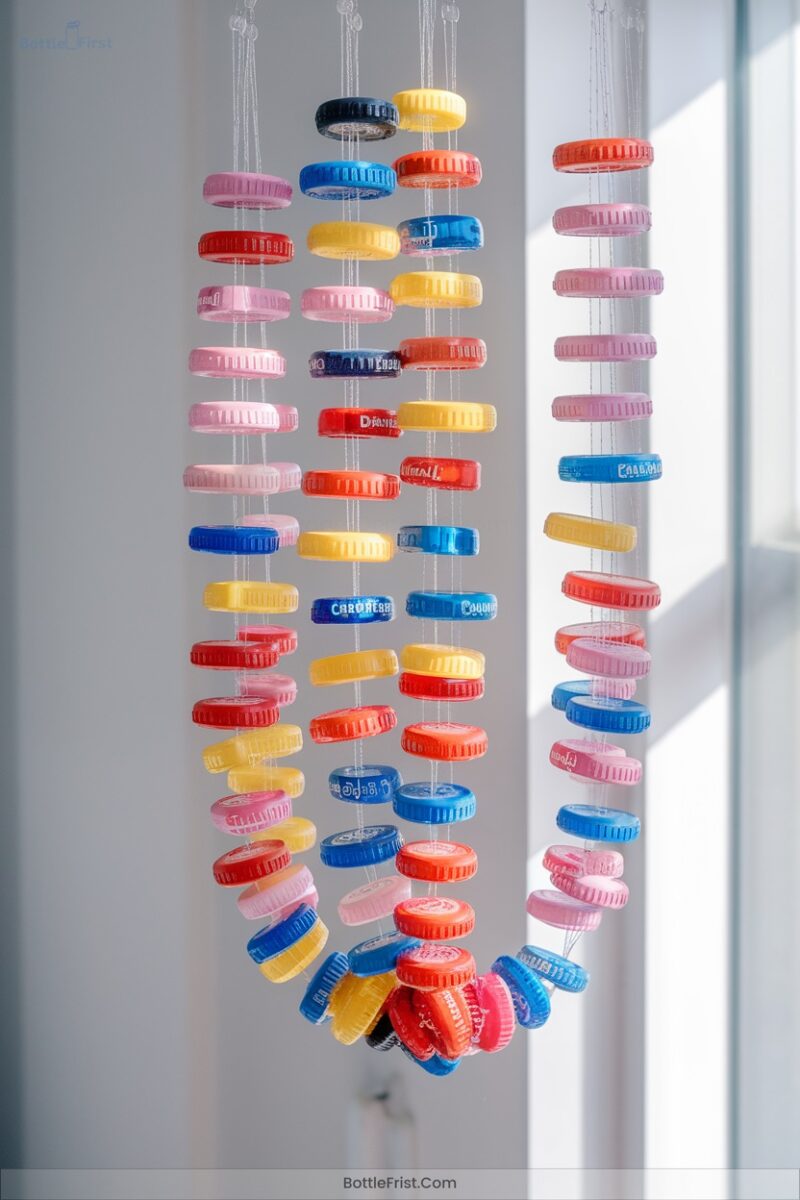
Although crafting wind chimes from bottle caps might seem like an unusual endeavor, it offers a delightful fusion of creativity and resourcefulness.
Immerse yourself in this project with:
- 150-200+ bottle caps: Opt for lightweight aluminum.
- Jump rings: Use 10mm+ for sturdy connections.
- Thread/wire: Fishing thread guarantees outdoor durability.
- Base options: Metal baskets or wooden sticks work great.
Begin by punching two holes per cap and threading with colorful wire.
Arrange caps in vertical chains, interspersing bells for sound variety. Secure your creation to a recycled base, testing balance and sound.
Customize by adding beads or shells for a unique touch.
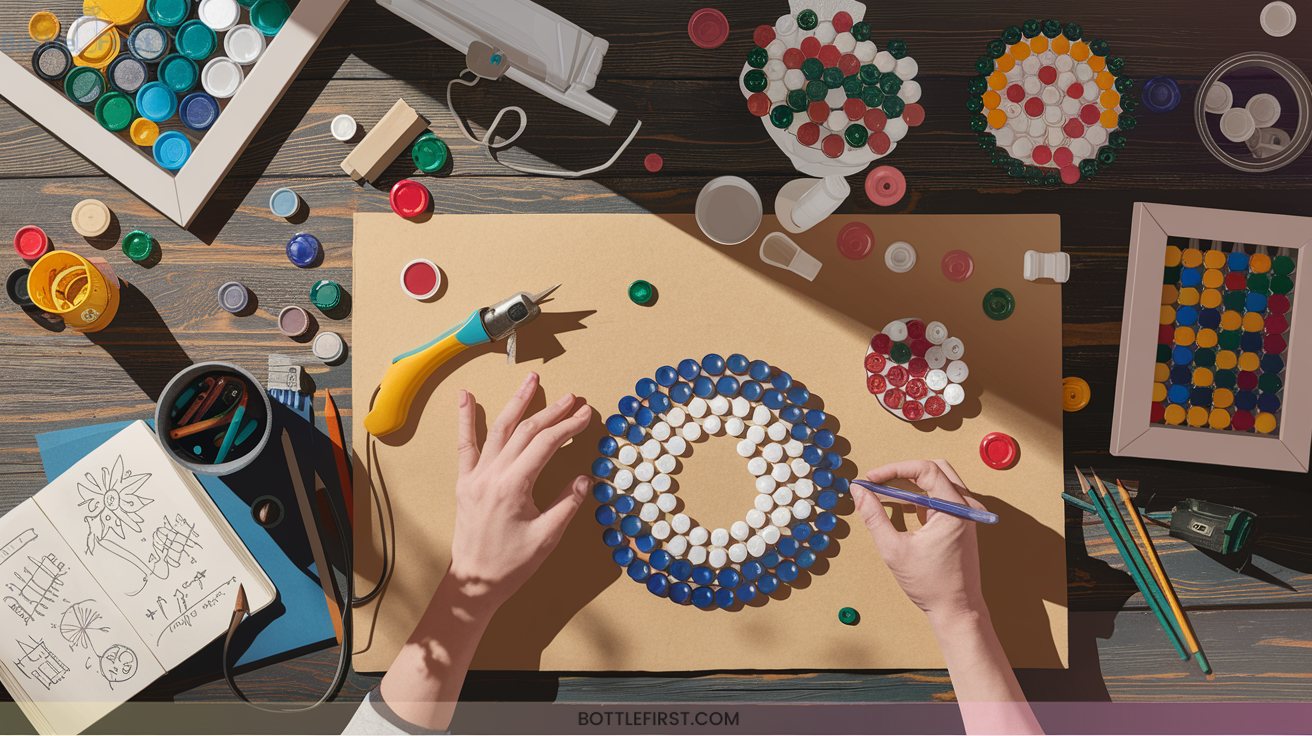
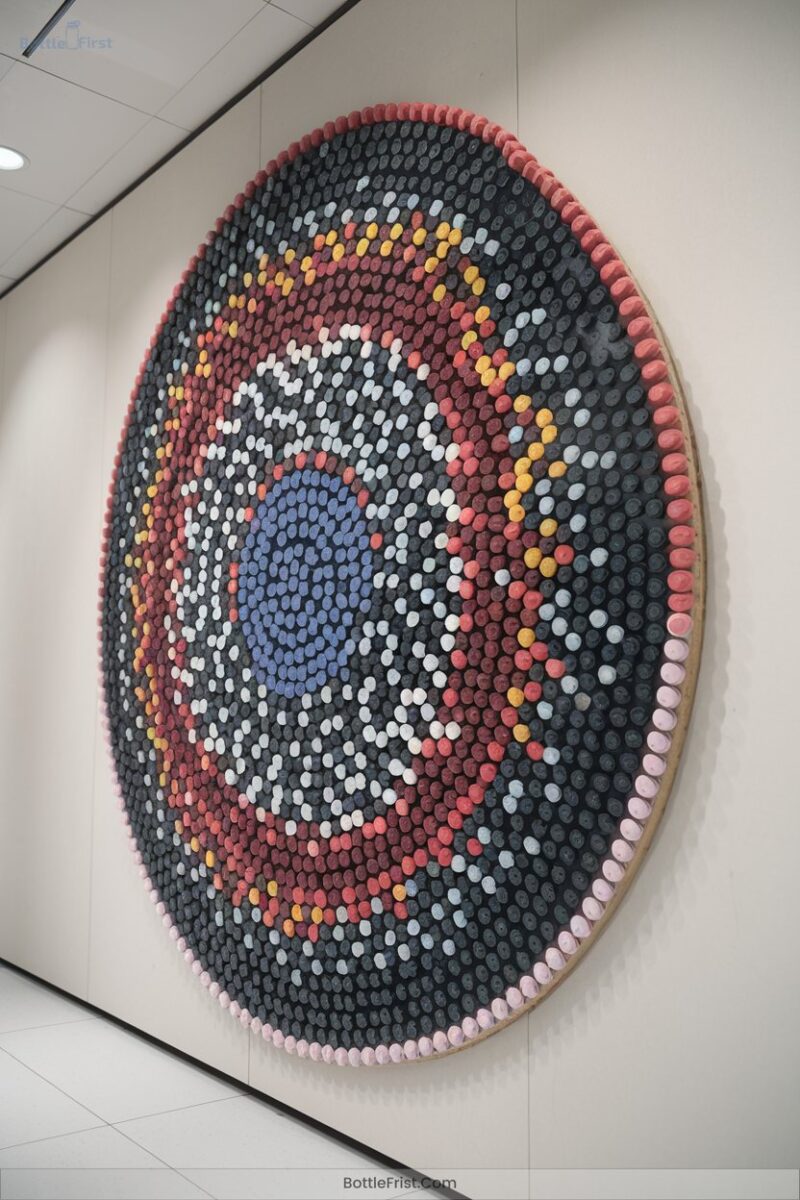
19. Bottle Cap Mosaic Art
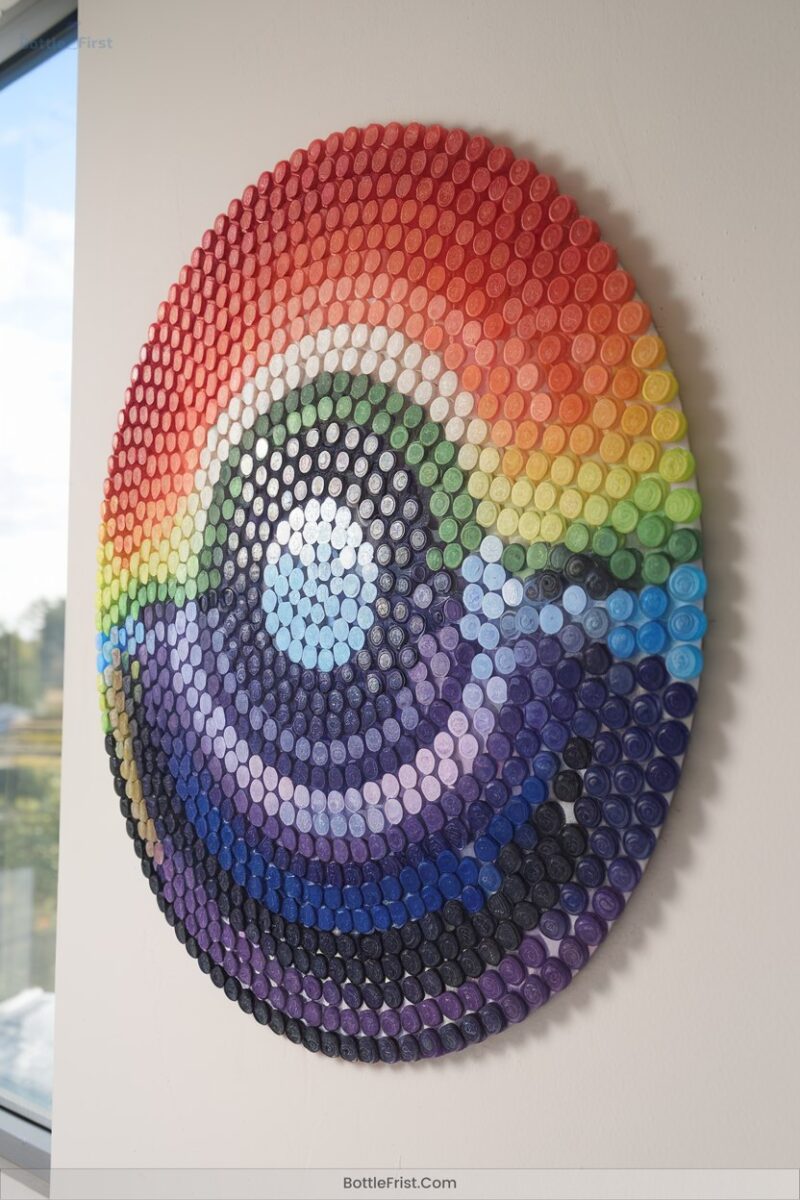
Creating bottle cap mosaic art is a rewarding journey where creativity meets sustainability.
Start with a sturdy base like an 18″x18″ plywood board and gather colorful caps, sourced from community drives. Clean and sort them, testing layouts before gluing. Use tacky glue or Liquid Nails for strong adhesion. Seal your board with outdoor acrylic paint to withstand moisture.
Begin with a robust plywood base and vibrant caps, securing with strong glue and sealing with outdoor paint for durability.
Choose a simple motif, such as an animal or landscape, and use colored markers for guidance. Experiment with pointillism by clustering caps for gradients.
Add paper punches or rhinestones for texture. Engage your community in design and assembly for a meaningful experience.
20. Bottle Cap Candle Holders
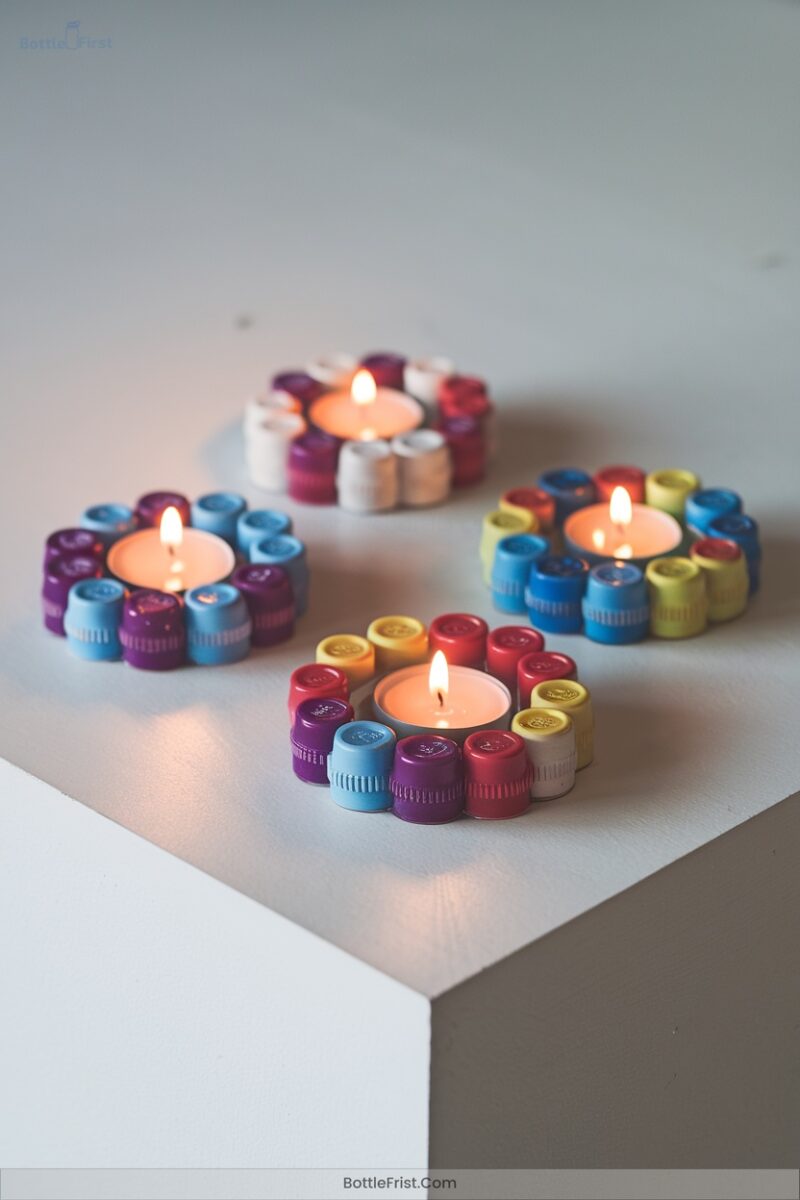
Transform discarded bottle caps into charming candle holders with just a few simple steps.
Start by collecting bottle caps and old candles. Melt the wax using a heat pad, ensuring you work on a non-flammable surface. Pour the melted wax into the caps, using clear tape to shape it neatly.
Secure wicks with adhesive, bending them for safety. Assemble your creations with flair:
- Patterned holders: Cut diagonally for decorative edges.
- Floral decorations: Create flower-like centerpieces.
- Texture additions: Add glitter or yarn for visual interest.
- Layered lighting: Stack tiers for dramatic effects.
Ensure adequate ventilation and stable bases for safety.
Frequently Asked Questions
What Tools Are Needed to Safely Cut Plastic Bottle Caps?
You’ll need a hacksaw, utility knife, craft knife, and drill with bits. Don’t forget safety gear like goggles and gloves. Secure your workspace with a vice and clamps. Smooth edges with a file and sandpaper.
How Can I Ensure Bottle Caps Are Securely Attached to Projects?
Secure bottle caps by ensuring 90% adhesion success with E-6000 glue. Clean them well, sand for texture, and pre-arrange your design. For lasting bonds, reinforce with hot glue and test strength after 24 hours.
Are There Specific Paints Recommended for Decorating Plastic Bottle Caps?
For decorating plastic bottle caps, use acrylic spray paint for quick, even coverage. Opt for matte synthetic paint for a glare-free base. Nail polish adds vibrant, glossy details. Mix techniques for a truly unique, innovative finish.
Can Plastic Bottle Caps Be Recycled After Crafting Use?
You can recycle crafted bottle caps, but check local guidelines first. Separate caps from bottles, ensuring they’re clean and free from non-recyclable adhesives. Consider creative reuse or specialized programs if standard recycling isn’t an option.
How Do I Create a Uniform Hole in Bottle Caps for Threading?
Dust off your trusty drill, align the bottle cap on a vintage phonograph, and press down gently. Confirm the drill bit is the right size. Voilà, you’ve crafted a perfectly uniform hole with precision and flair!
Conclusion
You’ve got a treasure trove of bottle cap craft ideas at your fingertips, but maybe you’re thinking, “Do I really have the time?” Don’t fret! Each project is a quick, fun escape from the everyday hustle.
Imagine transforming mundane caps into vibrant garden markers or whimsical wind chimes, all while flexing your creative muscles. Immerse yourself, and you’ll see—it’s not just art; it’s a delightful journey that turns ordinary moments into extraordinary memories.