Can You Make Whipped Cream in a Blender Bottle? Yes, 8 Steps
Yes, you can make whipped cream in a blender bottle. The process is relatively simple and straightforward, and it doesn’t require any special tools or ingredients.
Whipped cream can be made in a blender bottle by adding heavy cream and sugar, then shaking the mixture vigorously.
The shaking action helps to incorporate air into the cream, causing it to thicken and form soft peaks, characteristic of whipped cream.
The process is generally quicker than using a traditional whisk and bowl, as the blender bottle provides a more effective, efficient way to whip the cream.
In a blender bottle, making whipped cream is a hassle-free process. Simply add your heavy cream and sugar, then shake the bottle vigorously.
The blender ball inside the bottle helps to incorporate air into the cream, causing it to thicken rapidly.
The result is a light, fluffy whipped cream that’s perfect for topping off your favorite desserts.
8 Steps to Make Whipped Cream in a Blender Bottle
| Steps | Description |
|---|---|
| Step 1 | Ensure the blender bottle is clean and dry |
| Step 2 | Pour the necessary amount of heavy cream (roughly 1 cup) into the blender bottle |
| Step 3 | Add sugar (roughly 1-2 tablespoons to taste) |
| Step 4 | Screw on the lid of the blender bottle tightly |
| Step 5 | Shake vigorously for approx. 5 – 7 minutes until the cream thickens |
| Step 6 | Check the consistency, continue shaking if necessary |
| Step 7 | Once desired consistency is achieved, add any flavorings (like vanilla extract) and gently stir |
| Step 8 | Use immediately or refrigerate until needed |
Key Takeaway
Five Facts About Making Whipped Cream in a Blender Bottle
How Does A Blender Bottle Work?
Overview Of The Design And Functionality Of A Blender Bottle
Blender bottles have become a popular kitchen gadget for making shakes, smoothies, and even whipped cream.
These innovative containers are designed with a unique mechanism that turns ordinary ingredients into creamy treats.
Let’s take a closer look at how a blender bottle works and what makes it so effective.
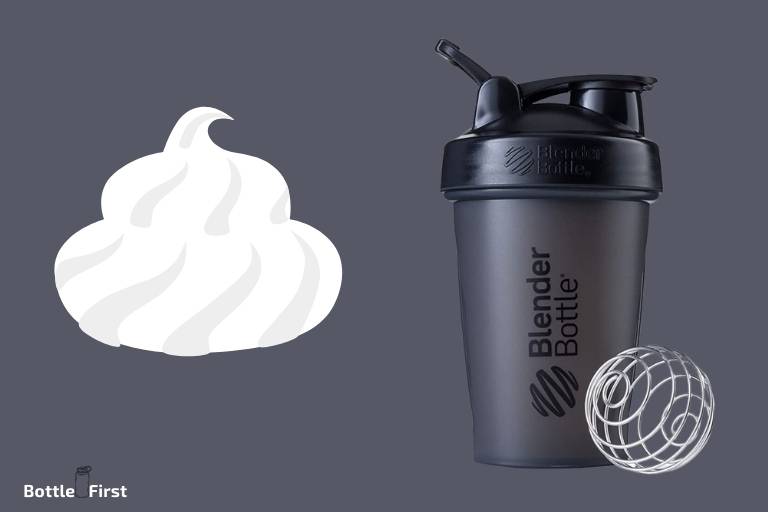
- Design: Blender bottles typically consist of a plastic bottle with a screw-on lid and a wire whisk ball inside. The lid has a flip-top spout for easy pouring and a loop handle for convenient carrying. The bottle is usually marked with measurement lines for precise ingredient ratios.
- Blender ball: The secret behind the blender bottle’s effectiveness lies in its patented blender ball. This small, wire whisk ball is made of high-quality stainless steel and is designed to efficiently mix ingredients when shaken. The ball is placed inside the bottle and moves freely as you shake it, creating a vortex that blends everything together.
- Vortex effect: When you shake the blender bottle, the blender ball rapidly moves around the bottle, creating a powerful vortex. This vortex helps to break down ingredients, mixing them thoroughly and evenly. As a result, you can achieve a smooth texture and consistent flavor in your creations.
Explanation Of The Mechanism Behind The Blender Ball
Now, let’s delve deeper into the mechanism of the blender ball and understand how it works its magic:
- Rapid mixing: As you shake the blender bottle, the blender ball spins and orbits around the bottle. This rapid movement allows it to effectively mix ingredients by combining the convective motions with the shear forces applied during shaking.
- Bouncing action: The wire whisk ball is not only responsible for stirring, but it also contributes to the creation of a bouncing action when shaken. This bouncing action enhances the blending process by helping to break down stubborn clumps and ensuring that no lumps or powder remain.
- Efficient mixing: The design of the blender ball ensures that it reaches all corners of the bottle, leaving no ingredient untouched. The wire whisk shape helps to create a convection-like flow, ensuring efficient mixing for a smooth and lump-free result.
- Multifunctional: The blender ball is not limited to just mixing drinks but can also be used for other culinary purposes. It can be used to emulsify vinaigrettes, blend dressings, whisk eggs, or even froth milk. Its versatility makes it a handy tool in any kitchen.
Blender bottles offer a convenient and effective way to create creamy concoctions.
With their unique design and the power of the blender ball, whipping up delicious drinks and even homemade whipped cream becomes a breeze.
So grab your blender bottle, add your favorite ingredients, and shake your way to a delightful treat!
Ingredients Needed For Whipped Cream In A Blender Bottle
Making whipped cream in a blender bottle is a convenient and fuss-free way to enjoy this delightful topping.
With just a few simple ingredients, you can transform regular cream into a light and fluffy treat that elevates any dessert or beverage.
In this section, we will explore the necessary ingredients for making whipped cream in a blender bottle, emphasizing its simplicity and ease of preparation.
Listing The Necessary Ingredients For Making Whipped Cream
- Heavy cream: The main ingredient for whipped cream is heavy cream, also known as double cream or whipping cream. It contains a high fat content, which is essential for achieving the desired creamy texture.
- Sweetener: To add sweetness to the whipped cream, you will need a sweetener like granulated sugar, powdered sugar, or a liquid sweetener such as honey or maple syrup. Choose the type and amount of sweetener based on your preference and the recipe you are making.
- Flavorings (optional): While not necessary, you can enhance the flavor of your whipped cream with extracts like vanilla, almond, or even citrus zest. These flavorings can add a delightful twist to the traditional whipped cream.
Now that you know the minimal ingredients required, you can easily whip up a batch of delicious whipped cream in a blender bottle.
Just gather these ingredients, and you’ll be ready to create fluffy clouds of cream to complement your favorite treats.
Step-By-Step Guide To Making Whipped Cream In A Blender Bottle
Preparing The Blender Bottle For Use:
Before you begin making whipped cream in a blender bottle, it’s important to prepare the bottle properly.
Here are the key points to keep in mind:
- Begin by thoroughly cleaning the blender bottle with warm soapy water. Make sure to clean all parts, including the lid, blender ball, and the bottle itself.
- Rinse the bottle with clean water to remove any soap residue, and then dry it completely.
- Ensure that the blender ball is in place inside the bottle. This metal ball helps to mix and aerate the ingredients, resulting in creamy whipped cream.
- Chill the blender bottle in the refrigerator for about 10-15 minutes before using it. This step helps to keep the cream cold and encourages better whipping.
Mixing The Ingredients In The Blender Bottle:
Once you have prepared the blender bottle, it’s time to mix the ingredients.
Follow these steps for a smooth mixing process:
- Pour the desired amount of heavy cream into the blender bottle. Remember to leave enough space for expansion as the cream is being whipped.
- Add sweetener (such as powdered sugar or granulated sugar) and flavorings (such as vanilla extract) according to your taste preferences. These ingredients enhance the flavor of the whipped cream.
- Screw on the lid tightly to prevent any spills during the shaking process.
- Shake the blender bottle gently to ensure that the ingredients are thoroughly mixed. This is an important step to achieve a smooth consistency and even distribution of flavors.
Demonstrating The Shaking Technique To Achieve Whipped Cream Texture:
To achieve the perfect whipped cream texture, follow these steps and use the shaking technique:
- Hold the blender bottle firmly with both hands to prevent any leakage.
- Shake the bottle vigorously in an up and down motion. The shaking action helps to incorporate air into the cream, resulting in a fluffy and light texture.
- Continue shaking for about 1-2 minutes or until the cream thickens. You will notice that the liquid cream is transforming into a thick and creamy whipped cream.
- Avoid over-shaking, as it can cause the cream to become stiff or even turn into butter. Keep an eye on the consistency and stop shaking once it reaches the desired texture.
Remember, making whipped cream in a blender bottle is a simple yet effective method to create delicious homemade whipped cream.
Enjoy the process and savor the fluffy goodness on your favorite desserts!
Tips And Tricks For Successful Whipped Cream Making
Whipped cream is a versatile dessert topping that adds a touch of indulgence to any sweet treat.
While it’s traditionally made using a whisk or a mixer, did you know that you can make whipped cream in a blender bottle too?
In this section, we’ll share some handy tips and tricks to ensure your whipped cream making is a success.
So grab your blender bottle and let’s get started!
Suggestions For Keeping The Ingredients Cold To Achieve Better Results
Making whipped cream requires chilled ingredients to achieve that light and fluffy texture we all love.
Here are some suggestions to keep your ingredients cold for better results:
- Refrigerate the cream: Before you start making whipped cream, make sure to chill your heavy cream in the refrigerator for at least a few hours. Cold cream whips up faster and holds its shape better.
- Pre-chill the blender bottle: To keep the cream cold throughout the whipping process, it’s a good idea to pre-chill your blender bottle in the fridge or freezer. This will help maintain the desired temperature and prevent the cream from warming up too quickly.
- Use ice-cold utensils: Whisk or mixer attachments can also affect the temperature of the cream. To keep everything cold, place your whisk or mixer attachment in the freezer for a few minutes before using them. This will help ensure that the cream stays chilled during the whipping process.
Importance Of Using Fresh Cream And Not Overfilling The Blender Bottle
When it comes to making whipped cream in a blender bottle, the quality of the cream and the amount you use are crucial factors for success.
Here’s why:
- Freshness matters: To achieve the best whipped cream, always use fresh cream that hasn’t passed its expiration date. Fresh cream has a higher fat content, which results in better stability and a smoother texture when whipped.
- Don’t overfill the blender bottle: Overfilling the blender bottle can lead to less effective whipping and messy outcomes. To achieve optimal results, only fill the blender bottle halfway with the cream. This allows enough space for the cream to expand as it whips, leading to a light and airy texture.
- Avoid temptation to add additional ingredients: While it may be tempting to add flavorings such as vanilla extract or sweeteners to your whipped cream, it’s best to keep it simple when using a blender bottle. Additional ingredients can affect the cream’s consistency and may prevent it from whipping properly.
By following these tips and tricks, you’ll be able to create delicious homemade whipped cream using a blender bottle.
Whether you’re topping off a slice of pie or dolloping it onto fresh fruits, enjoy the homemade goodness of your whipped cream creation!
Is it Safe to Put Hot Liquid in a Blender Bottle?
When it comes to putting hot liquid in a blender bottle, caution is advised. Blender bottles are primarily designed for cold or room temperature liquids. The high temperature can cause the bottle to warp or even crack, posing a safety hazard. To avoid any mishaps, it is recommended to let hot liquids cool down before pouring them into a blender bottle.
Can You Use a Blender Bottle to Make Peanut Butter?
Yes, you can use a blender bottle to make peanut butter. Simply add peanuts to the blender bottle, secure the lid tightly, and shake vigorously until desired consistency is achieved. The peanut butter in blender bottle method is a convenient and mess-free way to create homemade creamy or chunky peanut butter within minutes.
FAQ About Can You Make Whipped Cream In A Blender Bottle
Can You Make Whipped Cream In A Blender Bottle?
Yes, you can make whipped cream in a blender bottle by adding heavy cream and shaking vigorously.
How Long Does It Take To Make Whipped Cream In A Blender Bottle?
It takes approximately 2-3 minutes of shaking to make whipped cream in a blender bottle.
What Ingredients Do You Need To Make Whipped Cream In A Blender Bottle?
To make whipped cream in a blender bottle, you’ll need heavy cream and any desired sweeteners or flavorings.
Can You Make Flavored Whipped Cream In A Blender Bottle?
Yes, you can make flavored whipped cream in a blender bottle by adding extracts, syrups, or other flavorings.
What Other Recipes Can You Make With A Blender Bottle Besides Whipped Cream?
In addition to whipped cream, you can use a blender bottle to make protein shakes, salad dressings, and pancake batter.
Conclusion
Making whipped cream in a blender bottle is a convenient and quick option for those without access to a whisk or mixer.
The process involves combining heavy cream, sweetener, and flavorings in the blender bottle and shaking vigorously until soft peaks form.
Although it may not produce the same volume and texture as traditional methods, it is a viable alternative for small servings or in a pinch.
However, it is important to note that the type of blender bottle used can affect the outcome, with options designed specifically for whipping cream providing better results.
Additionally, experimentation with chilling the bottle, using colder ingredients, or adding stabilizers can improve the overall performance.
Overall, while a blender bottle may not be the traditional tool for making whipped cream, it can still be a practical and effective solution.

