Diy Water Bottle Filter Aquarium: 10 Easy & Quick Steps!
Creating a DIY water bottle filter aquarium is a cost-effective and straightforward method to maintain a clean and safe environment for your aquatic friends.
A water bottle filter aquarium uses a simple, homemade filtration system to clean the water in your aquarium.
The process involves using readily available materials such as a water bottle, filter media, and an air pump to create a filtration unit that pulls dirty water through the media, trapping impurities and releasing clean water back into the tank.
A DIY water bottle filter aquarium is an excellent option for hobbyists on a budget or those who enjoy DIY projects.
It’s an affordable, easy, and eco-friendly way to keep your aquarium clean, ensuring a healthier habitat for your fish. Plus, it gives you the satisfaction of creating something useful with your own hands.
10 Steps: DIY Water Bottle Filter Aquarium
| Steps | Materials Needed | Description |
|---|---|---|
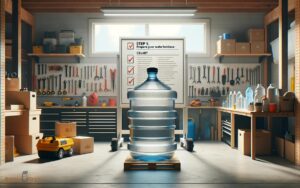
| 1 | Water Bottle | Begin with a clean, empty water bottle. This should be large enough to accommodate your filter materials, and small enough to fit inside your aquarium |
| 2 | Activated Charcoal | You need activated charcoal due to its porous nature, which can absorb toxins and impurities, thus helping to cleanse the water |
| 3 | Cotton Balls | Cotton balls are used to hold the activated charcoal in place and act as a pre-filter, catching larger particles before they reach the charcoal |
| 4 | Coarse Sponge | A coarse sponge is necessary to provide the final filtration stage, preventing any remaining impurities from reaching the aquarium |
| 5 | Cut the Bottle | Cut the bottom off the bottle. You will insert the filter materials into this end, and then place the bottle, neck-down, into the tank |
| 6 | Add Cotton | Place a layer of cotton balls into the bottom of the bottle. This will help keep the other layers of your filter in place |
| 7 | Add Charcoal | Add a layer of activated charcoal on top of the cotton layer |
| 8 | Add Sponge | Place your coarse sponge on top of the charcoal. This will catch any impurities that manage to get through the previous layers |
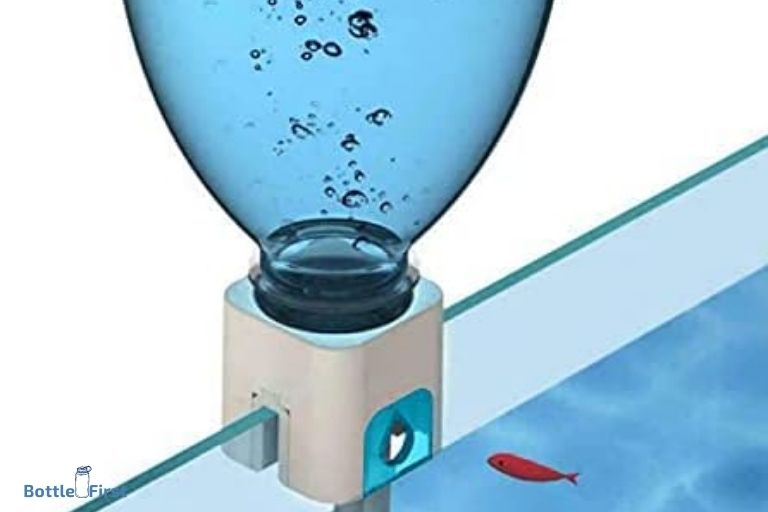
| 9 | Install Filter | Place your DIY water bottle filter into the aquarium, with the neck of the bottle submerged in the water. Ensure it’s stable and won’t be dislodged by the fish or water movement |
| 10 | Monitor | Regularly monitor your DIY filter’s performance. Replace the materials as needed, generally every 2-4 weeks, depending on the size of your tank and the number of fish |
Please note: This DIY filter could be a solution for small tanks and temporary situations but it’s not recommended for long-term use or for larger aquariums.
bottlefirst
Key Takeaway
Five Facts About Diy Water Bottle Filter Aquarium
Why Choose A Diy Water Bottle Filter For Your Aquarium?
Advantages Of A Diy Water Bottle Filter For Aquariums
A water bottle filter is an innovative and cost-effective solution for aquarium enthusiasts who want to maintain a clean and healthy aquatic environment for their beloved fish.
By opting for a diy water bottle filter, you can experience a range of advantages that make it a worthwhile investment.
Here are some key points to consider:
Enhanced filtration:
Diy water bottle filters are designed to effectively remove impurities and toxins from the aquarium water. They employ a combination of mechanical, chemical, and biological filtration methods, ensuring that your fish have a pristine and safe habitat.
Cost savings:
One of the most significant advantages of opting for a diy water bottle filter is the potential for cost savings.
Compared to traditional filters, which can be quite expensive to purchase and maintain, a diy setup utilizing a water bottle as the primary filtration component can be a budget-friendly alternative.
Customizability:
Diy water bottle filters offer a high level of customizability, allowing you to personalize your aquarium’s filtration system based on your specific needs.
From adjusting the flow rate to incorporating different filter media, you have the flexibility to create a filtration setup that caters to the unique requirements of your fish and plants.
Space efficiency:
Another advantage of a diy water bottle filter is its compact size. The small footprint of the setup makes it ideal for aquariums of all sizes, enabling you to maximize the available space while still providing efficient filtration for your aquatic pets.
Easy maintenance:
Diy water bottle filters are relatively simple to maintain. With easy access to the filter media and straightforward cleaning procedures.
You can effortlessly keep the system in optimal working condition, ensuring the longevity of your filter and the health of your aquarium inhabitants.
How A Diy Water Bottle Filter Can Save You Money
Creating a diy water bottle filter for your aquarium not only offers superior filtration capabilities but also provides notable cost savings.
Here are some key points to consider:
Affordable materials:
The components required for a diy water bottle filter are readily available and inexpensive.
From a standard water bottle to filter media such as sponge, activated carbon, and ceramic rings, these affordable materials make it possible to establish a quality filtration system without breaking the bank.
Reduced running costs:
Traditional aquarium filters often require expensive replacement cartridges or filter pads. However, with a diy water bottle filter, you can utilize cost-effective filter media that can be easily cleaned and reused, significantly reducing ongoing expenses.
Longevity and durability:
Investing your time in building a diy water bottle filter can result in a system that is designed to last.
As you have control over the quality of materials used and the maintenance routine, you can prolong the lifespan of the filter, saving you money on premature replacements.
Energy efficiency:
Diy water bottle filters typically operate using air pumps, which are generally more energy-efficient compared to power-hungry motor-driven filters. By choosing this setup, you can enjoy energy savings while still providing effective filtration for your aquarium.
Avoidance of additional purchases:
Some aquarium hobbyists end up purchasing multiple filters or supplementary equipment to meet their specific filtration requirements.
However, with a diy water bottle filter, you can customize the setup to address various filtration needs, eliminating the need for additional equipment and potential extra costs.
By opting for a diy water bottle filter for your aquarium, you not only enjoy the advantages of enhanced filtration and customizability but also benefit from significant cost savings.
This budget-friendly solution allows you to maintain a healthy and thriving aquatic environment for your fish without breaking the bank.
Essential Materials For Building A Diy Water Bottle Filter
When it comes to creating a diy water bottle filter for your aquarium, choosing the right materials is crucial.
Not only will it determine the effectiveness of the filtration process, but it will also impact the overall health and well-being of your aquatic pets.
To ensure optimal water purification, here are the essential materials you’ll need:
Choosing The Right Water Bottle For The Filter
When selecting a water bottle for your diy filter, there are a few key factors to consider. Keep in mind that it should be bpa-free, as any harmful chemicals can seep into the water and pose a threat to your fish.
Here are some suitable options:
- Plastic water bottle: Look for a sturdy, transparent plastic bottle with a wide opening. This will make it easier to clean and maintain the filter.
- Glass water bottle: If you prefer a more eco-friendly option, a glass water bottle can be a great choice. It is chemically inert and will not introduce any contaminants into the water.
Necessary Tools For Construction
To successfully build your diy water bottle filter, you’ll need a few basic tools.
These tools will help you assemble the filter and ensure it functions properly:
- Scissors or utility knife: These tools will come in handy when cutting the water bottle and making necessary adjustments.
- Drill or awl: You’ll need a drill or awl to create holes in the water bottle’s cap for water intake and outlet.
- Silicone sealant or aquarium-safe adhesive: This will be used to seal any gaps or potential leaks in the filter. Ensure you choose a non-toxic adhesive specifically designed for aquarium use.
Selecting Suitable Filter Media For Optimal Water Purification
The filter media you choose plays a vital role in purifying the water and maintaining a healthy aquarium environment. The right combination of filter media will help remove impurities, chemicals, and debris from the water.
Consider the following options:
- Activated carbon: This highly porous material effectively removes toxins, odors, and discoloration from the water. It is commonly used as the primary filter media in aquarium filters.
- Ceramic rings or bio-balls: These provide a large surface area for beneficial bacteria to colonize, aiding in the biological filtration process.
- Filter floss or sponge: These mechanical filter media trap debris and particulate matter, preventing them from circulating back into the aquarium.
By selecting the appropriate water bottle, gathering the necessary tools, and choosing suitable filter media, you can construct a diy water bottle filter that provides optimal water purification for your aquarium.
Remember to regularly clean and maintain the filter to ensure its continued effectiveness.
Happy fish keeping!
Step-By-Step Guide To Building Your Diy Water Bottle Filter Aquarium
Creating a water bottle filter for your aquarium is a cost-effective and efficient way to maintain clean and clear water for your aquatic pets.
With just a few simple steps, you can assemble your own diy water bottle filter and enjoy the benefits of a healthier aquatic environment.
Follow this step-by-step guide to get started:
Preparing The Water Bottle For Filtration
- Begin by thoroughly cleaning the water bottle to ensure it is free from any dirt, debris, or contaminants.
- Remove the label from the bottle and rinse it with water to eliminate any residue.
- Using a sharp pair of scissors, carefully cut the bottom portion of the bottle to create an opening for water flow.
- Make sure to smoothen any rough edges to prevent any harm to the aquarium inhabitants.
Assembling The Filter Components
- Prepare the activated carbon by rinsing it under running water to remove any loose particles.
- Take a small piece of filter floss or sponge and place it at the bottom of the water bottle to act as a physical barrier.
- Add a layer of activated carbon on top of the filter floss to absorb impurities and chemical pollutants from the water.
- Secure the layer of activated carbon by placing another piece of filter floss/sponge on top.
- Carefully position the air stone at the center of the water bottle vertically. This will ensure proper oxygenation of the water.
- Attach an air tube to the air stone and ensure the other end of the tube is connected to an air pump outside the aquarium.
Installing The Diy Water Bottle Filter In Your Aquarium
- Place the diy water bottle filter in the desired area of your aquarium. Make sure it is securely positioned and won’t be easily toppled over.
- Connect the air pump to a power source and let it run. This will create a continuous flow of air through the air stone and filter setup.
- Monitor the water flow through the diy filter and make adjustments if necessary. The rate of water flow should be adequate for proper filtration.
- Ensure that the diy filter is easily accessible for maintenance purposes, such as replacing the filter media or cleaning the air stone.
By following these simple steps, you can create your own diy water bottle filter for your aquarium. Not only will this save you money, but it will also provide a cleaner and healthier environment for your aquatic pets.
Give it a try and see the difference it makes in maintaining water quality in your aquarium. Happy filtering!
Maintaining And Troubleshooting Your Diy Water Bottle Filter
Setting up your diy water bottle filter for your aquarium is a great way to ensure the water quality is up to par for your aquatic friends. However, it’s important to regularly maintain and troubleshoot your filter to keep it running smoothly.
Here are some key points to keep in mind:
Regular Maintenance Routines
- Inspect the filter components: Regularly check the filter components such as the water intake tube, filter media, and air tubing for any signs of damage or clogs.
- Clean the filter media: Every month, remove and rinse the filter media with dechlorinated water. This helps remove any accumulated debris and maintains the filter’s effectiveness.
- Replace filter media when needed: Over time, the filter media may lose its efficiency. Replace it with a new one as recommended by the manufacturer to ensure optimal filtration.
- Keep the filter intake clean: Regularly clean the filter intake area by gently removing any debris that may obstruct the water flow.
Tips For Preventing Clogs And Blockages
- Regularly rinse the filter material: Rinsing the filter material regularly helps prevent excess debris from accumulating and clogging the filter.
- Avoid overfeeding your fish: Overfeeding can lead to excessive waste, which can clog the filter and reduce its effectiveness. Feed your fish only the amount they can consume in a few minutes.
- Use pre-filter sponge: Placing a pre-filter sponge on the intake tube can help trap larger debris and prevent it from clogging the filter media.
- Avoid overstocking your aquarium: Overstocking can lead to increased waste production, putting a strain on the filter system. Maintain a suitable fish-to-water ratio to prevent excessive waste buildup.
Common Troubleshooting Issues And Solutions
- Low water flow: If you notice a decrease in water flow, check for clogs in the filter intake and clean the filter media. Also, ensure that the air tubing is properly connected and not blocked.
- Noisy operation: Excessive noise may indicate an issue with the filter’s impeller. Clean the impeller and ensure it is properly aligned. If the noise persists, consider replacing the impeller or contacting the manufacturer for further assistance.
- Water bypassing the filter: If water is bypassing the filter and not going through the media, check the filter setup and make sure all connections are secure. Ensure that the air tubing is properly connected and not causing any leaks.
- Leaks: Inspect all connections and o-rings for any signs of damage or loose fittings. Tighten the fittings or replace any faulty components to fix the leak.
Remember, a well-maintained diy water bottle filter is essential for keeping your aquarium water clean and your fish healthy.
Regular maintenance and troubleshooting will ensure the filter functions optimally, providing a conducive environment for your aquatic pets.
Upgrading Your Diy Water Bottle Filter For Enhanced Filtration
Are you looking to take your diy water bottle filter to the next level and improve the filtration capabilities in your aquarium?
With a few simple upgrades, you can enhance the efficiency and effectiveness of your filter, ensuring that your aquatic friends enjoy a clean and healthy environment.
In this section, we will explore advanced filtration media options, adding additional filtration stages, and enhancing water flow and circulation for better filtration efficiency.
Exploring Advanced Filtration Media Options
To enhance the filtration capabilities of your diy water bottle filter, consider incorporating advanced filtration media. These media options can help remove impurities and provide a higher level of filtration for your aquarium.
Here are some key options to consider:
- Activated carbon: Activated carbon effectively absorbs dissolved organic compounds, chemicals, and odors, improving water quality and clarity.
- Bio balls: Bio balls provide a large surface area for beneficial bacteria to grow, helping to break down harmful substances and maintain a stable biological filtration system.
- Zeolite: Zeolite is a natural mineral that can remove ammonia and other harmful substances from the water, preventing spikes in ammonia levels and promoting a healthier environment for your fish.
- Ceramic rings: Ceramic rings offer a porous surface for beneficial bacteria to colonize, improving biological filtration and water quality.
Adding Additional Filtration Stages
Another way to upgrade your diy water bottle filter is by incorporating additional filtration stages. By adding more stages, you can increase the filtration efficiency and tackle a wider range of impurities.
Consider the following options:
- Mechanical filtration: Include filter floss or sponge at the initial stage to trap large debris and particles, preventing them from clogging the rest of the filter media.
- Chemical filtration: Introduce a separate chamber with activated carbon or other chemical filter media to target dissolved impurities and maintain water clarity.
- Biological filtration: Enhance the biological filtration stage by adding more bio balls, ceramic rings, or other types of biological media to support the growth of beneficial bacteria.
Enhancing Water Flow And Circulation For Better Filtration Efficiency
Another crucial factor in improving the efficiency of your diy water bottle filter is enhancing water flow and circulation within the aquarium.
Here are some tips to achieve better filtration efficiency:
- Positioning: Properly position your filter outlet to ensure optimal water circulation throughout the tank, reaching all corners and providing thorough filtration.
- Adjustable flow: If possible, invest in a filter with adjustable flow settings. This allows you to tailor the filtration rate to the specific needs of your aquarium and its inhabitants.
- Powerheads: Consider adding a powerhead or circulation pump to create stronger water movement, preventing dead spots and promoting better filtration throughout the tank.
- Regular maintenance: Keep your filter clean and regularly check for any blockages that may affect water flow. Clean or replace filter media as needed to maintain peak performance.
By exploring advanced filtration media options, adding additional filtration stages, and enhancing water flow and circulation, you can significantly upgrade your diy water bottle filter for enhanced filtration in your aquarium.
These simple yet effective steps will help ensure a clean and healthy environment for your aquatic pets to thrive.
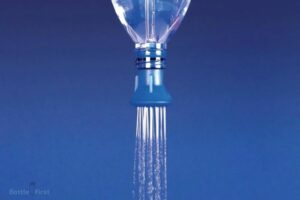
What Are Some Quick and Easy Methods to Empty a Water Bottle?
There are a few fastest water bottle emptying methods that can come in handy when you need to empty a water bottle quickly. One option is to simply pour the water out by tilting the bottle at an angle and emptying it into a sink or another container. Another method is to use a straw or small hose to suck the water out of the bottle. Alternatively, squeezing the bottle tightly can help to expedite the process.
FAQ About Diy Water Bottle Filter Aquarium
How Does A Water Bottle Filter Aquarium Work?
A water bottle filter aquarium uses a filtration system to remove impurities and toxins from the water, creating a clean and healthy environment for the fish.
What Are The Benefits Of Using A Diy Water Bottle Filter Aquarium?
Using a diy water bottle filter aquarium helps to improve water quality, enhances fish health, and saves money compared to commercially available aquarium filters.
Can I Make A Water Bottle Filter Aquarium At Home?
Yes, you can easily make a water bottle filter aquarium at home using basic materials like a water bottle, filter media, and an air pump. It’s a cost-effective solution.
What Types Of Fish Can Live In A Water Bottle Filter Aquarium?
A water bottle filter aquarium is suitable for small fish species like bettas, guppies, and tetras, which thrive in a compact and low-maintenance environment.
How Often Should I Clean The Water Bottle Filter Aquarium?
Cleaning the water bottle filter aquarium is essential to maintain optimal water quality. It’s recommended to clean the filter media and perform a partial water change every two weeks for best results.
Conclusion
To summarize, creating a diy water bottle filter aquarium is an innovative and cost-effective solution for maintaining a clean and healthy aquatic environment.
By repurposing everyday materials, such as empty water bottles and filter media, you can easily construct a filtration system that effectively removes pollutants and improves water quality.
This diy project not only benefits the well-being of your aquarium inhabitants but also helps reduce waste by recycling plastic bottles.
Additionally, customizing your filter media allows you to cater to the specific needs of your aquarium, whether it’s removing excess fish waste or controlling algae growth.
With a little creativity and resourcefulness, you can create a sustainable and efficient filtration system that can be easily maintained. Start your diy adventure today and enjoy the benefits of a cleaner and more vibrant aquarium.