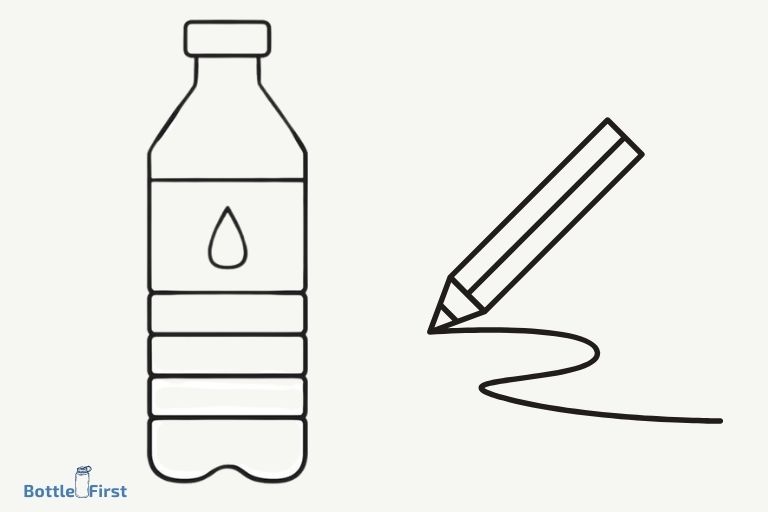
Easy to Draw Water Bottle: Step By Step Guide!
Drawing a water bottle can be accomplished by anyone, even beginners, in just a few easy steps. With basic shapes and lines, you can create an accurate depiction of a water bottle.
This includes the body or main compartment of the bottle, the neck or narrow part leading to the cap, and the cap itself.
When learning how to draw a water bottle, you’ll primarily use simples shapes like ovals, rectangles, and lines to create the basic outline.
Adding details, such as the label, cap texture, and even the water level, helps make the bottle look more realistic.
However, it’s important to remember that every item, including water bottles, can come in many different shapes and sizes. Therefore, practicing with different types of bottles will improve your drawing skills.
Drawing a water bottle might seem complicated at first, but by breaking it down into simple shapes, the process becomes much easier.
Remember, the key to drawing is observation. Pay close attention to the details of the water bottle you’re trying to draw and practice regularly. The more you practice, the better your drawings will become.
6 Steps: Easy to Draw Water Bottle
| Step No. | Instructions for Drawing a Water Bottle |
|---|---|
| 1 | Draw a vertical line |
| 2 | Draw a parallel vertical line a short distance away |
| 3 | Connect the ends of the two lines with a semi-circle to create the bottom of the water bottle |
| 4 | Draw a rectangle at the top of the two vertical lines |
| 5 | Inside the rectangle, draw another smaller rectangle to create the bottle cap |
| 6 | If desired, you can add details like the water level or a label |
Key Takeaway
Five Facts About Easy To Draw Water Bottle
Materials Needed And Preparation
Before you start drawing an easy-to-draw water bottle, there are a few things you’ll need to gather.
Additionally, preparing your workspace will help ensure that you have a comfortable and organized environment to work in. Here’s what you’ll need:
Required Tools And Materials
- A sheet of white paper or a sketchbook
- Pencil
- Eraser
- Ruler
- Pen or marker (optional)
- Colored pencils or markers (optional)
To make the drawing process easier, it’s important to gather these materials before you begin. Having everything at hand will save you from interruptions and allow you to focus on creating your water bottle sketch.
Preparing Your Workspace
- Find a well-lit area: Choose a spot in your home or workspace where you have access to natural or bright lighting. This will help you see the details of your drawing clearly.
- Clear your space: Remove any clutter or unnecessary items from your workspace. Having a tidy area will help you concentrate, allowing your creativity to flow uninterrupted.
- Use a clean surface: Ensure that your work surface is clean and free from dirt or dust. This will prevent any unwanted marks or smudges on your drawing.
- Position your paper: Place your sheet of paper or sketchbook on a flat and stable surface. Use a clipboard or tape to keep it securely in place, preventing it from shifting while you’re drawing.
- Set up your tools: Arrange your pencils, eraser, ruler, and any optional pens or colored pencils/markers within easy reach. Having everything organized will save you time rummaging through your supplies.
Now that you have gathered the necessary tools and prepared your workspace, you’re ready to begin drawing your easy-to-draw water bottle. Remember to have fun and let your imagination guide you as you bring your water bottle sketch to life.
Understanding The Basic Shapes
Breaking Down The Water Bottle Into Simple Shapes
When it comes to drawing objects, breaking them down into simple shapes is a tried and true method to make the process easier and more manageable. The same goes for drawing a water bottle!
By understanding the basic shapes that make up a water bottle, you can create a foundation for your drawing and bring it to life.
Let’s dive in and explore the main components of a water bottle using simple shapes.
Identifying The Main Components Of The Water Bottle
When drawing a water bottle, it’s essential to identify the main components that make up its structure. By focusing on these key elements, you can create a more accurate representation of the bottle.
Here are the main components you should pay attention to:
- Cylinder: The body of the water bottle is typically cylindrical in shape. Think of it as a tall, elongated circle or a vertical tube. This shape forms the basis of the bottle.
- Cap: The top part of the water bottle is the cap. It’s usually circular or semi-circular in shape, resembling a flattened sphere. This shape sits on top of the cylinder and keeps the water secure inside the bottle.
- Neck: Connecting the cap and the cylinder, the neck is a small cylindrical shape that provides a passage for drinking. It’s like a shorter and narrower version of the main cylinder.
- Base: On the opposite end of the cylinder, you’ll find the base. It’s typically a larger circular shape that supports the entire structure, providing stability to the bottle when placed on flat surfaces.
- Handle (optional): Some water bottles may have a handle attached to the side of the cylinder. This handle can be drawn as a simple curved shape or a small elongated rectangle, depending on its design.
Remember, these components can vary slightly depending on the type of water bottle you’re drawing, but they generally follow these basic shapes.
By breaking down the water bottle into these simple shapes, you’ll have a solid foundation to start your drawing and make it easier to add details and refine your artwork.
Now that we’ve identified the main components and their corresponding shapes, let’s move on to the next step of drawing the water bottle – adding details.
Step-By-Step Drawing Guide
Sketching The Outline Of The Water Bottle
When it comes to drawing a water bottle, the first step is to create its outline. This will serve as the foundation for the rest of the drawing.
Here’s a step-by-step guide on how to sketch the outline of a water bottle:
- Start by drawing a straight vertical line in the middle of your paper. This will be the centerline of the bottle.
- At the top of the centerline, sketch a horizontal line. This will represent the opening of the bottle.
- From the top of the horizontal line, draw a curved line downwards on both sides, mirroring each other. These lines will form the sides of the bottle.
- Connect the curved lines at the bottom using a horizontal line. This will complete the outline of the water bottle’s body.
- Next, add a curved line above the centerline to create the outline of the bottle’s cap.
- To make the drawing more realistic, lightly sketch the shape of the label or any other details on the bottle.
Adding Details And Refining The Shape
Once you have sketched the basic outline of the water bottle, it’s time to add details and refine its shape.
Here’s how you can do it:
- Start by defining the opening of the bottle by adding a curved line along the horizontal line you drew earlier.
- Add a small circle or ellipse at the top of the cap to indicate the opening where you would drink from.
- Refine the shape of the bottle’s body by smoothing out any rough lines and making it more symmetrical.
- Add any additional details to the label or logo on the bottle. You can also add a line near the bottom of the bottle to indicate its base.
- Erase any unnecessary lines and overlapping areas to clean up the drawing.
Incorporating Shading And Highlights For A Realistic Look
To give your water bottle drawing a realistic look, you can incorporate shading and highlights.
Here’s how you can do it:
- Start by identifying the primary light source in your drawing. This will determine where the highlights and shadows fall on the water bottle.
- Shade the areas on the bottle that are away from the light source, using hatching or cross-hatching strokes to create a sense of three-dimensionality.
- Leave some areas untouched or lightly shaded to represent the highlights where the light is hitting the bottle.
- Use an eraser to create additional highlights by gently lifting off some graphite to make certain areas appear brighter.
- Continuously observe and adjust the shading and highlights to achieve the desired realistic look.
- Remember to blend the shading and highlights using a blending tool or a tissue to create a smoother transition between light and dark areas.
By following these step-by-step instructions and incorporating shading and highlights, you can create a realistic and visually appealing drawing of a water bottle. So grab your pencils and start sketching your own masterpiece!
Tips And Techniques For Enhancing Your Drawing
Enhancing your drawing skills can be an exciting journey, allowing you to bring life to your artwork and express your creativity.
Whether you are a beginner or an experienced artist, there are always new techniques to explore and master.
In this section, we will discuss three key areas to focus on for improving your drawings: choosing the right pencil and paper, practicing different shading techniques, and adding texture and depth to your artwork.
Choosing The Right Pencil And Paper:
When it comes to drawing, selecting the right tools is essential for achieving the desired results.
Consider the following tips for choosing the right pencil and paper:
- Pencil selection: Choose a pencil with the appropriate hardness that suits your drawing style. Harder pencils, such as 2h or 3h, produce lighter lines and are ideal for sketching outlines. Softer pencils like 2b, 4b, or 6b create darker lines and are perfect for shading and adding details.
- Paper quality: Opt for a paper that is smooth and sturdy, allowing your pencils to glide effortlessly. A heavier weight paper, such as 140gsm or higher, is recommended to prevent smudging and provide a solid foundation for your drawings.
Practicing Different Shading Techniques:
Shading adds depth, dimension, and realism to your drawings. Here are some shading techniques you can practice to enhance your artwork:
- Hatching: This technique involves creating parallel lines to achieve shading effects. By varying the spacing and angle of the lines, you can create different textures and tones.
- Cross-hatching: Similar to hatching, cross-hatching involves intersecting parallel lines. By layering these lines in different directions, you can create darker values and intricate textures.
- Blending: Blending involves smoothing out the lines and transitions between different shades. You can use your fingers, blending stumps, or even a tissue to achieve a seamless blend.
Adding Texture And Depth To Your Drawing:
Texture and depth make your drawings visually engaging and captivating.
Here are some ways to add texture and depth to your artwork:
- Stippling: Stippling involves creating patterns and textures using tiny dots. By varying the density and size of the dots, you can create different textures and shades.
- Cross-contour lines: These are lines that follow the form of an object to create a three-dimensional illusion. By understanding how the lines wrap around the object, you can enhance its realism.
- Highlights and shadows: Adding highlights and shadows to your drawings can dramatically enhance depth. Observe how light falls on objects and create areas of brightness and darkness accordingly.
With these tips and techniques in mind, you can elevate your drawing skills and create stunning artwork.
Remember, practice is key, so take the time to experiment with different tools, techniques, and subjects. Happy drawing!
Showcasing Your Artwork
Displaying And Sharing Your Finished Drawing:
Once you’ve created a stunning water bottle drawing, it’s time to showcase your artwork to the world.
Here are a few ways you can display and share your masterpiece:
- Digital platforms: Share your drawing on social media platforms like instagram, facebook, or twitter. Use relevant hashtags to reach a wider audience and connect with fellow artists. Additionally, you can create a dedicated website or blog where you can showcase your artwork in an organized manner.
- Art galleries and exhibitions: Consider submitting your water bottle drawing to local art galleries or exhibitions. This can provide an opportunity for your work to be seen by art enthusiasts and potential buyers.
- Art competitions: Participating in art competitions can not only help you gain recognition but also give you a chance to win prizes or scholarships. Look out for contests that specifically focus on drawing or illustration.
- Prints and merchandise: Transform your drawing into prints, posters, or even merchandise like t-shirts or mugs. This way, you can sell your artwork to fans and admirers, allowing them to proudly display your water bottle drawing in their homes.
Seeking Feedback And Improving Your Skills:
Artistic growth and improvement come through continuous learning and feedback.
Here are a few ways you can seek feedback and enhance your drawing skills:
- Online art communities: Engage with online art communities such as forums, groups, or subreddits dedicated to drawing. Share your artwork and seek constructive criticism or advice from experienced artists. Remember, feedback from others can provide fresh perspectives and insights.
- Art classes and workshops: Consider enrolling in art classes or workshops to learn new techniques and improve your skills. These sessions can provide valuable guidance from professional artists and an opportunity to connect with fellow art enthusiasts.
- Mentorship or art critiques: If possible, seek out a mentor or join an art critique group to receive personalized feedback on your work. Direct instruction and critique from an experienced artist can help you identify areas for improvement and further refine your drawing abilities.
- Continuous practice: The key to improving any skill is consistent practice. Set aside dedicated time each day to sketch, draw, and experiment with different styles and mediums. Regular practice will help you develop your own unique artistic voice.
Exploring Different Drawing Styles And Variations:
While creating a water bottle drawing, don’t be afraid to explore different drawing styles and variations. This can add freshness and uniqueness to your artwork.
Here are some ideas to help you branch out:
- Realistic drawing: Challenge yourself to create a hyper-realistic water bottle drawing with intricate details, textures, and shading. This style can showcase your technical skills and attention to detail.
- Abstract drawing: Experiment with abstract interpretations of water bottles. Play with shapes, colors, and textures to create a unique and expressive representation of the subject.
- Cartoon or comic style: Give your water bottle drawing a fun and whimsical twist by adopting a cartoon or comic style. Emphasize exaggerated features, vibrant colors, and dynamic poses to bring your artwork to life.
- Mixed media: Combine different mediums like ink, watercolor, or colored pencils to create a mixed media water bottle drawing. This style allows for experimentation and can result in visually captivating and textured artwork.
Remember, exploring different drawing styles and variations not only adds versatility to your portfolio but also keeps your artistic journey exciting and dynamic. Embrace new techniques, try out unique ideas, and let your creativity soar.
Now that you have some insights on how to showcase your artwork, seek feedback, and explore various drawing styles, it’s time to put your skills into action.
Let your artistic talent shine through your water bottle drawings and watch your artistic journey flourish.
Happy drawing!
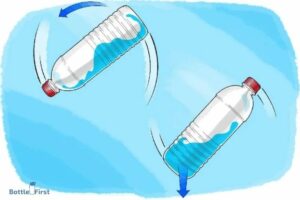
Is It Difficult to Attach a Water Bottle to a Backpack?
When it comes to the attaching water bottle to backpack method, some find it challenging. The bottle’s shape, backpack’s design, and the attachment mechanism can all influence the difficulty level. However, with a versatile backpack and a compatible bottle, finding a secure and convenient attachment method should not be overly complicated.
FAQ About Easy To Draw Water Bottle
How Do You Draw A Water Bottle?
To draw a water bottle, start with a straight line for the body and add curved lines for the top and bottom. Then, add details like the lid and label.
What Are The Materials Needed To Draw A Water Bottle?
To draw a water bottle, you will need a pencil, eraser, paper, and colored pencils or markers for coloring.
What Are Some Tips For Drawing A Realistic Water Bottle?
To make your water bottle drawing look realistic, pay attention to the proportions and angles. Also, use shading to create highlights and shadows for a 3d effect.
Can I Use A Reference Image To Draw A Water Bottle?
Yes, using a reference image can be helpful when drawing a water bottle. It can assist in capturing the shape and details accurately.
Any Suggestions For Drawing A Water Bottle For Beginners?
For beginners, it’s best to start with simple shapes and gradually add details. Don’t be afraid to make mistakes, and practice regularly to improve your skills.
Conclusion
Drawing can be a fun and rewarding activity, and creating your own water bottle design is a great place to start. With just a few simple steps and a bit of creativity, you can easily draw a water bottle that is unique and eye-catching.
By using basic shapes and adding details, you can bring your design to life and showcase your artistic abilities. Whether you are a beginner or more experienced artist, this easy-to-follow guide can help you create a water bottle drawing that you can be proud of.
So grab your pencil and sketchbook, and let your imagination run wild as you create a water bottle design that is as cool and refreshing as the real thing. Happy drawing!