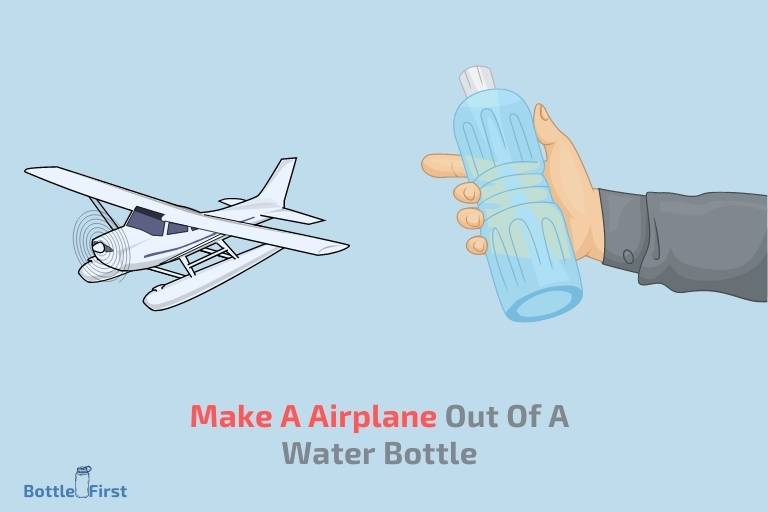
How to Make a Airplane Out of a Water Bottle?
Creating an airplane out of a water bottle is a fun and creative way of recycling. You will need a water bottle, scissors, glue, and some crafting paper.
The bottle will serve as the fuselage, while the paper can be used to create wings, tail fins, and other parts.
Recycling water bottles into craft projects can be educational and entertaining. By creating an airplane out of a water bottle, children can learn about aerodynamics and the environment.
It also offers an opportunity to spend quality time together and stimulate creativity.
Crafting an airplane out of a water bottle can be an exciting project for kids.
It not only encourages creativity but also teaches them about aerodynamics and the importance of recycling.
This simple DIY project can provide hours of entertainment and learning, making it a perfect activity for family bonding and fun.
Sure, here’s how you can structure the table.
Steps to Make an Airplane Out of a Water Bottle
| Steps | Instructions |
|---|---|
| 1 | Gather materials |
| 2 | Choose a water bottle |
| 3 | Cut the body of the airplane |
| 4 | Create the wings |
| 5 | Attach the wings to the body |
| 6 | Make the tail of the airplane |
| 7 | Connect the tail to the body |
| 8 | Construct the propeller |
| 9 | Affix the propeller to the bottle cap |
| 10 | Decorate your airplane |
Key Takeaway
Interesting Facts About Making an Airplane Out of a Water Bottle
Materials Needed
Gather The Necessary Supplies For Constructing A Water Bottle Airplane
To embark on creating your very own airplane out of a water bottle, it’s essential to gather all the required materials first.
Not only will this ensure a smooth crafting process, but it also allows you to incorporate eco-friendly practices by using recyclable items.
Here are the materials you’ll need:
- A plastic water bottle: Choose a clean, empty water bottle made of durable plastic. Opt for one that is larger in size as it will provide more stability and space for decorating.
- Scissors: Make sure to have a pair of sharp scissors on hand for cutting through the plastic.
- Craft knife (optional): If you prefer more precise cutting, a craft knife can be used instead of scissors.
- Ruler: Having a straight ruler handy will assist in measuring and marking specific areas for cutting.
- Lightweight cardboard or cardstock: This will be used to create the wings and tail of the airplane. Choose a material that is sturdy yet flexible.
- Tape: Regular clear tape or double-sided tape can be used to secure various parts of the airplane together.
- Decorative materials: Get creative and personalize your airplane with colorful markers, stickers, or even paint. This step is entirely optional but adds a fun and unique touch to your creation.
- Glue (optional): If you prefer a more permanent bond between the different components, you can use glue instead of tape.
- Small paper clip or paper fastener: This will serve as the airplane’s nose weight to enhance balance and stability during flight.
- Rubber band (optional): To achieve a basic launching mechanism, you can attach a rubber band to the airplane’s propeller.
Remember, it’s important to prioritize using materials that are friendly to the environment.
By opting for recyclable items and minimizing waste, you’re contributing to a sustainable crafting experience.
Now that you have gathered all the necessary supplies, you’re ready to move on to the next step of building your own water bottle airplane.
Building The Base
Creating a sturdy base for the airplane using a water bottle:
You’re about to embark on an exciting adventure of turning a regular water bottle into a fantastic airplane!
Building a strong base is the first step in achieving flight-worthy results.
Here’s how you can create a stable foundation for your airplane using a water bottle:
- Start by gathering the necessary materials. You will need a plastic water bottle, scissors, duct tape, and a ruler.
- Carefully remove the label from the water bottle to ensure a smooth surface.
- Take the scissors and carefully cut off the bottom of the water bottle. This will form the main structure of your airplane’s base.
- To enhance stability and durability, reinforce the base with duct tape. Wrap the tape around the cut end of the water bottle, securing it tightly.
- Next, cut a small slit at the back of the base. This will allow you to insert the tail of your airplane later on.
- Measure and cut two small strips of duct tape, approximately 3-4 inches in length. Attach these strips diagonally across the top of your base, creating an ‘x’ shape. This reinforcing technique will provide additional strength to your airplane’s structure.
- Repeat the process for the bottom of the base, crossing the ‘x’ shape with another set of duct tape strips.
- Ensure that all edges are securely taped and that the base feels solid and stable.
Now that you’ve successfully created a sturdy base for your airplane using a water bottle, you’re ready to move on to the next step – designing the wings!
Stay tuned for our upcoming section on how to craft the perfect wings for your water bottle airplane.
Let your creativity soar!
Crafting The Wings
When it comes to making an airplane out of a water bottle, designing and constructing the wings that are aerodynamically efficient is crucial.
The wings play a vital role in determining the flight performance of your homemade airplane. In this section, we will explore some key points for achieving the ideal wing shape and size.
Designing And Constructing Wings That Are Aerodynamically Efficient
Designing the wings of your water bottle airplane requires careful consideration of aerodynamic principles.
Follow these steps to create wings that will optimize the flight performance:
- Determine the wingspan: The wingspan refers to the length from one wingtip to the other. Aim for a wingspan that provides enough surface area for lift, stability, and control.
- Select the wing shape: There are different wing shapes available such as rectangular, elliptical, tapered, and swept-back. Each shape offers different advantages depending on your desired flight characteristics. Research and choose the wing shape that suits your airplane design.
- Calculate the wing aspect ratio: Aspect ratio is the ratio of wingspan to average chord length. It affects the drag and lift characteristics of the wings. Higher aspect ratios generally result in better flight efficiency. Find the right aspect ratio by considering the desired flight performance and the available materials.
- Choose the right materials: The choice of materials for the wings can significantly impact the weight and strength of your airplane. Lightweight and rigid materials such as balsa wood or foam board are commonly used. Consider the materials’ availability, cost, and suitability for your specific design.
- Construct the wing structure: Once you have the necessary materials, you can start building the wing structure. Cut and shape the wing components based on your chosen design and dimensions. Use adhesive or appropriate fasteners to assemble the wing parts securely.
Tips For Achieving The Ideal Wing Shape And Size
To ensure your water bottle airplane’s wings are optimized for flight, consider the following tips:
- Test and iterate: Building and testing prototypes allows you to evaluate the wings’ performance and make necessary adjustments. Use trial and error to fine-tune the wing shape, size, and other factors to enhance the flight characteristics.
- Balance and symmetry: It is crucial to maintain proper balance and symmetry in your wing design. Uneven wings can cause instability during flight. Ensure the wings are symmetrical and well-aligned to achieve smooth and controlled flights.
- Avoid excessive weight: Excessive weight can hinder the airplane’s flight performance. Keep the wings as lightweight as possible without compromising structural integrity. This will improve the plane’s maneuverability and reduce drag.
- Include wing features: Incorporating wing features like wingtips or winglets can enhance stability and minimize drag. These additions can improve your airplane’s overall performance, especially during turns and high-speed flights.
Remember, crafting the wings of your water bottle airplane requires careful thought and experimentation.
So, take your time, follow the guidelines above, and enjoy the process of creating a high-flying aircraft.
Adding Finishing Touches
Decorating your water bottle airplane to make it unique and visually appealing
So, you’ve followed the steps and successfully made an airplane out of a water bottle. Now it’s time to add some finishing touches to make it truly stand out.
In this section, we’ll explore creative ideas for personalizing your creation and making it visually appealing.
Decorating Your Water Bottle Airplane To Make It Unique And Visually Appealing:
- Add color and patterns: Use colored tape or adhesive vinyl sheets to cover the body of the airplane. You can create stripes, polka dots, or even go for a camouflage look to mimic real airplanes. Get creative with different colors and patterns to make it more visually appealing.
- Attach stickers: Decorate your airplane by attaching stickers that represent your favorite characters, symbols, or logos. You can find various airplane-themed stickers or use any stickers that resonate with your personal interests.
- Paint it: If you’re feeling artistic, why not paint your water bottle airplane? Use acrylic or spray paint to add vibrant colors or intricate designs. Remember to use tape or stencils to create clean lines and avoid smudging the paint.
- Use markers: Grab a set of permanent markers and let your imagination run wild! Use different colors to draw patterns, shapes, or even create a custom design. Make sure to choose markers that adhere well to the material of your water bottle.
- Attach streamers or ribbons: Let your airplane soar in style by attaching colorful streamers or ribbons to its wings or tail. Not only will this add a playful touch, but it will also help with the airplane’s stability during flight.
Creative Ideas For Personalizing Your Creation:
- Give it a name: Every airplane needs a name. Come up with a unique and catchy name for your water bottle airplane. You can use letter stickers or write it directly on the airplane with a marker or paint.
- Design a logo: If you’re feeling extra creative, design a logo for your water bottle airplane. It can be as simple as a symbol or a more elaborate emblem. This will add a professional touch and make your creation feel like a real aircraft.
- Create a cockpit: Enhance the realism of your water bottle airplane by designing a cockpit. Use plastic or cardboard cut-outs to create seats, control panels, and even a miniature pilot. This will give your airplane a more lifelike appearance.
- Make it functional: Take your water bottle airplane to the next level by adding functional accessories. Attach a small parachute to the back of the airplane to make it float gracefully when thrown in the air. You can also experiment with small propellers or wheels for a more interactive experience.
- Document your creations: Finally, capture the beauty of your water bottle airplanes by taking pictures or videos. Share your creations on social media or start a gallery to inspire others. Who knows, you might even become a trendsetter in the water bottle airplane community!
These ideas should help you make your water bottle airplane truly unique and visually appealing. Let your creativity take flight and enjoy the process of personalizing your own airborne masterpiece!
Can I Make G Fuel in a Water Bottle Using the Same Steps?
Yes, you can easily make G Fuel in a water bottle using the same steps. Simply follow the instructions on the product packaging and mix the required amount of G Fuel powder with water in your bottle. Shake well, and voila! You have yourself a refreshing and energizing drink, making g fuel in a water bottle a convenient option.
FAQ About How To Make A Airplane Out Of A Water Bottle
How Do You Make An Airplane Out Of A Water Bottle?
To make an airplane out of a water bottle, you will need scissors, tape, and patience. Let’s get started!
What Are The Benefits Of Making An Airplane Out Of A Water Bottle?
Making an airplane out of a water bottle is a great diy project that promotes creativity, recycling, and provides an engaging activity for kids.
Can I Decorate My Water Bottle Airplane?
Absolutely! You can let your imagination soar by decorating your water bottle airplane with colorful markers or stickers to give it a personalized touch.
How Far Can A Water Bottle Airplane Fly?
The distance a water bottle airplane can fly depends on various factors such as design, construction, and throwing technique. Experiment and see how far yours can go!
What Skills Can I Learn By Making A Water Bottle Airplane?
Making a water bottle airplane can enhance your problem-solving skills, hand-eye coordination, and understanding of basic aerodynamics. It’s a fun way to learn and play!
Conclusion
To sum up, creating an airplane out of a water bottle is an innovative diy project that sparks creativity and imagination.
It not only provides hours of entertainment but also educates individuals about the principles of flight and aerodynamics in a hands-on and engaging way.
By utilizing simple materials like a water bottle, straws, and paper, anyone can construct their own miniature aircraft and explore the wonders of aviation.
This activity promotes sustainability and recycling by repurposing everyday items. Moreover, it encourages problem-solving skills, as adjustments and modifications can be made to optimize the airplane’s performance.
Whether you are a child or an adult, making a water bottle airplane is a fun and enriching experience that allows you to soar through the skies with your own creativity and ingenuity.
So, gather your materials, follow the steps outlined in this blog post, and let your imagination take flight!