How to Make a Water Bottle Terrarium? 11 Easy Steps
To make a water bottle terrarium, you will need a water bottle, small plants or seeds, potting soil, small pebbles or gravel, activated charcoal, and a cork or lid.
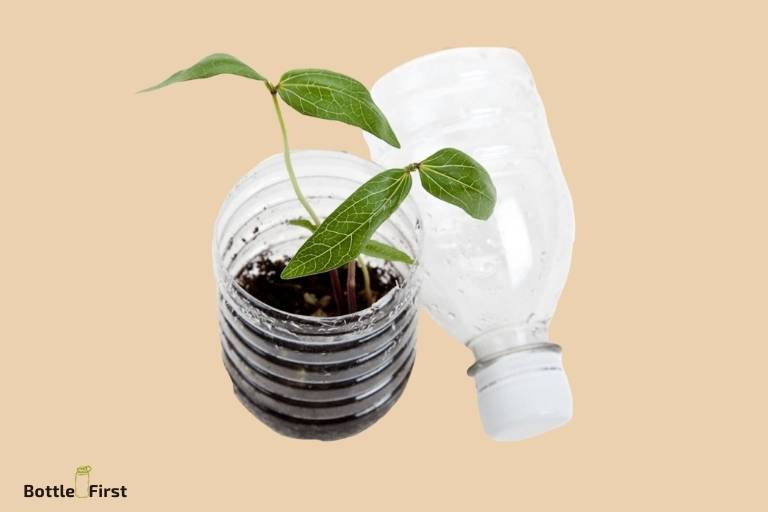
Begin by cutting the water bottle in half. Layer the bottom with pebbles for drainage, then a layer of activated charcoal to filter the water, and finally, add a layer of potting soil.
Now you can add your plants or seeds. Once done, place the top half of the water bottle back and secure it with the lid.
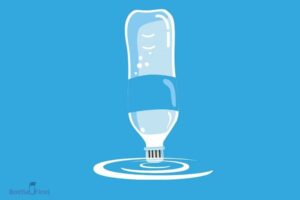
A water bottle terrarium is a miniature ecosystem that’s easy to create and maintain. It’s a great way to study the water cycle, photosynthesis, and plant growth.
The pebbles and charcoal act as a filtration system, while the potting soil provides nutrients for the plants. The water bottle creates a humid environment that helps the plants thrive.
Creating a water bottle terrarium is not only a fun DIY project but also an effective way to understand the ecosystem.
Once the plants are inside the terrarium, they release water vapor which then condenses on the bottle walls, and trickles down into the soil, mimicking the natural water cycle.
This mini ecosystem requires little to no maintenance and can be a great way to bring a piece of nature into your home or classroom.
11 Steps for Making a Water Bottle Terrarium
| Steps | Description |
|---|---|
| Step 1 | Gather Materials |
| Step 2 | Select a Water Bottle |
| Step 3 | Clean the Bottle |
| Step 4 | Add a Drainage Layer |
| Step 5 | Add Charcoal Layer |
| Step 6 | Add Moss Layer |
| Step 7 | Add Soil Layer |
| Step 8 | Plant the Terrarium |
| Step 9 | Close the Bottle |
| Step 10 | Place the Terrarium in a Suitable Location |
| Step 11 | Monitor and Maintain the Terrarium |
Key Takeaway
Fascinating Facts About Water Bottle Terrariums
Materials Needed
Making a water bottle terrarium is a fun and creative project that allows you to bring a piece of nature into your home.
To get started, you will need the following materials:
- Glass water bottle: Find a clear glass water bottle that is large enough to accommodate your plants and provide them with enough room to grow.
- Pebbles or small rocks: These will serve as the bottom layer of your terrarium, allowing for drainage and preventing water from pooling at the roots of your plants.
- Activated charcoal: This is an essential component of your terrarium as it helps to filter and purify the air inside the bottle.
- Potting soil: Choose a high-quality potting soil that is suitable for the types of plants you will be using in your terrarium. It should be well-draining and nutrient-rich.
- Plants or moss: Select plants that thrive in a closed environment, such as ferns, moss, or succulents. These will add greenery and beauty to your terrarium.
- Water spray bottle: A small spray bottle will come in handy for misting your terrarium and keeping the plants adequately hydrated.
Now that you have gathered all the necessary materials, you are ready to create your water bottle terrarium.
Choosing The Right Container
When it comes to creating a water bottle terrarium, one of the most important decisions you’ll make is choosing the right container.
The container you select will not only serve as the home for your mini ecosystem but also affect the overall success of your terrarium.
Here are a few key points to consider when selecting your container:
Size and shape:
- Consider the size and shape of the water bottle for your terrarium. A small water bottle will work well for a compact and minimalist terrarium, while a larger bottle will allow for more creative freedom.
- Keep in mind that the size of your plants will determine the size of the container. If you plan on using small succulents, a narrow-necked bottle may be suitable. For larger plants, opt for a wider-mouthed bottle that provides more space and air circulation.
Removable cap or opening:
- Ensure that the water bottle you choose has a removable cap or opening. This will allow for easy maintenance and care of your terrarium.
- With a removable cap, you will be able to water your plants and adjust the humidity levels as necessary. It also provides access for pruning, removing dead leaves, and replanting if needed.
Transparent material:
- Opt for a water bottle made of transparent material such as glass or clear plastic. Transparency allows you to observe the growth and development of your terrarium plants.
- Being able to see inside the bottle also adds a visual element, allowing you to appreciate the miniature world you’ve created.
Recycled or reused bottles:
- Consider using recycled or reused water bottles for your terrarium. Not only is this an eco-friendly option, but it also adds a unique and personal touch to your creation.
- Make sure to clean the bottle thoroughly before use to remove any residue or impurities that may harm your plants.
Remember, the container you choose will serve as the foundation for your water bottle terrarium.
By selecting one that is the right size, has a removable cap or opening, is transparent, and possibly recycled, you’ll be on your way to creating a stunning and thriving mini ecosystem.
So, gather your materials and let your creativity flow as you embark on this exciting terrarium project!
Setting Up The Base
When it comes to setting up a water bottle terrarium, it’s essential to create a proper base that provides drainage and prevents odor and mold.
Follow these steps to ensure your terrarium thrives:
Layer the bottom with pebbles for drainage:
- Start by placing a layer of pebbles at the bottom of the water bottle. This will allow excess water to drain away, preventing the roots of your plants from becoming waterlogged.
- The pebbles should be about an inch thick, providing enough space for water to accumulate without drowning the plants.
Add a thin layer of activated charcoal:
- After the pebbles, add a thin layer of activated charcoal. This will help eliminate any potential odor and prevent mold from developing in your terrarium.
- Activated charcoal acts as a natural filter, absorbing impurities and keeping the terrarium environment fresh and healthy.
Ensure even coverage:
- Make sure the pebbles and activated charcoal are distributed evenly across the base. This will ensure proper drainage and prevent any concentrated areas that could lead to waterlogging or odor buildup.
Press down gently:
- Once you’ve added the pebbles and activated charcoal, gently press down on the layers to ensure they are firmly in place. This will help create a stable base for the rest of the terrarium layers.
With the base properly set up, you can now move on to the next step of creating your water bottle terrarium. Keep in mind that a well-draining base and the use of activated charcoal are crucial for the overall health and longevity of your terrarium.
So take your time to create a solid foundation before adding the soil and plants.
Remember, as you go along, to have fun and get creative with your terrarium design. In the next section, we will discuss the selection of the right soil for your terrarium.
Adding Potting Soil And Plants
Now that you have prepared your water bottle terrarium and created the perfect drainage layer, it’s time to add potting soil and plants to bring your miniature garden to life.
Follow these steps to ensure your terrarium thrives:
Fill The Bottle With Potting Soil, Leaving Enough Space For The Plants:
- Select a good quality potting soil that is well-draining and rich in nutrients.
- Carefully pour the potting soil into the water bottle, filling it about three-quarters full.
- Leave enough space at the top for the plants and some air circulation.
Use A Small Spoon Or Tools To Carefully Place The Plants In The Soil:
- Choose small, compact plants that will fit well within the confines of the water bottle. Succulents, moss, and small ferns are suitable choices.
- Gently remove the plants from their containers, being careful not to damage the roots.
- Use a small spoon or a specialized terrarium tool to create holes in the soil.
- Place each plant into a hole, making sure the roots are well-covered with soil.
- Space out the plants evenly, allowing for their future growth.
Gently Pat The Soil To Secure The Plants In Place:
- Once the plants are in position, lightly pat the soil around them to secure them in place.
- Be gentle while patting to avoid compacting the soil too much.
- Ensure that the plants are stable and not at risk of toppling over.
Remember to consider the specific care instructions for each plant you choose. Some may require more sunlight, while others thrive in shaded conditions.
Place your terrarium in an appropriate location, and enjoy the beauty of your self-contained garden!
By following these simple steps and providing the right care, your water bottle terrarium will become a stunning and low-maintenance addition to your home or office space.
Get creative, experiment with different plant combinations, and watch your miniature ecosystem thrive in its own little world.
Happy terrarium gardening!
Maintenance And Care
Taking care of your water bottle terrarium is essential to ensure the health and longevity of the plants inside.
Follow these simple maintenance tips to keep your terrarium thriving:
Provide Indirect Sunlight For The Terrarium
- Place your terrarium in an area that receives bright, indirect sunlight. Direct sunlight can scorch the plants and cause them to wither.
- Avoid placing the terrarium near windows that receive intense sunlight as this can create a greenhouse effect and overheat the plants.
- Monitor the lighting conditions regularly and adjust the terrarium’s position as needed to maintain the ideal amount of sunlight.
Mist The Terrarium With Water Regularly To Maintain Moisture
- Use a spray bottle to mist the terrarium at least once a week. This helps to recreate the environment of a moist and humid tropical habitat.
- Ensure that the mist covers all areas of the terrarium, including the soil and leaves of the plants.
- Be careful not to oversaturate the terrarium with water, as excess moisture can lead to mold and root rot.
Trim Or Remove Any Dead Or Overgrown Plants
- Regularly inspect your terrarium and remove any plants that show signs of wilting or decline.
- Overgrown plants can compete for resources and hinder the growth of other plants in the terrarium, so trim them back as necessary.
- Use clean and sharp gardening shears or scissors to avoid damaging the plants while pruning.
Remember to enjoy the process of caring for your water bottle terrarium. Observing how the plants grow and thrive in their miniature ecosystem is a rewarding experience.
With proper maintenance and care, your terrarium can become a captivating centerpiece in your home or office space.
Can the Steps for Making a Water Bottle Stash be Applied to Making a Water Bottle Terrarium?
The same easy steps for water bottle stash can indeed be applied to making a water bottle terrarium. With a few modifications, such as adding soil, plants, and ensuring proper drainage, you can transform your water bottle stash into a miniature and sustainable ecosystem. Give it adequate light and water, and enjoy the beauty of nature in a compact form.
FAQ About How To Make A Water Bottle Terrarium
How Do You Make A Water Bottle Terrarium?
To make a water bottle terrarium, you’ll need a clear plastic bottle, soil, small plants, and some decorative elements.
What Kind Of Plants Can Be Used In A Water Bottle Terrarium?
You can use small plants such as succulents, ferns, moss, or air plants in a water bottle terrarium.
How Often Do You Need To Water A Water Bottle Terrarium?
Water bottle terrariums require very little water. Check moisture levels every 2-4 weeks and water sparingly if needed.
Can A Water Bottle Terrarium Be Placed In Direct Sunlight?
Water bottle terrariums thrive in indirect sunlight or bright, filtered light. Avoid direct sunlight to prevent overheating.
Can A Water Bottle Terrarium Be Sealed?
While some people prefer to seal their water bottle terrariums, it is not necessary. An open terrarium allows for better airflow and prevents excess humidity.
Conclusion
Creating a water bottle terrarium is a simple yet satisfying way to bring a touch of nature into your home.
By repurposing a water bottle, you can create a mini-ecosystem that is not only visually appealing but also low maintenance.
Whether you have a green thumb or are just starting out with gardening, this diy project is perfect for anyone.
The key to a successful water bottle terrarium lies in choosing the right plants, layering the materials properly, and providing adequate care.
With a clear understanding of these steps, you can create a thriving and self-sustaining terrarium that will surely brighten up any space.
Remember to choose plants that thrive in humid environments, such as ferns or moss, and ensure proper light exposure.
By following the steps outlined in this guide, you can create your own water bottle terrarium and enjoy the beauty and tranquility of nature right at your fingertips.