How to Make Butter in a Water Bottle? 7 Easy Steps
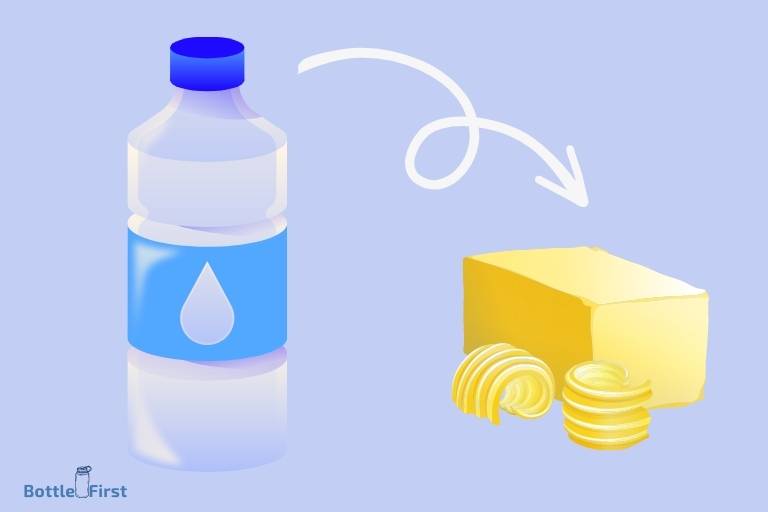
Making butter in a water bottle is a simple and fun DIY project. You only need heavy cream and a water bottle.
All you have to do is pour the cream into the water bottle, seal it tight, and then shake it vigorously for about 10-15 minutes or until the butter forms.
Drain the excess liquid and there you have it – homemade butter.
Butter is essentially the fat in the cream separating from the other components. This is achieved through agitation.
By shaking the cream within the water bottle, you’re forcing the fat molecules to stick together and clump, forming butter.
Making butter in a water bottle can be an exciting and practical experiment, especially for kids.
It provides a visual demonstration of how fat molecules in cream separate from the liquid when agitated, forming butter.
Plus, the end product can be used in your cooking or baking, making it a rewarding process.
7 Steps to Make Butter in a Water Bottle
| Steps | Description |
|---|---|
| Step 1 | Fill a water bottle about halfway with heavy cream |
| Step 2 | Screw the cap on the water bottle securely |
| Step 3 | Shake the water bottle vigorously for about 15-20 minutes |
| Step 4 | Drain the liquid (buttermilk) that separates and you should be left with butter |
| Step 5 | Rinse the butter with cold water |
| Step 6 | Press the remaining liquid out of the butter |
| Step 7 | Store the butter in a butter dish or container in the refrigerator |
Key Takeaway

Fascinating Facts About Making Butter in a Water Bottle
Understand The Science Behind Churning Butter
Have you ever wondered how butter is made? Churning butter is a fascinating process that not only results in a delicious and creamy spread but also involves some intriguing scientific principles.
In this section, we will explore the basics of butter making, the chemical reactions that take place during churning, and the importance of temperature and agitation in this process.
The Process Of Butter Making: Exploring The Basics
Churning butter involves transforming cream into a solid fat by agitating it vigorously.
Here are the key steps involved in this process:
- Cream selection: Start by choosing high-fat cream, as it contains more milk fat, resulting in a richer and tastier butter.
- Gathering equipment: You’ll need a clean water bottle with a tightly sealed lid or a butter churn. For small quantities, a water bottle can work wonders!
- Filling the bottle: Pour the cream into the water bottle, filling it only halfway to leave enough room for shaking.
- Churning: Seal the bottle tightly and begin shaking it vigorously. You can even add a small ball or marble to help with the churning process.
- Separation: After a few minutes of shaking, the cream will undergo a remarkable transformation. It will separate into solid fat (butter) and liquid (buttermilk).
- Draining and washing: Carefully pour out the buttermilk, leaving the solid butter behind. Rinse the butter by adding cold water and repeating the process until the water runs clear.
- Kneading and shaping: Remove excess water from the butter by kneading it and shaping it into a block or using molds for a more decorative finish.
- Storing: Finally, store your homemade butter in the refrigerator to keep it fresh and ready for use.
Chemical Reactions Involved In Churning Butter
Several chemical reactions occur during the process of churning butter, resulting in the transformation of cream into butter.
Here are the key reactions:
- Agitation: The vigorous shaking or stirring causes the fat globules in the cream to collide, eventually causing them to clump together and separate from the liquid.
- Coalescence: As the fat globules collide, they stick together due to their hydrophobic nature, forming larger fat globules.
- Fat crystallization: The fat globules continue to collide and coalesce until they reach a critical size, resulting in the formation of fat crystals. These crystals give butter its solid texture.
- Buttermilk separation: The fat globules clump together and separate from the liquid, known as buttermilk. This separation occurs due to the differences in density between the fat and the liquid components.
Importance Of Temperature And Agitation In Butter Making
Temperature and agitation play crucial roles in the process of butter making.
Here’s why they are important:
- Temperature: Churning cream at a slightly cooler temperature, around 50-55°f (10-13°c), helps to achieve maximum butterfat agglomeration. Lower temperatures allow the fat globules to solidify more easily, aiding the separation from the liquid.
- Agitation: Vigorously shaking or stirring the cream ensures proper collision and coalescence of the fat globules. Without sufficient agitation, the fat globules may not come together, resulting in unsuccessful butter formation.
Remember, understanding the science behind churning butter not only enhances your appreciation for this simple but remarkable process, but it also gives you the freedom to experiment with different variables to achieve the perfect homemade butter.
So grab your water bottle or butter churn, and let the science of butter making begin!
Gathering The Necessary Ingredients And Tools
So, you want to make butter in a water bottle? Great choice! This method is not only fun and easy, but it also requires minimal ingredients and tools.
Let’s dive right in and gather everything you’ll need to start churning your homemade butter.
Ingredients Required: Cream And A Water Bottle
To make butter in a water bottle, you’ll need just two simple ingredients – cream and a water bottle.
Here’s a breakdown of what you’ll need:
- Cream: The main ingredient for making butter is cream. You can use either heavy cream or whipping cream, depending on your preference. Make sure the cream is fresh and of good quality for the best results.
- Water bottle: A regular plastic water bottle will serve as your butter-making vessel. Clean it thoroughly before use to ensure hygiene.
Advantages Of Using A Water Bottle For Butter Making
Using a water bottle for making butter offers several advantages that make the process even more convenient and enjoyable.
Here are a few benefits you can expect:
- Easy shaking: The shape and size of a water bottle make it perfect for shaking the cream vigorously. The narrow neck and secure cap allow for a firm grip, preventing any accidents during the shaking process.
- Convenient handling: Unlike traditional churners or machines, a water bottle is compact and easy to handle. You can effortlessly shake it to churn the cream into butter without any complicated mechanisms.
- Cost-effective: Investing in expensive butter churners or appliances is not necessary when you have a water bottle at hand. This low-cost alternative provides the same end result without breaking the bank.
Additional Tools And Equipment For A Smooth Process
While cream and a water bottle are the main ingredients for making butter, a few additional tools can help streamline the process and ensure a smoother experience.
Here are some options to consider:
- Strainer: After shaking the cream, you may want to strain the liquid whey from the butter. A fine mesh strainer or cheesecloth can come in handy for this purpose.
- Salt: If you prefer salted butter, adding a pinch of salt will enhance the flavor. Keep a little salt nearby to sprinkle on the butter later.
- Refrigerator: Once your butter is ready, storing it in the refrigerator will help it solidify and maintain freshness. Make sure you have enough space in your fridge before starting the process.
Now that you have gathered your ingredients and tools, you are one step closer to making delicious homemade butter.
With cream, a water bottle, and a few additional supplies, you are well-prepared to embark on this exciting butter-making adventure.
So, let’s get started and turn cream into a creamy spread that will make your taste buds tingle!
Step-By-Step Instructions For Making Butter In A Water Bottle
Have you ever wondered how to make butter at home without any fancy equipment? Look no further because we have an easy and fun method for you to try – making butter in a water bottle!
Not only is it a great activity to do with kids, but it also allows you to control the freshness and quality of your butter.
Follow these step-by-step instructions to whip up your homemade butter in no time.
Choosing The Right Cream: Freshness Matters
Before you start making butter, it’s crucial to choose the right cream. Freshness plays a significant role in the final taste and texture of your butter.
Here are a few key points to keep in mind:
- Opt for heavy cream or whipping cream with a high-fat content of at least 35%. Lower fat creams may not yield desirable results.
- Look for cream that is pasteurized and not ultra-pasteurized. Ultra-pasteurization can affect the cream’s ability to form butter due to the high heat treatment involved.
Pouring The Cream Into The Water Bottle And Securing The Lid Tightly
Now that you have the perfect cream selected, it’s time to start the butter-making process.
Follow these steps:
- Pour the chosen cream into a clean and dry water bottle, leaving some space at the top for shaking.
- Ensure the lid is tightly sealed to prevent any leaks during the shaking process.
Shaking And Agitating The Bottle: Determining The Ideal Duration
This step requires a bit of arm workout, but it’s well worth the effort. The shaking and agitating process helps the cream transform into butter.
Here’s what you need to do:
- Hold the tightly secured water bottle with both hands.
- Shake the bottle vigorously, moving it up and down and from side to side.
- Shake consistently for approximately 10-15 minutes or until the butter separates from the liquid. The exact timing may vary depending on the cream and your shaking technique.
Recognizing The Visual Signs Of Butter Formation
As you continue shaking the bottle, keep an eye out for visual cues that indicate butter formation.
Check for the following signs:
- The cream will go through stages of thickening, resembling whipped cream.
- Eventually, the butter will separate from the liquid, known as buttermilk, which will appear as a cloudy liquid in the bottle.
Separating The Solid Butter From The Buttermilk
Once the butter has completely separated from the buttermilk, it’s time to separate the two.
Follow these steps:
- Carefully unscrew the lid of the water bottle.
- Tilt the bottle over a bowl or sink to let the liquid buttermilk flow out.
- Gently squeeze the butter solids to remove any excess buttermilk trapped inside.
Washing And Kneading The Butter For Better Taste And Shelf Life
As the final step in the butter-making process, washing and kneading the butter will help enhance its taste and extend its shelf life.
Here’s what to do:
- Fill a bowl with cold water and place the butter in it.
- Knead the butter under the water, squeezing and pressing it to remove any residual buttermilk and impurities.
- Drain the water and repeat the washing process until the water runs clear.
- Once clean, shape the butter into a block or roll using your hands or a butter mold.
Congratulations! You’ve successfully made homemade butter using a simple water bottle method. Spread it on your favorite bread or use it in recipes for a rich and flavorful addition.
Enjoy the satisfaction of creating your butter from scratch, and remember to share this fun technique with others.
Tips And Tricks For A Successful Butter Making Experience
Making butter in a water bottle can be a fun and rewarding diy project.
To ensure a successful butter making experience, here are some tips and tricks to keep in mind:
Role Of Temperature In Butter Making: Room Vs. Chilled Cream
- Use chilled cream: Start with chilled cream as it helps the butter form more efficiently. The cold temperature solidifies the fat content, making it easier to separate from the liquid.
- Room temperature cream: If you don’t have chilled cream on hand, you can use room temperature cream. However, keep in mind that it may take longer for the butter to form and separate from the buttermilk.
Enhancing The Flavor: Incorporating Salt Or Other Mix-Ins
- Adding salt: For a classic and savory taste, consider incorporating salt into your butter. You can mix in a small amount of salt after your butter has formed and is still soft.
- Trying other mix-ins: Get creative and experiment with different flavors! You can add herbs, spices, honey, or even garlic to give your butter a unique and delicious twist. Be sure to mix in your desired mix-ins thoroughly for a well-distributed flavor.
Preventing Butter Spoilage And Extending Its Shelf Life
- Removing excess liquid: After your butter forms, make sure to thoroughly squeeze out any remaining buttermilk. Excess liquid can contribute to spoilage.
- Storing in an airtight container: Transfer your homemade butter to a clean, airtight container to prevent it from coming into contact with air. Oxygen exposure can lead to rancidity and spoilage.
- Refrigerate promptly: It’s crucial to refrigerate your butter immediately after making it. Proper refrigeration will help inhibit bacterial growth and extend its shelf life.
Storing And Preserving Homemade Butter Properly
- Wrap in wax paper: To preserve your butter’s freshness and prevent it from absorbing any unwanted odors from the fridge, consider wrapping it in wax paper or parchment paper.
- Freezing extra butter: If you find yourself with more butter than you can consume within a reasonable timeframe, freezing is an excellent option. Divide it into smaller portions, wrap in wax paper, and place in a freezer-safe bag. Thaw only what you need to maintain its quality.
Experimenting With Different Cream Variations And Flavors
- Trying different cream types: While traditional butter is made from cow’s milk, you can experiment with other cream variations like goat, sheep, or even plant-based creams. Each type will offer a unique flavor profile.
- Exploring flavored butters: Once you’ve mastered the basics, don’t be afraid to explore flavored butters. From sweet options like cinnamon sugar to savory combinations like garlic and herbs, there is an endless array of possibilities to discover.
Remember, making butter in a water bottle is a fun and creative process.
Don’t be afraid to experiment with different ingredients and techniques to find your perfect homemade butter recipe.
Enjoy the satisfaction of spreading your delicious creation on fresh bread or using it for cooking and baking purposes.
Happy butter making!
Exploring The Versatility Of Homemade Butter
If you’ve ever wondered how to make butter in a water bottle, you’re in for a treat!
Not only is it a fun diy project, but the end result is a delicious and versatile ingredient that can be incorporated into various cooking and baking recipes.
Let’s delve into the world of homemade butter and discover its endless possibilities.
Utilizing Homemade Butter In Cooking And Baking
Butter adds a rich, creamy flavor to both sweet and savory dishes.
Here’s how you can make the most of your homemade butter:
- Spread it on warm bread or toast for a simple and satisfying breakfast or snack.
- Use it as a cooking fat for frying, sautéing, or even roasting vegetables to impart a delicious golden brown color and a hint of nuttiness.
- Substitute it for oil in recipes to enhance the flavor and moisture of cakes, cookies, and pastries.
- Add a pat of butter to a steaming bowl of pasta, allowing it to melt and create a luscious sauce.
- Incorporate it into your homemade sauces and gravies for an extra smooth and velvety texture.
Creating Flavored Butters: Sweet And Savory Options
Homemade butter can easily be transformed into a variety of flavors with the addition of simple ingredients.
Consider the following options:
- Sweet flavored butters: Mix in a teaspoon of honey or maple syrup for a touch of sweetness. Alternatively, infuse your butter with vanilla extract or add a sprinkle of cinnamon for a warm and comforting flavor.
- Savory flavored butters: Enhance the taste of your butter by incorporating minced garlic or finely chopped fresh herbs such as basil, rosemary, or thyme. For an extra kick, add a dash of chili flakes or grated parmesan cheese.
Exploring The Health Benefits Of Homemade Butter
While butter has often been considered unhealthy, homemade butter offers some surprising health benefits:
- Nutrient-rich: Homemade butter contains essential vitamins like a, d, e, and k, which are important for bone health, vision, and immune function.
- Healthy fats: Butter made from grass-fed cows contains a good balance of omega-3 and omega-6 fatty acids, which may help reduce inflammation in the body.
- High in butyrate: Butyrate is a short-chain fatty acid found in butter, known for its potential to improve gut health and reduce the risk of inflammatory bowel diseases.
Customizing The Texture And Consistency Of Butter
One of the great advantages of homemade butter is the ability to customize its texture and consistency to suit your preferences:
- Soft spreadable butter: If you prefer a softer, more easily spreadable butter, store it at room temperature.
- Firm butter: For a firmer texture, refrigerate your butter. This is ideal for recipes that require cutting it into small pieces, such as pie crusts or scones.
Incorporating Butter Making Into A Sustainable Lifestyle
Making your own butter not only allows for creativity in the kitchen but also aligns with a sustainable lifestyle.
Consider the following tips:
- Use organic cream or cream from grass-fed cows to support environmentally friendly practices.
- Repurpose the leftover buttermilk to make pancakes, biscuits, or even use it in marinades for tenderizing meat.
- Store your homemade butter in glass jars or reusable containers to reduce plastic waste.
Now that you know the various ways to utilize, customize, and flavor your homemade butter, it’s time to grab a water bottle and get churning!
Let your culinary creativity soar as you embrace the versatility of this homemade delight.
Can the Same Steps Be Applied to Make Guinea Pigs Drink from a Water Bottle?
Guinea pigs can be trained to drink from a water bottle too! Follow these easy steps for guinea pig water bottle training: firstly, position the water bottle low, close to their bedding. Secondly, guide their snout towards the bottle’s spout, holding it lightly. Lastly, offer treats and praise when they successfully drink from the bottle. Practice patience and consistency for effective results.
FAQ About How To Make Butter In A Water Bottle
How Do You Make Butter In A Water Bottle?
To make butter in a water bottle, first, fill the bottle with cream and shake vigorously for about 10 minutes until the butter separates from the liquid.
Can I Use Any Type Of Cream To Make Butter?
Yes, you can use heavy cream or whipping cream to make butter in a water bottle. The higher the fat content, the better the results.
How Long Does It Take To Make Butter In A Water Bottle?
The process of making butter in a water bottle usually takes around 10 minutes of shaking until the butter separates from the cream.
What Should I Do With The Liquid Leftover After Making Butter?
The liquid leftover after making butter, known as buttermilk, can be used in various recipes or enjoyed as a refreshing drink.
Can I Store The Homemade Butter In The Water Bottle?
While you can initially make butter in a water bottle, it is recommended to transfer the homemade butter into a designated butter container for proper storage and use.
Conclusion
Making butter in a water bottle is a fun and easy activity that you can enjoy with the whole family.
Not only does it allow you to create a delicious spread for your bread, but it also teaches valuable lessons about the science of food.
By simply shaking a mixture of heavy cream and salt inside a water bottle for around 10 minutes, you can transform it into smooth and creamy butter.
The process is simple, requiring minimal ingredients and equipment. Moreover, making butter in a water bottle is a cost-effective and eco-friendly alternative to buying store-bought butter.
Whether you are looking to engage in a hands-on kitchen experiment or simply want to add a personal touch to your meals, making butter in a water bottle is a delightful activity that is sure to satisfy both your taste buds and curiosity.
So gather your ingredients and start shaking!


