How to Make Your Own Water Bottle: 7 Easy Steps!
Creating your own water bottle is a simple and eco-friendly project. All you need is a reusable bottle, some personalization tools like paint or stickers, and a bit of creativity.
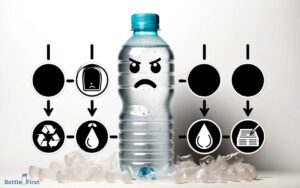
Making your own water bottle not only allows you to express your personal style, but it also reduces plastic waste.
Reusable water bottles are more sustainable and cost-efficient than single-use plastic bottles. You can personalize your bottle using materials like paint, stickers, or even DIY decor.
Remember, making your own water bottle is not only a fun project, but it also promotes sustainability. It allows you to reduce plastic waste significantly and express your creativity while staying hydrated.
Take this opportunity to craft a bottle that reflects your personality and emphasizes the importance of environmental care.
7 Steps: DIY Water Bottle Creation Process
| Step | Material Needed | Instructions |
|---|---|---|
| 1 | Plastic Bottle | Choose a plastic bottle that is BPA-free. |
| 2 | Marker | Use the marker to design your own pattern or write your name on the bottle. |
| 3 | Colored Tapes | Decorate the bottle with colored tapes to make it more personalized. |
| 4 | Waterproof Stickers | You can also use waterproof stickers to customize your bottle. |
| 5 | Water | Fill the bottle with water. It is advisable to use filtered water for health reasons. |
| 6 | Refrigerator | Place the bottle in the refrigerator if you prefer cold water. |
| 7 | Bottle Cap | Always make sure to close the cap tightly to prevent leakage. |
Key Takeaway

Five Facts About Make Your Own Water Bottle
Choosing The Right Materials
When it comes to making your own water bottle, one of the most crucial decisions you’ll need to make is choosing the right materials.
With so many options available in the market, it can be a little overwhelming to determine which materials are best suited for your diy water bottle project.
Before diving into the production process, let’s explore different materials suitable for water bottles and the eco-friendly options available.
Exploring Different Materials For Water Bottles
Here are some key points to consider when exploring different materials for your diy water bottle:
- Glass: Glass is a popular choice for water bottles due to its versatility and durability. It provides a clean and pure taste, making it ideal for those who prefer their water untainted by other materials. Additionally, glass bottles are 100% recyclable and do not contain harmful chemicals like bpa (bisphenol a).
- Stainless steel: Stainless steel water bottles are known for their excellent durability and insulation properties. They can keep your beverages cool for hours, making them a perfect choice for active individuals. Stainless steel is also free from harmful chemicals and easy to clean.
- Bpa-free plastic: Although concerns have been raised about plastic bottles and their impact on the environment, there are bpa-free options available that are considered safer. These bottles do not contain bisphenol a, a potentially harmful chemical. If you choose to go with plastic, be sure to select bpa-free materials.
- Aluminum: Aluminum water bottles are lightweight, making them a convenient choice for people on the go. They are also recyclable, making them a more eco-friendly option compared to single-use plastic bottles. However, it’s important to note that some aluminum bottles may have a lining that could contain harmful chemicals, so it’s best to opt for those labeled as bpa-free.
The Eco-Friendly Options Available
Here are some eco-friendly options to consider when making your own water bottle:
- Upcycled materials: Look for creative ways to reuse materials you already have at home, such as repurposing glass jars or stainless steel containers. Not only will this save you money, but it will also reduce waste and promote sustainability.
- Bamboo: Bamboo is a fast-growing and renewable resource, making it an excellent eco-friendly alternative for water bottles. Bamboo bottles are lightweight, biodegradable, and have natural antimicrobial properties.
- Plant-based plastics: Some companies have started producing water bottles made from plant-based plastics, which are derived from renewable resources like sugarcane or cornstarch. These bottles have a lower carbon footprint compared to traditional plastics, making them a more sustainable option.
By carefully considering the materials you use for your diy water bottle project, you can create a personalized and eco-friendly hydration solution that aligns with your values.
Remember, the choice of material not only affects the durability and functionality of your water bottle but also plays a significant role in environmental sustainability.
So go ahead, get creative, and make your own water bottle that checks all the boxes for both quality and eco-friendliness.
Designing Your Water Bottle
So, you’ve decided to make your own water bottle? That’s a great and fun project to take on! Designing your water bottle allows you to get creative and customize it to suit your personal style.
In this section, we’ll explore how you can find inspiration for your design and incorporate your unique flair into the final product.
Finding Inspiration For Your Design
Finding inspiration for your water bottle design can be an exciting part of the process.
Here are some tips to help you come up with creative ideas:
- Look around you: Take a moment to observe your surroundings. Look at patterns, colors, and shapes in nature, art, or even everyday objects. Inspiration can strike from the simplest of things.
- Browse online: Explore websites, social media platforms, and design blogs for inspiration. Look for water bottle designs, graphic art, and patterns that catch your eye.
- Get inspired by hobbies or interests: Consider incorporating elements from your favorite hobbies or interests into your design. Whether it’s sports, music, travel, or something else entirely, let your passions guide your creativity.
- Sketch and brainstorm: Grab a pen and paper and start sketching out ideas. Don’t worry about perfection at this stage; it’s all about generating as many concepts as possible. Brainstorm different themes, motifs, or symbols that resonate with you.
- Ask for opinions: Reach out to friends, family, or online communities for feedback on your design ideas. They might offer fresh perspectives or suggest exciting elements you hadn’t considered before.
Incorporating Your Personal Style
Your water bottle design should reflect your personal style and taste.
Here are some ways you can add a touch of uniqueness to your creation:
- Choose colors wisely: Consider using colors that resonate with you or represent your personality. Whether you prefer bold and vibrant hues or subtle and muted tones, color choice can make a big impact on the overall design.
- Play with typography: If you enjoy typography, experiment with different fonts and lettering styles. Incorporate meaningful quotes, mantras, or personal mottos to create a visually appealing and inspiring design.
- Embrace textures and patterns: Incorporating textures or patterns can add depth and visual interest to your water bottle. Think about incorporating your favorite textures like marble, wood, or even intricate geometric patterns to create a unique look.
- Experiment with materials: Explore various materials such as metal, glass, or fabric to elevate your water bottle’s design. Each material brings its own aesthetic and feel, allowing you to create a truly one-of-a-kind piece.
- Add personal touches: Don’t forget to add personal touches that make the design truly yours. Consider including your initials, a small illustration that represents you, or even a favorite quote that resonates with your values.
Designing your own water bottle gives you the freedom to unleash your creativity and create a truly unique and personalized piece.
Remember to find inspiration from your surroundings, incorporate your personal style, and let your imagination run wild. Get ready to make a water bottle that is as functional as it is beautiful!
Assembling Your Water Bottle
Step-By-Step Guide To Assembling Your Water Bottle
Assembling your own water bottle can be a fun and rewarding experience.
Follow these simple steps to put together your personalized hydration companion:
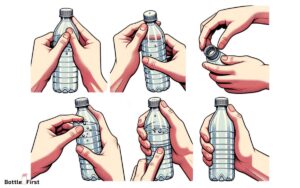
- Start by gathering all the necessary tools and materials.
- Begin with the main body of the water bottle. Insert the bottle bottom into the bottle sleeve until it clicks into place.
- Next, attach the bottle cap to the top of the bottle sleeve. Ensure a secure fit by twisting it clockwise until it locks.
- If your water bottle includes a straw, insert it into the designated slot on the bottle cap. Make sure it extends all the way to the bottom of the bottle.
- Connect the drinking spout to the top of the straw. It should fit snugly, preventing any leaks.
- Check the o-rings on both the bottle cap and drinking spout to make sure they’re in good condition. Replace any damaged o-rings to maintain a watertight seal.
- Once all the components are securely in place, give your water bottle a test run. Fill it with water and make sure there are no leaks or loose connections.
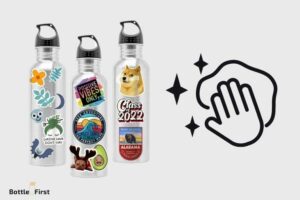
- Customize your water bottle further by adding stickers, decals, or personalized labels. Let your creativity shine!
Tools And Materials Needed
To assemble your water bottle, you’ll need the following tools and materials:
- Water bottle body and sleeve
- Bottle bottom and cap
- Drinking spout and straw (if applicable)
- O-rings
- Stickers or decals for customization
Tips For A Seamless Assembly Process
Follow these tips to ensure a smooth and hassle-free assembly process:
- Read the instructions provided with your water bottle carefully to understand the specific steps and components.
- Lay out all the parts before you start assembling to get a clear view of what goes where.
- Take your time and be gentle when connecting the different components to avoid damaging any parts or creating leaks.
- If you encounter any difficulties during assembly, consult the manufacturer’s website or customer support for assistance.
- Regularly check your water bottle for any loose or worn-out parts and replace them promptly to maintain its functionality and prevent leakage.
Remember, assembling your water bottle is a fun diy project that allows you to create a personalized and eco-friendly hydration solution. Enjoy the process and stay hydrated in style!
Maintenance And Care
Proper Cleaning And Maintenance Of Your Water Bottle
Proper cleaning and maintenance is essential to ensure the longevity and hygienic use of your homemade water bottle.
By following some simple steps, you can keep your bottle in pristine condition.
- Rinse thoroughly after each use: After finishing your drink, make sure to rinse the bottle with warm water. This simple step helps remove any leftover liquid and prevents odors from developing.
- Use a mild soap or dishwashing liquid: Regularly washing your water bottle with a gentle soap or dishwashing liquid helps remove any built-up residue. Remember to use a bottle brush to scrub the inside and reach all the corners.
- Avoid harsh cleaning agents: Harsh chemicals or bleach should be avoided as they may damage the bottle’s materials and potentially leave harmful residue.
- Pay attention to tricky spots: Pay extra attention to the cap, spout, and the areas where the lid screws onto the bottle. These areas can accumulate bacteria or mold if not cleaned properly. Use a small brush to reach these spots and ensure a thorough cleaning.
- Allow the bottle to air dry: After washing, leave the bottle uncapped and upside down to air dry completely. Avoid using a towel or cloth to dry it, as they may introduce lint or bacteria.
- Store it properly: Store your water bottle in a clean and dry environment to prevent any contamination or odor buildup. Keep it away from direct sunlight, as prolonged exposure to sunlight can degrade the materials over time.
By following these maintenance tips, you can keep your homemade water bottle clean, safe, and ready for use.
Remember, a well-maintained water bottle ensures a healthy and refreshing drinking experience every time.
FAQ About Make Your Own Water Bottle
What Materials Do I Need To Make My Own Water Bottle?
To make your own water bottle, you will need a food-safe plastic or metal bottle, a cap or lid, and any additional decorations or customizations you desire.
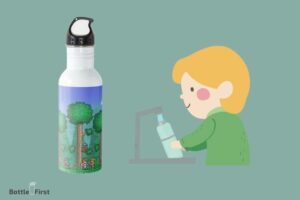
How Can I Clean My Homemade Water Bottle?
Cleaning your homemade water bottle is easy. Simply wash it with warm soapy water after each use, and allow it to air dry completely before using again.
Can I Personalize My Diy Water Bottle With My Name?
Absolutely! Personalizing your diy water bottle with your name or other designs is a great way to make it unique and easily identifiable.
Are Homemade Water Bottles Safe To Use?
Yes, as long as you use food-safe materials and clean your homemade water bottle regularly, it is safe to use. However, make sure to avoid using toxic materials or substances.
How Can I Make My Homemade Water Bottle Leak-Proof?
To ensure your homemade water bottle is leak-proof, make sure the cap or lid fits tightly and securely. You can also use an additional seal or silicone ring for added protection against leaks.
Conclusion
To sum up, making your own water bottle can be a fun and eco-friendly project that allows you to customize your hydration experience. By following the steps mentioned in this blog post, you can create a unique water bottle that suits your style and needs.
Remember to choose safe and durable materials, such as stainless steel or bpa-free plastic, to ensure the longevity and healthiness of your bottle. Additionally, don’t forget to personalize your bottle with stickers, paint, or other decorations to truly make it your own.
Lastly, always remember the importance of staying hydrated and using reusable water bottles to reduce waste and contribute to a greener planet.
So, why not start crafting your own water bottle today and show off your creativity while making a positive impact on the environment?
Get started and enjoy the satisfaction of sipping from a bottle you made yourself!