Upside down Water Bottle to Water Plants: 4 Easy Steps!
Creating a DIY Self-Watering System for Your Plants Using an Upside-Down Water Bottle
The upside-down water bottle method is an ingenious and cost-effective way to ensure your plants receive consistent moisture without the need for daily manual watering.
Here’s how to set it up:
- Clean an empty plastic bottle.
- Make small holes in the cap.
- Cut the bottom of the bottle off.
- Fill the bottle with water.
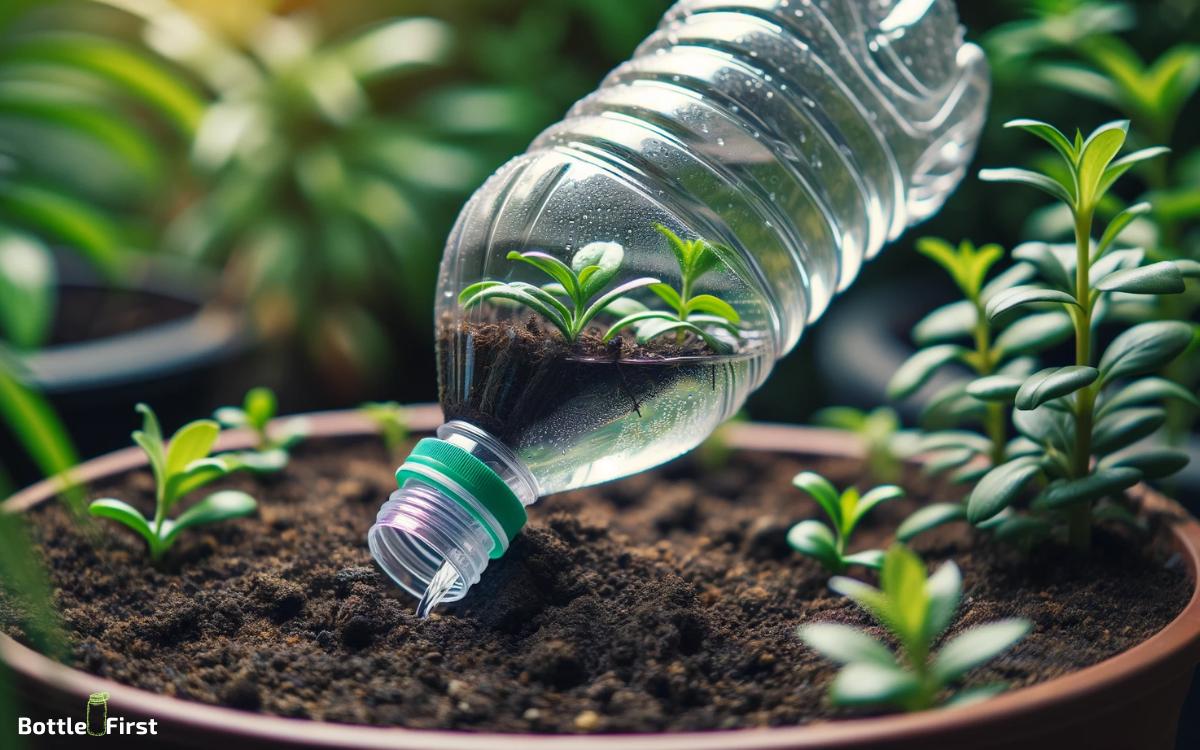
- Invert and insert the bottle into the soil near the plant.
This simple system works through gravity and slow water release, allowing the plant to absorb water as needed. Keep your plants perfectly watered with this clever, eco-friendly upside-down bottle trick.
Key Takeaway
Materials Needed
You will need a few simple materials for creating an upside-down water bottle to water plants. First, gather a plastic water bottle, a sharp tool like a knife or scissors, and a water-absorbent rope or string.
The plastic water bottle should be clean and dry, with the label removed. The sharp tool will be used to carefully cut a small hole in the cap of the water bottle, ensuring it’s just big enough for the rope to fit through.
The water-absorbent rope or string will need to be long enough to reach the bottom of the water bottle and extend into the soil of the plant.
These materials are essential for constructing your upside-down water bottle irrigation system and providing a convenient way to water your plants.
Step 1: Selecting the Right Bottle
When selecting a bottle for watering your plants, consider the size of the bottle to ensure it provides enough water for your plants without drowning them. Additionally, it’s important to consider the drainage needs of your plants to avoid overwatering.
Choosing the right bottle will help maintain the ideal moisture levels for your plants, promoting healthy growth.
Bottle Size Matters
To effectively water your plants using an upside-down water bottle, start by selecting a bottle with the right size and shape for your specific plant’s needs.
The size of the bottle matters significantly. For smaller plants, such as herbs or small potted flowers, a standard 16-ounce water bottle may suffice.
However, for larger plants or those with deeper roots, consider using a 1 or 2-liter bottle to ensure an adequate water supply.
Additionally, the shape of the bottle should match the watering area of the plant. For example, if the plant has a widespread, opt for a bottle with a broader base to cover more ground.
By selecting the appropriate bottle size and shape, you can ensure that your plants receive the ideal amount of water for their specific requirements.
Consider Drainage Needs
Selecting the right bottle for watering your plants upside down involves considering their drainage needs to ensure optimal growth and health.
To choose the best bottle for your plants, follow these guidelines:
- Transparency: Select a clear plastic bottle to easily monitor the water level and ensure your plants are receiving an adequate amount of water.
- Size: Opt for a bottle that’s proportionate to the size of the plant. Larger plants require bottles with greater capacity, while smaller plants need smaller bottles to avoid waterlogging.
- Perforations: Carefully create small holes in the bottle cap or bottom to regulate water flow. This prevents overwatering and ensures proper drainage for the plant’s roots.
- Material: Choose a durable plastic bottle that can withstand outdoor conditions and is easy to clean for reuse.
Step 2: Preparing the Bottle
Begin by cleaning the bottle thoroughly with soap and water. Remove any labels or residue that may be present on the bottle.
Next, use a sharp object to carefully poke a few small holes in the bottom of the bottle to allow for gradual water release. This will ensure that the plants receive a steady supply of water without becoming waterlogged.
After creating the drainage holes, fill the bottle with water and securely screw on the cap.
Turn the bottle upside down and insert it into the soil near the base of the plant, ensuring that it’s stable and upright.
The inverted bottle will gradually release water as the soil dries out, providing your plants with a consistent source of hydration.
Step 3: Planting the Bottle
After preparing the bottle, inserting it into the soil near the base of the plant is the next step in effectively watering your plants.
Here’s how to plant the bottle:
- Choose the Right Spot: Select a location near the base of the plant where the bottle can be easily inserted into the soil without causing damage to the plant’s roots.
- Dig a Hole: Use a trowel or your hands to create a small hole in the soil, making sure it’s deep enough to accommodate the bottle without tipping over.
- Insert the Bottle: Gently push the prepared water bottle upside down into the hole, ensuring that it’s stable and secure in the soil.
- Monitor and Adjust: Keep an eye on the bottle to ensure that it continues to provide water to the plant effectively, adjusting its position if necessary.
Step 4: Monitoring and Refilling
Now that the upside-down water bottle is in place, it’s important to monitor the water level regularly. Consider using a water level indicator to easily keep track of the amount of water remaining.
Based on the size of the plant and environmental conditions, adjust the refilling frequency as needed to ensure the plant receives sufficient water.
Water Level Indicator
Check the water level in the upside-down water bottle regularly to ensure that your plants are receiving an adequate supply of water.
Here’s how to create a water level indicator to monitor and refill the bottle:
- Create a mark on the bottle at the desired water level using a permanent marker.
- Check the water level against the mark at least once a day to ensure it doesn’t drop below the required level.
- Refill the bottle when the water level falls below the mark to maintain a consistent water supply for your plants.
- Adjust the mark as needed based on your plant’s water consumption and environmental conditions.
Refilling Frequency Suggestions
You should monitor the water level in the upside-down water bottle regularly, using an indefinite pronoun. Checking the water level every 2-3 days is recommended to ensure that the plants receive an adequate supply of water.
However, the frequency may vary depending on factors such as plant size, environmental conditions, and water consumption rates.
It’s important to observe the moisture level in the soil as well to determine if the current watering schedule is sufficient.
Adjust the refilling frequency based on the specific needs of your plants. Keeping a consistent check on the water level and plant condition will help you establish an effective refilling routine.
Benefits of Upside-Down Watering
To understand the benefits of upside-down watering, consider your plants’ specific needs and how this method can meet them effectively.
Upside-down watering offers several advantages for your plants:
- Even Moisture Distribution: Gravity pulls the water downward, ensuring that the entire root system receives water evenly.
- Prevention of Soil Compaction: Watering from the bottom up helps prevent soil compaction, allowing the roots to breathe and absorb nutrients more efficiently.
- Reduced Evaporation: By delivering water directly to the roots, upside-down watering reduces water loss through evaporation.
- Prevention of Fungal Diseases: Watering from the bottom helps keep the foliage dry, reducing the risk of fungal diseases that thrive in moist conditions.
Tips for Success
To ensure successful upside-down watering, consistently monitor the moisture level of the soil. Use your finger to check the soil’s moisture before watering. Ideally, the soil should be slightly dry before adding water.
Ensure the water bottle is securely attached to avoid any accidents. Position the bottle in a way that allows for easy refilling and maintenance. Choose the right size of water bottle based on the plant’s water needs and the container size.
Keep an eye out for any signs of overwatering or underwatering, such as yellowing leaves or soil that’s too wet or too dry. Adjust the watering frequency as needed to maintain optimal soil moisture.
Conclusion
So there you have it, a simple and practical way to water your plants upside down using a water bottle. It may seem a bit unconventional, but the benefits are undeniable.
Just remember to select the right bottle, prepare it properly, and monitor and refill as needed. Your plants will thank you for the consistent and efficient watering method.
Happy gardening!

