Diy Pet Water Bottle: 7 Easy & Quick Steps!
Making a DIY pet water bottle is a cost-effective, innovative, and convenient way of ensuring that your pet has access to clean water, especially when travelling or going on an outing. All you need are simple materials like a plastic bottle, a small bowl, a drill, and some adhesive.
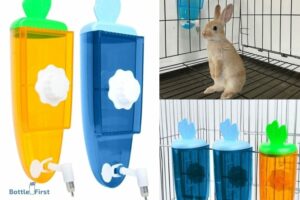
A DIY pet water bottle is a homemade water dispenser for pets, often made from a plastic bottle.
It is designed in such a way that when the bottle is inverted and plugged into a small bowl, water can drip from the bottle into the bowl, providing a steady supply of water for your pets. It can also regulate the water flow, preventing spillage and over-drinking.
A DIY pet water bottle not only ensures that your pet has a consistent supply of clean water but it also fosters responsible pet parenting.
By making one, you are proactively providing for your pet’s needs and contributing to sustainability by repurposing disposable materials. Through this ingenious solution, you are promoting good health for your pet and helping the environment.
7 Steps: DIY Pet Water Bottle
| DIY Pet Water Bottle | Description |
|---|---|
| Materials Needed | 1. Any plastic water bottle (16 oz, 20 oz, 2 L, etc.) 2. Duct tape 3. Food-grade silicone 4. Drill with bit |
| Step 1 | Clean and dry the plastic water bottle thoroughly |
| Step 2 | Using a drill, make a small hole about 1 inch from the base of the bottle |
| Step 3 | Smoothen the drilled hole with sandpaper to ensure no sharp edges |
| Step 4 | Apply food-grade silicone around the hole on the inside and outside of the bottle |
| Step 5 | Allow the silicone to dry completely |
| Step 6 | Test the bottle by filling it with water and placing it upside down. Water should slowly drip from the hole |
| Step 7 | Secure the bottle to your pet’s cage using duct tape |
| Caution | Always monitor your pet’s behavior with the DIY pet water bottle to ensure they are drinking enough and the bottle is functioning correctly |
| Cost | Minimal, most materials can be found around the home |
Key Takeaway
Five Facts About Diy Pet Water Bottle
Benefits Of Diy Pet Water Bottle
Having a diy pet water bottle can be a game-changer for pet parents on the go. Whether you’re taking a hike, going for a car ride, or simply spending time outdoors, a diy pet water bottle ensures that your furry friend stays hydrated.
Let’s explore some of the key benefits of this handy accessory:
Convenience And Portability
- Easy to carry: The diy pet water bottle is designed to be lightweight and portable, making it a breeze to carry along on your adventures.
- No need for bowls: With a built-in water dispenser, you can say goodbye to carrying bulky bowls and the hassle of finding a clean surface for your pet to drink from.
- Quick and easy hydration: Simply press the button on the diy pet water bottle, and water flows out effortlessly, providing instant refreshment for your pet.
Cost-Effective And Environmentally Friendly
- Cost-effective alternative: Diy pet water bottles are a budget-friendly option compared to purchasing single-use plastic bottles or disposable water bowls.
- Environmentally conscious choice: By using a reusable diy pet water bottle, you contribute to reducing plastic waste and protecting the environment.
Ensures Hydration On-The-Go
- Hydration anytime, anywhere: Whether you’re out for a walk, traveling, or enjoying outdoor activities, a diy pet water bottle ensures that your pet always has access to fresh water.
- Prevents dehydration: Regular hydration is crucial for your pet’s health, especially during hot weather or physical exertion. With a diy pet water bottle, you can stay proactive in keeping your furry friend hydrated.
A diy pet water bottle offers convenience, cost-effectiveness, and ensures your pet’s hydration on the go.
By incorporating this practical accessory into your outings, you can provide your furry companion with the necessary hydration they need to stay happy and healthy.
So why not give it a try and make your adventures with your pet even more enjoyable?
How To Make A Diy Pet Water Bottle
Are you tired of carrying around a bulky water dish every time you take your pet for a walk? Well, we have the perfect solution for you – a diy pet water bottle!
Not only is it convenient and easy to carry, but it also ensures that your furry friend stays hydrated on the go.
In this guide, we will walk you through the step-by-step process of making your own diy pet water bottle. Let’s get started!
Materials Needed
To make your own diy pet water bottle, you will need the following materials:
- Empty plastic bottle with a screw-on cap: Choose a bottle size that is suitable for your pet and easy to carry.
- A small pet water dispenser: This can be either a commercially available pet water dispenser or a diy version.
- Scissors: To cut the bottle and dispenser.
- Hot glue gun or strong adhesive: To secure the components together.
- Water: Fill the bottle with fresh, clean water before heading out.
Step-By-Step Instructions
Now that you have gathered all the necessary materials, let’s dive into the step-by-step instructions for making your diy pet water bottle:
- Choosing the right bottle: Select a plastic bottle with a screw-on cap that is suitable for your pet’s size and travel needs. Consider the bottle’s capacity and shape, which should be comfortable for your pet to drink from.
- Preparing the bottle: Ensure that the bottle is thoroughly cleaned and free from any residue or odor. Remove any labels or stickers, and wash the bottle with warm water and mild soap if necessary. Rinse it thoroughly and let it air dry.
- Creating the water dispenser: Take the small pet water dispenser and determine the size of the opening needed to fit into the bottle cap. Use the scissors to carefully cut a hole in the center of the cap that matches the size of the dispenser.
- Securing the bottle for travel: Apply hot glue or strong adhesive around the edges of the dispenser, and press it firmly into the hole you made in the cap. Ensure that it is securely attached and doesn’t leak when filled with water.
- Testing for leakages: Fill the bottle with water and tighten the cap. Turn the bottle upside down and gently squeeze it to check for any leaks. Adjust the dispenser and seal any gaps if necessary.
- Ensuring cleanliness: Before each use, make sure to wash the bottle and dispenser with warm, soapy water. Rinse them thoroughly to remove any soap residue before refilling with fresh water for your pet.
Now you have your own diy pet water bottle ready to go! Make sure to carry it with you whenever you take your pet out for a walk or on any outdoor adventure.
Remember, staying hydrated is essential for your pet’s well-being, so offer them water regularly during your outings.
Keep your furry friend happy and hydrated with this simple and practical diy pet water bottle. Enjoy your time together outdoors without worrying about carrying around a bulky water dish. Happy hydrating!
Tips For Using Diy Pet Water Bottle
Proper maintenance and cleaning:
- Regularly clean the diy pet water bottle to ensure your pet’s health and safety.
- Wash the bottle with warm water and mild soap at least once a week.
- Thoroughly rinse the bottle to remove any soap residue.
- Inspect the bottle for any signs of wear and tear, such as cracks or leaks, and replace if necessary.
- Check the water bottle’s nozzle or spout to make sure it is clean and free from blockages.
- Keep the bottle in a clean and dry area when not in use to prevent the growth of bacteria.
Ensuring fresh and clean water:
- Refill the diy pet water bottle with fresh water regularly, especially on hot days when pets tend to drink more.
- Use filtered or purified water to provide the best quality water for your pet.
- Empty any remaining water and clean the bottle before refilling it to prevent bacteria growth.
- Monitor the water level in the bottle and refill it as needed to ensure your pet always has access to water.
- Place the water bottle in a shaded area to prevent the water from becoming too warm and less appetizing for your pet.
Adjusting the water flow for your pet’s comfort:
- Some pets may prefer a certain water flow, so adjust the bottle’s nozzle to cater to your pet’s needs.
- Experiment with different flow settings on the nozzle to find the one that your pet is most comfortable with.
- If your pet is hesitant to drink from the bottle, try gently squeezing it to create a small water stream to entice them.
- Observe your pet’s drinking habits and make necessary adjustments to ensure they are getting enough water.
- Remember to always provide a regular bowl of water as an alternative option for your pet.
Remember, using a diy pet water bottle can be a convenient and efficient way to keep your pet hydrated. However, it’s important to maintain proper cleaning and hygiene practices to ensure your pet’s well-being.
By following these tips, you can provide fresh and clean water for your furry friend while catering to their individual needs.
Creative Diy Pet Water Bottle Ideas
Pet water bottles are an essential item for keeping our furry friends hydrated throughout the day. While store-bought options are readily available, why not get creative and make your own diy pet water bottle?
Not only is it a fun project, but it also allows you to personalize the water bottle to suit your pet’s needs and preferences.
In this section, we will explore some creative diy pet water bottle ideas that you can try.
Adding A Filter To The Water Bottle
A filter can help ensure that your pet drinks clean and fresh water. Here’s how you can add a filter to your diy pet water bottle:
- Start with a plastic water bottle with a screw-on cap.
- Cut a small hole in the cap, just big enough to fit the end of a filter.
- Insert the filter into the hole, making sure it is secure.
- Fill the bottle with water, and screw the cap on tightly.
- When your pet drinks from the bottle, the water will pass through the filter, removing any impurities.
Personalizing Your Pet’S Water Bottle
Adding a personal touch to your pet’s water bottle can make it even more special. Here are a few ways you can personalize it:
- Use stickers or decals to decorate the bottle with your pet’s name or cute designs.
- Attach a keychain or charm that represents your pet’s personality or interests.
- Paint the bottle with pet-friendly and non-toxic paint, adding fun patterns or colors.
- Wrap the bottle with a custom-made fabric sleeve that showcases your pet’s unique style.
Upcycling Household Items For Diy Pet Water Bottles
Don’t let unused household items go to waste. Instead, upcycle them to create diy pet water bottles.
Here are some ideas:
- Use an empty plastic juice or soda bottle by cleaning it thoroughly and converting it into a water dispenser for your pet.
- Repurpose a glass jar with a secure lid. Drill a small hole in the lid and attach a drinking spout for easy access.
- Convert an old watering can into a gravity-fed water container by attaching a tube and nozzle.
- Cut the top portion off a plastic milk jug, leaving the handle intact. Fill it with water and use the handle as a convenient way to carry and pour water for your pet.
With these creative ideas, you can make diy pet water bottles that are not just functional but also reflect your pet’s personality. So go ahead, get crafty, and give your furry friend a one-of-a-kind water bottle they’ll love!
Alternatives To Diy Pet Water Bottle
Portable Pet Water Bottle Options
When it comes to keeping your furry friend hydrated on the go, a diy pet water bottle may not always be the most convenient option. Luckily, there are a variety of portable pet water bottle alternatives that are readily available in the market.
These innovative solutions provide a hassle-free and efficient way to ensure your pet stays hydrated, whether you’re on a hike, road trip, or simply out for a stroll in the park. Let’s explore some of the top options:
Collapsible Pet Water Bowls
- Lightweight and compact design allows for easy storage in your bag or pocket.
- Made from durable materials to withstand rugged use.
- Simply fill the bowl with water and let your pet drink freely.
- Some models come with an attached carabiner for convenient attachment to your backpack or belt loop.
Portable Pet Water Bottles With Dispenser
- Incorporates a built-in dispenser that releases water when you press a button.
- Convenient and mess-free way to offer your pet a drink on the go.
- Most bottles feature a leak-proof design to prevent any spills or wasted water.
- Compact size ensures easy portability, making them ideal for walks, hikes, and travel.
Pet Water Bottle With Foldable Tray
- Features a foldable tray attached to the water bottle.
- Simply unfold the tray, fill it with water, and allow your pet to drink comfortably.
- Prevents the need for carrying a separate bowl or finding a suitable surface for your pet to drink from.
- Lightweight and easy to use, making it a popular choice for pet owners on the move.
Pet Water Dispensers For Home Use
While portable options are great for adventures outside the home, it’s important to have a reliable water dispenser for your pet’s daily needs.
These dispensers simplify the process of keeping your pet hydrated, ensuring a continuous supply of fresh water at home.
Here are a few popular options:
Gravity Water Dispensers
- Automatically replenish water as your pet drinks, ensuring a constant supply.
- Large capacity allows for extended periods without refilling.
- Easy to clean and maintain, with most models being dishwasher safe.
- Ideal for busy pet owners who want a convenient solution for keeping their fur babies hydrated throughout the day.
Electric Water Fountains
- Encourage pets to drink more water with their playful flowing streams.
- Filtered water helps remove impurities, providing a healthier drinking experience.
- Suitable for multi-pet households, as most fountains offer multiple drinking stations.
- Quiet operation ensures minimal disturbance, making it suitable for all types of homes.
Other Travel Watering Solutions
In addition to portable pet water bottles, there are a few other alternatives that can help you keep your pet hydrated on the go. These options offer flexibility and convenience, catering to different preferences and situations:
Disposable Water Pouches
- Lightweight and portable, perfect for short trips and emergencies.
- Simply tear open the pouch and let your pet drink directly from it.
- Easy to dispose of after use, reducing the need for cleaning and maintenance.
Outdoor Water Bowls
- Designed specifically for outdoor use, such as camping or picnics.
- Often collapsible or foldable, making them easy to pack and carry.
- Some bowls feature a waterproof lining to prevent leakage and messes.
- Suitable for providing water to multiple pets simultaneously.
Backpack With Built-In Water Bladder
- Ideal for adventurous pet owners who enjoy hiking or long walks.
- Allow your pet to drink directly from the built-in water bladder attached to your backpack.
- Hands-free design ensures maximum convenience and mobility during outdoor activities.
- The bladder can be easily refilled whenever necessary.
With these various alternatives to diy pet water bottles, you can find the perfect solution to keep your furry friend hydrated, regardless of your location or lifestyle.
Choose the option that best suits your needs and embark on exciting adventures with your pet, knowing that they’ll always have access to fresh water.
Can I Follow the Same Steps for Making a DIY Pet Water Bottle as a Gallon Water Bottle DIY?
When it comes to crafting your own pet water bottle, you may wonder if the same steps can be applied as with a gallon water bottle DIY. Luckily, with the right diy gallon water bottle tutorial, you can easily follow similar steps for both projects. Just ensure you have the necessary materials and instructions specific to your desired pet water bottle design.
FAQ About Diy Pet Water Bottle
How Can I Make A Diy Pet Water Bottle?
Making a diy pet water bottle is easy. You just need a clean plastic bottle, fill it with water, and create a small hole on the cap for your pet to drink from.
Why Should I Use A Diy Pet Water Bottle For My Pet?
Using a diy pet water bottle for your pet is beneficial because it ensures a continuous supply of fresh water, prevents spills, and promotes better hydration.
Can I Use Any Plastic Bottle For A Diy Pet Water Bottle?
It is recommended to use a bpa-free plastic bottle for your diy pet water bottle to ensure the safety and well-being of your pet.
How Often Should I Clean My Diy Pet Water Bottle?
To maintain hygiene, it is recommended to clean your diy pet water bottle at least once a week. Use warm soapy water and thoroughly rinse it before refilling.
Is A Diy Pet Water Bottle Suitable For All Types Of Pets?
A diy pet water bottle is suitable for most household pets including dogs, cats, rabbits, and small rodents. However, it may not be suitable for larger or more active pets who require more water.
Conclusion
To summarize, creating a diy pet water bottle is a simple and cost-effective solution for ensuring your furry friend stays hydrated. With just a few materials and a little bit of time, you can provide your pet with a constant supply of fresh, clean water.
Not only is it convenient, but it also helps to protect the environment by reducing plastic waste. By following the step-by-step instructions outlined in this blog post, you can customize the bottle to suit your pet’s needs and preferences.
Additionally, remember to regularly clean and refill the bottle to maintain optimal hygiene. So why wait? Give it a try and see the difference it can make for your beloved pet. Happy diy-ing!