Diy Small Animal Water Bottle: Step by Step Guide!
Creating a DIY small animal water bottle is a simple task that can be achieved using readily available materials like a plastic bottle, a small rubber tube, and a water bottle cap.
It not only saves cost but also gives the owner the opportunity to customize the water bottle to the pet’s preference. It ensures your pet stays hydrated and comfortable.
DIY small animal water bottle projects involve using a plastic bottle and a rubber tube that serves as a sipper. The bottle is filled with water and tightly sealed.
The tube’s end is pushed through the bottle cap to allow the pet to sip water as desired. This water bottle is then attached to the animal’s cage.
DIY small animal water bottles are a perfect solution for pet owners looking to save cost and provide personalized care for their pets. These do-it-yourself projects let you create a comfortable hydration system that caters to your pet’s needs. You can customize the water bottle’s size and the tube’s length to suit your pet’s specific preferences.
Essential Tips for Setting Up a DIY Small Animal Water Bottle
| Animal Type | Materials Needed | Steps | Additional Tips |
|---|---|---|---|
| Hamster | Water bottle, suction cups, wire, drill | 1. Drill hole in bottle cap 2. Attach wire to bottle 3. Fix suction cups to wire 4. Fill bottle with water 5. Attach to cage | Clean the bottle regularly |
| Rabbit | Water bottle, string, tube, drill | 1. Drill hole in bottle cap 2. Attach tube to bottle cap 3. Hang bottle inside cage using string 4. Fill bottle with water | Use a bigger bottle |
| Guinea Pig | Water bottle, wire, drill, small ball | 1. Drill hole in bottle cap 2. Insert small ball in tube attached to cap 3. Attach wire to bottle 4. Fill bottle with water 5. Fix bottle to cage using wire | Check water level daily |
| Chinchilla | Glass water bottle, string, metal tube | 1. Attach metal tube to bottle 2. Hang bottle in cage using string 3. Fill bottle with water | Use glass bottle to avoid chewing |
| Ferret | Water bottle, cable ties, drill, tube | 1. Drill hole in bottle cap 2. Attach tube to bottle cap 3. Secure bottle to cage using cable ties 4. Fill bottle with water | Ferrets may prefer bowls, observe your pet carefully |
Key Takeaway
Five Facts About Setting Up a DIY Small Animal Water Bottle
Why Diy Small Animal Water Bottle Matters
Importance Of Providing Clean And Fresh Water
Small animals, such as hamsters, guinea pigs, and rabbits, rely on a continuous supply of clean and fresh water for their well-being.
Here’s why it is crucial to ensure that your furry friend has access to clean and fresh water:
- Hydration: Just like humans, small animals need water to stay hydrated. Water helps in maintaining the overall health and functioning of their bodies, including digestion, circulation, and temperature regulation.
- Prevents dehydration: Dehydration can lead to various health issues in small animals, including organ failure and even death. Providing them with a water source ensures they stay hydrated throughout the day.
- Promotes metabolism: Adequate water intake supports optimal metabolism in small animals. It aids in the digestion and absorption of nutrients from their food, allowing them to extract the necessary energy.
- Maintains urinary tract health: Regular water consumption assists in keeping the urinary system healthy in small animals. It helps in flushing out toxins and preventing the formation of urinary stones or infections.
- Enhances overall well-being: By providing clean and fresh water, you contribute to the overall well-being of your small pet. It promotes their comfort, happiness, and ensures they thrive in their environment.
The Challenges Of Using Conventional Water Bottles
While conventional water bottles are commonly used for small animals, they come with their own set of challenges.
Here are some drawbacks that may arise when using regular water bottles:
- Leakage and wet bedding: Conventional water bottles are prone to leakage, leading to wet bedding and an unhygienic environment. This can increase the risk of bacterial growth and contribute to unpleasant odors.
- Difficult water-level monitoring: It can be challenging to accurately monitor the water level in traditional water bottles. This may result in insufficient water supply or not knowing when to refill the bottle.
- Potential blockage: The nozzles of conventional water bottles can become blocked by debris, preventing water flow. This blockage can go unnoticed, leaving the small animal without access to water.
- Inaccessibility for certain animals: Some small animals, such as rabbits, may find it challenging to drink from traditional water bottles due to their position or body size. This can lead to dehydration if not addressed.
Benefits Of Diy Solutions
Considering the challenges associated with conventional water bottles, diy solutions can be a practical alternative.
Here are some advantages of using diy small animal water bottle setups:
- Control over water quality: By creating your diy water bottle, you have full control over the cleanliness and freshness of the water provided to your pet. You can ensure it is free from debris, contaminants, and bacterial growth.
- Customizable design: Diy solutions allow you to customize the water bottle setup to suit your pet’s needs and characteristics. You can adjust the nozzle height, choose appropriate materials, and create a setup that ensures easy access to water.
- Cost-effective: Making your own diy water bottle can be more affordable than purchasing commercial alternatives. It allows you to utilize readily available materials, reducing the expense of specialized products.
- Reduced leakage risks: With careful assembly, diy water bottle setups can minimize the risk of leakage. This helps maintain a cleaner and drier environment for your small animal.
- Enhanced pet interaction: Building a diy water bottle setup can be a fun and creative project that involves your active participation. It allows you to bond with your small animal as you design and assemble the setup together.
Remember, providing clean and fresh water is essential for the health and well-being of small animals.
While conventional water bottles may present challenges, diy solutions offer benefits that can enhance your pet’s quality of life and make their water supply more manageable.
Materials And Tools Needed
In order to make your own diy small animal water bottle, you will need the following materials and tools:
- Clear plastic bottle with screw-on cap: The bottle will serve as the main component of the water bottle. Make sure it is made of clear plastic and has a screw-on cap to prevent leaks.
- Strong adhesive or glue: You will need a strong adhesive or glue to secure certain parts of the water bottle together. This will ensure that the bottle remains stable and doesn’t come apart.
- Drill or heated nail: A drill or heated nail will be necessary to create a hole in the plastic bottle. This hole will serve as the opening for the water to flow out of the bottle.
- Scissors: Scissors will be needed to cut any excess plastic or to make certain modifications to the bottle as needed.
- Small bowl or dish: You will need a small bowl or dish to catch any water that may drip from the bottle. This will help keep the area around the water bottle clean and prevent any mess.
- Wire or zip ties: Wire or zip ties will be used to secure the water bottle to the cage or enclosure. This will ensure that the bottle remains in place and doesn’t tip over.
- Optional: Decorative elements: if you want to add a personal touch to your small animal water bottle, you can include decorative elements such as stickers or paint. This is optional and purely for aesthetic purposes.
Remember to gather all the necessary materials and tools before starting your diy project. It’s always best to be prepared and have everything you need readily available.
Steps To Create Your Diy Small Animal Water Bottle
Creating a diy small animal water bottle can be a fun and cost-effective way to provide your furry friend with a constant supply of fresh water.
Follow these simple steps to create your own diy small animal water bottle:
Preparing The Bottle For Use
Before getting started, it’s essential to prepare the bottle properly:
- Cleaning the bottle thoroughly: Ensure that the bottle is clean and free of any residues or contaminants that could potentially harm your pet.
- Removing labels and any adhesive residue: Peel off any labels or sticky residues on the bottle to ensure a clean and safe water source for your small animal.
Creating The Spout
Next, it’s time to create the spout for the water to flow through:
- Choosing the desired location for the spout: Determine where on the bottle you want the spout to be located for easy access by your pet.
- Using the drill or heated nail to create a small hole: Carefully drill or heat a nail to create a small hole just big enough for the spout to fit snugly.
Attaching The Spout To The Bottle
Now it’s time to attach the spout securely to the bottle:
- Applying adhesive around the hole: Apply a small amount of adhesive, such as non-toxic silicone sealant, around the hole to create a watertight seal.
- Inserting the spout into the hole: Gently insert the spout into the hole, ensuring that it fits securely and doesn’t leak.
- Allowing the adhesive to dry and secure the spout: Give the adhesive enough time to dry and set properly before moving on to the next step.
Installing The Bottle In The Cage Or Enclosure
Once the spout is securely attached, it’s time to install the bottle in the cage or enclosure:
- Choosing a suitable location within reach of your pet: Select a convenient spot where your small animal can easily access the water bottle without any obstacles.
- Securing the bottle using wire or zip ties: Use wire or zip ties to securely fasten the bottle to the cage or enclosure, making sure it stays in place even with small animal movements.
Testing And Adjusting The Water Flow
After installing the bottle, it’s important to test and adjust the water flow as needed:
- Filling the bottle with water: Fill the bottle with water, leaving enough space to avoid overflowing when the pet drinks.
- Observing the water flow and making necessary adjustments: Observe how the water flows through the spout and make any adjustments to ensure a steady, controlled flow that your small animal can easily drink from.
By following these simple steps, you can create your own diy small animal water bottle that provides your pet with a constant supply of fresh water. It’s an easy and practical solution to ensure your furry friend stays hydrated throughout the day.
Tips For Maintenance And Safety
Taking proper care of your diy small animal water bottle is essential to ensure your pet’s health and well-being.
Regular maintenance and adherence to safety guidelines will help ensure that your furry friend has access to clean and fresh water at all times.
Here are some important tips to keep in mind:
Regular Cleaning And Sanitization
It’s crucial to regularly clean and sanitize the water bottle to prevent bacterial growth and contamination.
Follow these steps for effective cleaning:
- Start by disassembling the water bottle, including removing the spout and cap.
- Rinse all the parts with warm water to remove any residue.
- Use a mild dish soap to clean the bottle thoroughly, ensuring you reach all the corners.
- Rinse the bottle and all the parts thoroughly to remove any soap residue.
- To sanitize the bottle, you can use a mixture of water and white vinegar or a diluted bleach solution. Soak the parts in the solution for a few minutes, then rinse thoroughly.
- Allow all the parts to air dry before reassembling the water bottle.
Regular cleaning and sanitization, ideally once a week, will help maintain a hygienic water supply for your small animal.
Checking For Leaks Or Clogs
Periodically checking for leaks or clogs is important to ensure the water bottle is functioning properly.
Here’s what you should do:
- Inspect the bottle for any cracks or damage. If you notice any, replace the bottle immediately.
- Fill the bottle with water and hold it upside down to check for leaks. If there are any leaks, adjust the spout or replace it if necessary.
- Check that the water flow is steady and not blocked. Remove any debris or clogs that may obstruct the spout.
- Ensure the bottle is securely attached to the cage. Loose attachments can lead to accidents or spills.
Regularly checking for leaks or clogs will help maintain a consistent water supply for your small animal.
Monitoring Water Intake And Refilling As Needed
It’s important to monitor your small animal’s water intake and refill the bottle as needed.
Here’s what you should keep in mind:
- Observe your pet’s water consumption to ensure they are drinking an adequate amount. Any sudden changes in intake may signal an issue.
- Check the water level in the bottle regularly and refill it when it’s running low.
- During hot weather or periods of increased activity, your small animal may require more frequent refills to stay hydrated.
By monitoring water intake and refilling the bottle as needed, you can make sure your small animal always has access to fresh water.
Ensuring The Bottle Is Securely Attached To Prevent Accidents
To ensure your small animal’s safety and prevent accidents, it’s important to securely attach the water bottle to the cage.
Follow these guidelines:
- Use sturdy and reliable attachments designed specifically for small animal water bottles.
- Ensure the attachment is firmly secured to the cage, preventing any wobbling or dislodging.
- Regularly check the attachment for any signs of wear or damage. Replace it if necessary.
- Place the water bottle at a convenient height for your small animal to access without straining or stretching.
By properly securing the water bottle, you can prevent accidents and ensure your small animal’s well-being.
Regularly Inspecting And Replacing Worn-Out Parts
Over time, the components of the diy small animal water bottle may wear out and require replacement. Regular inspections are crucial for maintaining functionality and safety.
Here’s what you should do:
- Take a closer look at all the parts of the water bottle, including the spout, cap, and attachment.
- Look for signs of wear, such as cracks, discoloration, or loose fittings.
- Replace any worn-out parts promptly to maintain the water bottle’s effectiveness and prevent leaks or other issues.
Regularly inspecting and replacing worn-out parts will help ensure your small animal’s water bottle continues to work properly.
Remember, by following these maintenance and safety tips, you can provide your small animal with a clean and reliable water source.
Regular cleaning, checking for leaks or clogs, monitoring water intake, ensuring secure attachments, and inspecting and replacing worn-out parts will contribute to your pet’s overall health and well-being.
How Can I Personalize a Small Animal Water Bottle?
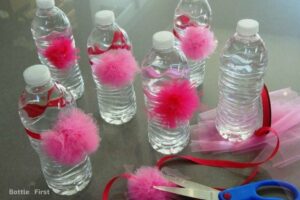
Looking to personalize a small animal water bottle? Follow this step-by-step personalized water bottle tutorial. Start by choosing a water bottle suitable for your pet’s size and needs. Next, gather materials like stickers, markers, or even their name tag. Then, get creative and decorate the bottle according to your pet’s unique personality. Finally, ensure the personalized touches are securely attached and easily washable.
FAQ About Diy Small Animal Water Bottle
How Do You Make A Diy Small Animal Water Bottle?
To make a diy small animal water bottle, you will need a plastic water bottle, a drill, and a water bottle cap with a drinking spout. Start by drilling a hole near the bottom of the bottle, insert the spout, and secure it with the cap.
What Is The Purpose Of A Small Animal Water Bottle?
A small animal water bottle is used to provide a continuous supply of fresh and clean water to small pets like rabbits, guinea pigs, and hamsters. It helps them stay hydrated throughout the day.
How Often Should A Small Animal Water Bottle Be Cleaned?
To ensure your pet’s health, it is recommended to clean the small animal water bottle at least once a week. Empty the bottle, wash it with warm soapy water, and rinse thoroughly before refilling.
Can I Use A Small Animal Water Bottle For Other Pets?
Small animal water bottles are specifically designed for small pets like rabbits, guinea pigs, and hamsters. While they may work for other small animals, it is best to consult with a veterinarian for recommendations for different pets.
What Are The Benefits Of Using A Diy Small Animal Water Bottle?
Using a diy small animal water bottle allows you to customize the size and design to suit your pet’s needs. It also promotes better hygiene, prevents spills, and provides easy access to water for your furry friend.
Conclusion
So, there you have it – a diy small animal water bottle that is easy to make and provides your furry friend with a constant supply of fresh water. By using simple materials and following a few steps, you can ensure that your pet stays hydrated and healthy.
Remember to regularly clean and fill the water bottle to maintain its effectiveness. Diy projects like this not only save money but also give you the satisfaction of providing for your pet’s needs in a creative and resourceful way. So why not give it a try?
Your small animal will thank you for it!