Diy Insulated Water Bottle – 7 Easy Steps
A DIY insulated water bottle is an easy way to keep your water cold for hours. This can be done using simple materials like an old sock, duct tape, and some aluminum foil.
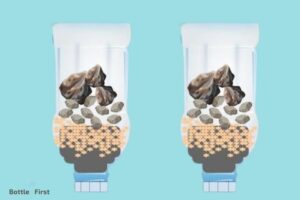
The insulation works by keeping the heat or cold from transferring to the water inside the bottle.
Insulation works by slowing down the transfer of heat, which is the energy that flows between objects of different temperatures.
So, in the case of a water bottle, the insulation keeps the water inside the bottle cool by slowing the transfer of heat from the air outside the bottle to the water inside.
A DIY insulated water bottle is not only cost-effective but also an excellent way to repurpose old materials.
The process involves wrapping the bottle in a thermal layer, such as an old sock, and then adding a layer of aluminum foil.
This creates a barrier that reduces the rate of heat transfer, keeping your water cooler for a longer period.
Sure, here’s a simple table.
7 Steps of Insulated Water Bottles
| Steps | Materials Needed | Instructions |
|---|---|---|
| 1. | Insulated water bottle, Spray-on foam insulation, Newspapers, Masking tape | Purchase necessary items from a hardware store or online. |
| 2. | Safety goggles, Gloves | Ensure you’re properly equipped with safety gear before handling the spray-on foam insulation. |
| 3. | Newspapers, Insulated water bottle, Masking tape | Cover the area with newspapers and mask off the parts of the water bottle you don’t want to insulate. |
| 4. | Spray-on foam insulation, Insulated water bottle | Apply the spray-on foam insulation on the water bottle as per the instructions on the product. |
| 5. | – | Let it dry for the recommended time. |
| 6. | Sandpaper | Once dry, sand off any excess foam insulation. |
| 7. | Paint (optional) | Finally, you can paint your DIY insulated water bottle if you wish. |
Please note that this is a general procedure and may not fit the specifics of all DIY insulated water bottle projects.
Key Takeaway
Five Facts About Choose an Insulated Water Bottle
What Is A Diy Insulated Water Bottle And Why Make One?
Are you tired of lugging around heavy water bottles that lose their temperature after just a few hours? If so, it’s time to consider making your own diy insulated water bottle.
This simple project allows you to create a bottle that will keep your beverages hot or cold for extended periods, all while saving you money.
Let’s explore the benefits of using an insulated water bottle and the cost-saving advantage of making your own diy version.
Benefits Of Using An Insulated Water Bottle:
- Temperature control: An insulated water bottle is designed to keep your beverages at the desired temperature for longer periods. Whether you prefer ice-cold water on a hot summer day or a warm cup of tea during winter, an insulated bottle ensures that your drinks stay at the perfect temperature.
- Hydration on the go: With an insulated water bottle, you no longer have to settle for lukewarm water or rely on single-use plastic bottles. Whether you’re hiking, going to the gym, or running errands, you can enjoy refreshing drinks throughout the day.
- Durability: Insulated water bottles are typically made from high-quality materials, such as stainless steel or bpa-free plastic. This durability ensures that your bottle can withstand the rigors of daily use, making it a reliable companion for your adventures.
- Environmentally friendly: By using a reusable insulated water bottle, you’re reducing your reliance on disposable plastic bottles. This eco-friendly choice helps decrease plastic waste and contributes to a healthier planet.
Cost-Saving Advantage Of Making Your Own Diy Version:
- Customization: Making your own diy insulated water bottle allows you to personalize it according to your preferences. From choosing the size and design to adding unique features like fruit infusers or tea strainers, you have the freedom to create a bottle that suits your needs.
- Budget-friendly: Purchasing a high-quality insulated water bottle can sometimes be expensive. However, making your own diy version can be a cost-effective alternative. By repurposing an existing bottle or using affordable materials, you can save money while still enjoying the benefits of an insulated container.
- Do-it-yourself satisfaction: There’s a sense of accomplishment that comes with creating something with your own hands. Making your diy insulated water bottle can be a fun and rewarding project, allowing you to showcase your creativity and resourcefulness.
Now that you understand the benefits of using an insulated water bottle and the cost-saving advantage of making your own diy version, it’s time to embark on this exciting journey.
Get ready to stay hydrated and enjoy your favorite beverages at the perfect temperature, all while saving money and reducing plastic waste.
Start by gathering the materials and let your creativity flow!
Exploring Various Insulation Materials
Pros And Cons Of Different Insulation Materials
Insulation is a crucial factor to consider when planning to diy an insulated water bottle.
The right insulation material can help keep your drink hot or cold for longer durations, enhancing your overall drinking experience. In this section, we will explore various insulation materials, their pros, and cons.
This will help you make an informed decision on which material to choose for your diy insulated water bottle.
Foam:
- Forms a barrier against heat transfer, providing good insulation.
- Lightweight and easy to work with.
- Budget-friendly option.
- May degrade over time and lose its insulating properties.
- Susceptible to mold growth if not properly maintained.
Rubber:
- Offers excellent insulation capabilities.
- Can withstand extreme temperatures.
- Durable and long-lasting.
- Thicker rubber may add bulk to your water bottle.
- Requires precise cutting and careful sealing to ensure proper insulation.
Reflective foil:
- Reflects radiant heat and sunlight, effectively insulating the bottle.
- High heat reflection ability.
- Can be a bit tricky to work with due to its flimsy nature.
- May require additional layers for optimal insulation.
Cork:
- Natural and sustainable material.
- Provides insulation against temperature fluctuations.
- Lightweight and easy to work with.
- Not as effective as other insulation materials.
- Requires careful sealing to prevent leaks.
Insulation tape:
- Offers a simple and convenient option for insulating your water bottle.
- Easy to apply and customize.
- Provides moderate insulation capabilities.
- May lose adhesive properties over time.
- Limited options for aesthetic customization.
Popular Options For Diy Insulated Water Bottles
Now that we’ve discussed the pros and cons of various insulation materials, let’s delve into the popular options for diy insulated water bottles.
These materials have gained popularity due to their effectiveness and availability, making them great choices for your diy projects.
Neoprene sleeves:
- Provides excellent insulation, keeping your drink cold or hot for extended periods.
- Widely available and easy to find in various colors and designs.
- Offers a snug fit for most water bottle sizes.
- May add some bulk to your water bottle.
Double-walled stainless steel bottles:
- The double walls create a vacuum seal that enhances insulation.
- Durable and long-lasting.
- Lightweight and easy to carry.
- Offers excellent temperature retention.
- Limited options for customization.
Thermal liners:
- Designed specifically for insulating water bottles.
- Offers superior insulation capabilities.
- Provides a versatile and customizable solution.
- Requires careful installation to ensure proper insulation.
Laminated bubble wrap:
- Cost-effective and readily accessible insulation option.
- Provides decent insulation properties.
- Easy to work with and customize.
- May not offer the same level of insulation as other materials.
By understanding the pros and cons of different insulation materials and exploring popular diy options, you can choose the ideal material to create your insulated water bottle.
Whether you prioritize affordability, durability, or customization options, the right insulation material will enhance your drinking experience and keep your beverages at the desired temperature for longer.
Selecting The Suitable Bottle
When it comes to diy insulated water bottles, choosing the right bottle is key. With so many options available, it can be overwhelming to know where to start.
Don’t worry, we’ve got you covered. In this section, we will discuss the factors to consider when selecting a bottle for insulation and recommend some bottle types that are ideal for diy projects.
Factors To Consider When Choosing The Right Bottle For Insulation
- Material: Opt for a bottle made of insulating materials such as stainless steel or double-walled plastic. These materials help regulate the temperature of your drink and keep it cold or hot for longer periods.
- Size and shape: Consider your needs and preferences. Do you need a smaller bottle for portability or a larger one for long hikes? Additionally, the shape of the bottle can affect insulation capabilities, with wider bottles usually providing better performance.
- Lid design: Look for bottles with leak-proof and easy-to-use lids. A secure lid ensures your drink stays insulated and prevents any mishaps while you’re on the go.
- Insulation technology: Some bottles come with advanced insulation technologies like vacuum insulation or copper lining, which offer superior temperature retention. Keep an eye out for these features if you want exceptional insulation performance.
Recommended Bottle Types For Diy Projects
Now that you know what factors to consider, let’s explore some bottle types that work great for diy insulated water bottle projects.
These options are not only readily available but also provide excellent insulation properties for your homemade creations:
- Hydro flask: Hydro flasks are hugely popular for their outstanding insulation capabilities. These stainless steel bottles come in various sizes and colors, making them a fantastic choice for diy projects.
- Yeti rambler: Known for its durability and insulation prowess, the yeti rambler is a go-to option for many diy enthusiasts. Its double-wall vacuum insulation keeps your drinks at the desired temperature for extended periods.
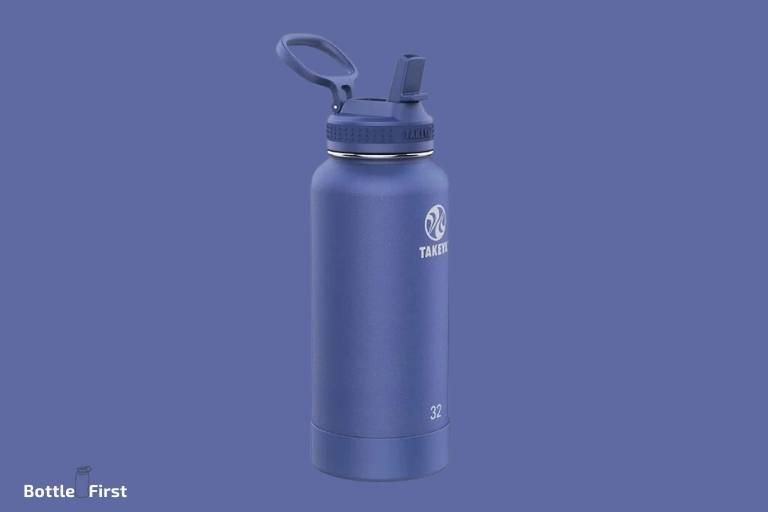
- Takeya actives: Takeya actives bottles offer a sleek design and exceptional insulation. Made from high-quality stainless steel, these bottles keep your beverages cold for up to 24 hours and hot for up to 12 hours.
- Klean kanteen: If you prefer a more eco-friendly option, klean kanteen is a brand worth considering. Their stainless steel bottles are free of harmful chemicals and provide reliable insulation for your diy projects.
Experiment with different bottle types, personalize them with your creative touch, and you’ll have your very own insulated water bottle that matches your style and keeps your drinks at the perfect temperature.
Remember, selecting the right bottle is the first step towards creating a diy insulated water bottle that meets your needs and expectations.
So, take your time, consider the factors mentioned above, and choose a bottle that aligns with your preferences and diy goals.
Gathering The Necessary Tools
Are you tired of buying expensive insulated water bottles that don’t quite meet your needs? Why not try making your own diy insulated water bottle?
Not only will you save money, but you’ll also have the opportunity to customize it to your liking.
In this section, we will discuss the tools you’ll need to gather before embarking on this exciting diy project.
List Of Tools Required For Making A Diy Insulated Water Bottle:
- Water bottle: Choose a reusable water bottle that suits your preferences in terms of shape, size, and material. Make sure it has a wide mouth for ease of assembly.
- Insulating material: A key component of your diy water bottle is the insulation layer. Opt for insulating materials such as foam, neoprene, or thermal batting. These materials will help keep your drink hot or cold for longer periods.
- Scissors or utility knife: These tools will be essential when cutting and shaping the insulating material to fit your water bottle. Ensure that you have a good pair of sharp scissors or a utility knife for precision cutting.
- Adhesive: To secure the insulating material to your water bottle effectively, you’ll need a strong adhesive. Choose a non-toxic adhesive suitable for the materials you’re using, such as fabric glue or adhesive foam tape.
- Measuring tape or ruler: Accurate measurements are crucial for achieving a snug fit between the insulating material and your water bottle. Have a measuring tape or ruler handy to ensure precision during the cutting process.
- Marker or pencil: Before cutting the insulating material, it’s essential to mark the measurements. A marker or pencil will allow you to outline the areas that need to be cut or trimmed, making the process more organized.
Alternatives For Specialized Tools:
- If you don’t have a scissors or utility knife, you can try using a sharp kitchen knife or a serrated bread knife as an alternative. However, exercise caution while cutting to avoid accidents.
- In the absence of fabric glue or adhesive foam tape, you can use a hot glue gun or even strong double-sided tape to attach the insulating material to your water bottle. Just make sure the adhesive you choose is suitable for the materials being used.
By gathering these essential tools, you’re taking the first step towards creating your very own insulated water bottle. This diy project offers both practicality and personalization, allowing you to stay hydrated in style.
In the next section, we will dive into the step-by-step process of assembling your diy insulated water bottle.
Let’s get started!
Getting The Required Supplies
Where To Find The Necessary Supplies
Are you ready to embark on a diy project to create your very own insulated water bottle? Before you dive in, let’s make sure you have all the necessary supplies.
Here, we’ll explore where you can find the materials you need and consider some eco-friendly and sustainable options to help you make an environmentally conscious choice.
Where To Find The Necessary Supplies
When it comes to sourcing the supplies for your diy insulated water bottle project, there are a few options available to you.
Here are some convenient places to find the necessary materials:
- Local hardware stores: Visit your nearest hardware store, as they often stock a wide range of insulation materials, such as foam, rubber, or thermal sheets. Look for insulation specifically designed for water bottles to ensure the best results.
- Online retailers: If you prefer the convenience of online shopping, there are numerous websites where you can purchase insulation materials. Online retailers offer a vast selection, allowing you to compare prices and read customer reviews to make an informed choice.
- Craft stores: Don’t overlook your local craft store, as they often carry different types of insulation materials for various projects. Check the sewing or fabric section for options like neoprene fabric, which is known for its excellent insulation properties.
Options For Eco-Friendly And Sustainable Materials
If sustainability is important to you, consider using eco-friendly materials for your diy insulated water bottle project.
Here are a few environmentally conscious options to explore:
- Recycled insulation: Look for insulation materials made from recycled or upcycled materials. These options not only provide effective insulation but also help reduce waste and minimize your environmental impact.
- Bamboo insulation: Bamboo is a sustainable and renewable resource. It can be used to create insulating sleeves or covers for your water bottle. Additionally, bamboo is known for its durability, ensuring your diy project will stand the test of time.
- Cork insulation: Cork, harvested from the bark of the cork oak tree, is an excellent natural insulator. It is lightweight, resistant to moisture, and has low thermal conductivity. Cork insulation offers both practicality and eco-friendliness.
- Plant-based insulation: Some manufacturers offer insulation made from plant-based materials, such as corn or hemp fibers. These options are biodegradable, renewable, and reduce reliance on synthetic materials.
Remember, it’s essential to choose materials that suit your project’s requirements while aligning with your sustainability goals.
With a little creativity, you can create a diy insulated water bottle that not only keeps your drinks at the perfect temperature but also contributes to a greener planet.
Preparing The Bottle
Prepping The Bottle
When it comes to creating your own insulated water bottle, proper preparation is key to ensure maximum efficiency.
In this section, we will guide you through the necessary steps to get your bottle ready for insulation.
Let’s dive in!
Cleaning the bottle:
- Start by washing the bottle thoroughly with warm soapy water to remove any dirt, debris, or lingering odors. This will ensure a clean surface for the insulation.
- Rinse the bottle thoroughly to remove any soap residue, as it can affect the insulation material’s adhesion.
Removing existing labels or coatings:
- To achieve optimal insulation, it is important to remove any pre-existing labels or coatings on the bottle.
- Gently peel off any stickers or labels using your nails or a flat-edged tool. If stubborn residue remains, use a mild adhesive remover or rubbing alcohol to dissolve it.
- If your bottle has a glossy coating, you can lightly sand it using fine-grit sandpaper. This will create a rough surface that helps the insulation material adhere better.
Inspecting for damages:
- Take a closer look at the bottle to check for any cracks, leaks, or damages. Repair or replace the bottle if necessary, as a flawed bottle may compromise the insulation effectiveness.
Ensuring dryness:
- Before proceeding with insulation, ensure that the bottle is completely dry both inside and outside. Any moisture or dampness can interfere with the insulation process and lead to mold or mildew growth.
Creating a smooth surface:
- If your bottle has any rough edges or imperfections, you can use sandpaper to smooth them out. This will provide a better surface for the insulation material to adhere to.
Applying a primer:
- Applying a primer to the bottle after cleaning and prepping can enhance the adhesion of the insulation material. Look for a primer specifically designed for bonding to plastic or metal surfaces.
Now that you have successfully prepared your bottle for insulation, you are ready to proceed to the next step of the diy insulated water bottle project.
Stay tuned for the upcoming section, where we will guide you through the insulation process itself.
Applying The Insulation Material
Techniques For Properly Applying The Insulation Material
Insulating your water bottle is a great diy project that can help keep your beverages at the desired temperature for longer.
However, it’s essential to apply the insulation material correctly to ensure a secure and efficient insulation layer.
Here are some techniques to help you achieve the best results:
Clean and dry the bottle:
Before applying the insulation material, make sure your water bottle is clean and dry. Any dirt, dust, or moisture on the surface may affect the adhesive properties of the insulation material.
Use a mild detergent and warm water to clean the bottle thoroughly, then let it dry completely.
Choose the right insulation material:
There are various insulation materials available for diy projects, such as foam, neoprene, or reflective insulation.
Consider factors like durability, flexibility, and heat retention properties when selecting the material best suited for your water bottle.
Measure and cut the material:
Take accurate measurements of your water bottle’s dimensions to determine the amount of insulation material required.
Use a sharp pair of scissors or a craft knife to cut the material into the desired shape and size. Remember to leave extra material for overlapping and securing the edges.
Apply an adhesive:
To ensure a secure bond between the insulation material and your water bottle, apply an adhesive to the surface of the bottle before placing the material.
Use a strong, waterproof adhesive suitable for the insulation material you’re using. Follow the instructions provided by the manufacturer for optimal application.
Cover the bottle evenly:
Lay the insulation material flat on a clean surface and carefully place the water bottle on top.
Roll the material around the bottle, making sure it covers the entire surface evenly. Smooth out any wrinkles or air bubbles for a seamless finish.
Secure the edges:
Once the insulation material is wrapped around the bottle, secure the edges to prevent it from unraveling or shifting over time.
Use strong tape or adhesive to hold the edges firmly in place. Ensure that the edges are tightly secured to maintain the insulation layer’s integrity.
Personalize your insulation:
This is an optional step, but if you want to add a personal touch or extra protection, you can decorate the insulation material with stickers, fabric, or even paint.
Just make sure any materials you use are safe and non-toxic, and avoid covering the entire bottle’s surface to maintain the insulation’s efficacy.
Test for effectiveness:
After applying the insulation material, it’s a good idea to test the effectiveness of your diy insulated water bottle.
Fill the bottle with hot or cold water and monitor how well it retains the temperature over time. Make any necessary adjustments or improvements if you notice any issues.
Maintain and clean your insulated bottle:
Insulation materials may require specific care instructions, so ensure you follow them to preserve the insulation’s performance and longevity.
Regularly clean your insulated water bottle using mild soap and warm water to keep it hygienic and ready for use.
Enjoy your temperature-controlled beverages:
Now that you have successfully applied the insulation material to your water bottle, you can enjoy your favorite beverages at the desired temperature for longer periods.
Whether it’s hot coffee on a chilly morning or refreshing cold water during your workout, your diy insulated water bottle will keep your drinks perfectly insulated.
Remember, the success of your diy insulated water bottle project depends on the proper application of the insulation material.
By following these techniques, you can ensure a secure and efficient insulation layer that will maximize heat retention or cooling capabilities.
Sealing And Finishing Touches
Adding a protective layer to the insulation material:
- Consider using a layer of adhesive foam or insulation tape to provide extra protection to the insulation material. This will help seal any gaps and prevent heat transfer or condensation.
- Ensure the adhesive foam or insulation tape is cut to the appropriate size and shape to fit snugly around the water bottle. This will help maintain the insulation and prevent any air leaks.
- Apply the adhesive foam or insulation tape evenly and firmly onto the surface of the insulation material. Make sure to press it down firmly to ensure a secure and long-lasting bond.
- Smooth out any bubbles or creases in the adhesive foam or insulation tape to ensure a neat and professional finish.
- Take extra care when applying the adhesive foam or insulation tape around any openings or joints to create a leak-proof barrier.
- Allow the adhesive foam or insulation tape to fully adhere to the insulation material before moving on to the next step.
Securing all components and ensuring a leak-proof design:
- Double-check that all components, including the insulation material, cap, and any attachments, are securely fastened to the water bottle.
- Inspect the water bottle for any potential areas where leaks may occur, such as around the cap or any seams.
- Apply a small amount of silicone sealant to seal any potential leak points. Ensure that the sealant is compatible with the materials used in the water bottle.
- Spread the silicone sealant evenly and thinly over the targeted areas, using a small brush or your finger, to create a watertight seal.
- Allow the silicone sealant to dry and cure according to the manufacturer’s instructions before using the water bottle.
- Test the water bottle for any signs of leakage by filling it with water and gently tilting it in various directions. If any leaks are detected, reapply the silicone sealant as necessary.
- Regularly inspect and maintain the water bottle to ensure that all components remain securely fastened and that the leak-proof design is maintained.
Remember, these sealing and finishing touches are crucial to create a reliable and effective insulated water bottle.
Taking the time to add a protective layer to the insulation material and ensuring a leak-proof design will enhance the performance of your diy project.
So, seal it right and enjoy your beverage at the desired temperature throughout the day!
Adding Style And Decoration
Creative Ideas For Personalizing Your Diy Insulated Water Bottle
When it comes to creating your own diy insulated water bottle, adding style and decoration is a fun way to make it unique and personalized.
Whether you prefer a minimalist design or a vibrant, eye-catching look, there are several creative ideas to enhance the appearance of your water bottle.
Here are some suggestions to get you started:
- Paint: Use acrylic or enamel paints to add a pop of color to your water bottle. Whether you opt for a simple design or intricate patterns, painting allows you to create a one-of-a-kind look. Consider using stencils or freehand painting for added creativity.
- Stickers: Decorate your diy insulated water bottle with stickers that reflect your personality or interests. From cute animals and inspirational quotes to logos of your favorite brands, there are countless sticker options available. Make sure to choose stickers that are waterproof and durable.
- Decals: Similar to stickers, decals are another way to personalize your water bottle. You can find premade decals online or create your own using vinyl sheets and a cutting machine. Apply the decals carefully, ensuring they adhere smoothly to the surface.
- Washi tape: Add a touch of whimsy to your water bottle by using colorful and patterned washi tape. This decorative tape is easy to apply and remove, allowing you to change up the design whenever you please. Mix and match different tapes to create unique patterns.
- Personalized labels: Design and print personalized labels using sticker paper. Include your name, favorite quotes, or even a custom logo. This option not only adds a personalized touch but also helps you easily identify your water bottle.
- Drip painting: For a unique and artistic look, try drip painting your water bottle. Simply dip a paintbrush or sponge into acrylic paint and let the paint drip down the bottle. Experiment with different colors and techniques to achieve the desired effect.
- Etching: Etching is a permanent way to personalize your diy insulated water bottle. Using etching cream and stencils, you can create intricate designs or monograms on the surface of the bottle. Etched designs provide an elegant and sophisticated look.
- Charms and keychains: Attach small charms or keychains to your water bottle for added decoration. Choose ones that represent your interests or add a touch of sparkle and personality. Just make sure they are securely fastened to avoid loss.
- Heat transfer vinyl: If you have a cutting machine, consider using heat transfer vinyl to add designs to your water bottle. Create custom shapes or phrases and transfer them onto the bottle using heat. This method allows for detailed and precise designs.
- Nature-inspired embellishments: Bring the outdoors to your diy insulated water bottle by attaching dried flowers, leaves, or shells. You can secure them with clear adhesive or encapsulate them in resin for a more durable finish. Nature-inspired embellishments add a unique and organic touch.
Get creative with your diy insulated water bottle and make it a reflection of your style and personality.
Whether you choose to paint, add stickers or decals, use washi tape, or try any of the other ideas mentioned, the possibilities are endless.
Enjoy the process of personalizing your water bottle and make it a true statement piece.
Enhancing Functionality
Have you ever wished your water bottle had more to offer than just hydration? Well, with a little bit of creativity and diy skills, you can enhance the functionality of your insulated water bottle.
Adding additional features and incorporating compartments can make your water bottle even more versatile and convenient.
Let’s explore some ideas to take your diy insulated water bottle to the next level.
Adding Additional Features Like A Flip-Top Lid Or Carrying Handle:
Flip-top lid:
- Allows for easy access to your drink without unscrewing the cap.
- Prevents spills and leaks while on the go.
- Provides a convenient one-handed operation.
Carrying handle:
- Makes it easier to carry your water bottle around.
- Allows you to attach the bottle to your backpack or bag.
- Provides a comfortable grip while on the move.
Incorporating Compartments For Storage Or Infusers:
Storage compartments:
- Ideal for storing small essentials like keys, cards, or snacks.
- Keeps your belongings secure and easily accessible.
- Adds practicality to your water bottle.
Infusers:
- Enables you to infuse your water with fruits or herbs for enhanced flavor.
- Adds a refreshing twist to your hydration routine.
- Provides a healthier alternative to sugary drinks.
By adding these additional features and compartments, you can transform your diy insulated water bottle into an all-in-one companion for your active lifestyle.
Whether you’re heading to the gym, going on a hike, or simply running errands, these enhancements will make your water bottle more functional and convenient.
So grab your tools and get creative!
Benefits And Final Thoughts On Diy Insulated Water Bottles
Recap On The Advantages Of Using A Diy Insulated Water Bottle
Insulated water bottles have gained popularity in recent years, thanks to their ability to keep beverages at the desired temperature for longer periods.
While there are many options available in the market, making your own insulated water bottle has its own set of benefits.
Let’s do a quick recap on why diy insulated water bottles are worth considering:
- Customization: Diy insulated water bottles offer the opportunity to personalize the design according to your preferences. From choosing the color and pattern to adding stickers or labels, you can create a bottle that’s uniquely yours.
- Cost-effective: Creating your own insulated water bottle can be a budget-friendly alternative to purchasing one. With a few simple materials and some creativity, you can have a functional and stylish bottle without breaking the bank.
- Eco-friendly: By repurposing materials or using recyclable components, diy insulated water bottles contribute to reducing waste and minimizing our impact on the environment. It’s a small but significant step towards sustainable living.
- Learning experience: Making your own insulated water bottle can be a fun and educational project. It allows you to explore your creativity, learn new crafting skills, and gain a sense of accomplishment when you see the final product.
- Personal satisfaction: There’s a sense of pride and satisfaction in using something you’ve made with your own hands. Every time you take a sip from your diy insulated water bottle, you’ll be reminded of the effort you put into creating it.
Encouragement for readers to try making their own version:
Creating a diy insulated water bottle is not only a practical solution but also an exciting and rewarding endeavor.
Regardless of your crafting experience or skill level, the following tips will help you get started on your own project:
- Research and gather materials: Look for tutorials, guides, or inspiration online to find ideas for your diy insulated water bottle. Make a list of the materials you’ll need, such as a stainless steel bottle, insulation material (like foam or neoprene), adhesive, and decorative elements.
- Plan your design: Decide on the aesthetic you want to achieve with your bottle. Consider color schemes, patterns, or any unique embellishments you’d like to incorporate. Sketch out your design or create a mood board to visualize the final product.
- Gather your tools: Assemble all the necessary tools for the project, including scissors, glue, markers, and any additional materials you’ll use for decoration.
- Follow a step-by-step guide: To ensure a successful outcome, follow a detailed guide or tutorial that walks you through the process. This will help you avoid mistakes and achieve the desired insulation effect.
- Enjoy the process: Making your own insulated water bottle should be a fun and enjoyable experience. Take your time, savor the journey, and embrace any creative detours that may arise along the way.
By trying your hand at making a diy insulated water bottle, you’ll not only have a functional and stylish accessory but also the satisfaction of crafting something unique and eco-friendly.
So go ahead, unleash your creativity, and enjoy the benefits of your very own homemade insulated water bottle.
Can I Make an Insulated Edible Water Bottle Using the Same Steps?
Of course, it is possible to create an insulated edible water bottle using the same steps as any other DIY project. By following specific edible water bottle diy steps, you can ensure a safe and sustainable solution. This innovative concept combines functionality and eco-friendliness, offering a unique way to enjoy drinking water while reducing plastic waste.
FAQ About Diy Insulated Water Bottle
How Do I Make My Own Insulated Water Bottle?
To create your own insulated water bottle, you’ll need a stainless steel bottle, insulation material, and adhesive.
What Is The Purpose Of Insulating A Water Bottle?
Insulating a water bottle helps keep your drink cold or hot for longer periods, making it convenient for outdoor activities.
What Are Some Easy Diy Insulating Materials?
Some common and easy-to-find insulating materials you can use are foam, bubble wrap, felt, or fiberglass insulation.
How Effective Is Diy Insulation For Water Bottles?
Diy insulation can be effective in maintaining the temperature of your drink for a few hours, depending on the quality of materials used.
Can I Reuse My Diy Insulated Water Bottle?
Yes, you can reuse your diy insulated water bottle multiple times, as long as the materials and adhesive are in good condition.
Conclusion
To sum up, creating your own diy insulated water bottle is a practical and cost-effective solution for keeping your beverages hot or cold on the go.
With just a few simple materials and basic crafting skills, you can customize and personalize your bottle to fit your style and needs.
By insulating your water bottle, you can enjoy the convenience of a portable drink container that maintains the temperature of your beverages for longer periods.
Whether you are camping, hiking, or attending outdoor events, having an insulated water bottle will ensure that you always have a refreshing drink at hand.
Furthermore, by reducing the use of disposable plastic bottles, you can contribute to protecting the environment.
So why not give it a try? Create your own diy insulated water bottle today and enjoy the benefits of a sustainable, insulated, and stylish beverage container.
Stay hydrated and make a positive impact!