How to Insulate a Water Bottle: 5 Steps
Discover the secrets to keeping your drink at the desired temperature for longer periods! Learn how to insulate a water bottle for ultimate refreshing sips on-the-go.
To insulate a water bottle, you’ll need to use proper insulation materials and techniques that retain the bottle’s temperature.
Whether you’re hiking or simply enjoying outdoor activities, an insulated water bottle is key to maintaining the temperature of your drink. By investing in a high-quality insulator or creating your own, you can combat temperature fluctuation, which in turn keeps your drinks enjoyable for extended periods.
5 Steps on How to Insulate a Water Bottle
| Step | Materials Needed | Instructions |
|---|---|---|
| 1 | Insulating Sleeve | Purchase an insulating sleeve that fits the size of your water bottle. |
| 2 | Water Bottle | Insert the water bottle into the insulating sleeve. |
| 3 | Lid | Ensure the water bottle lid is tightly closed to prevent heat transfer. |
| 4 | Insulating Tape | Wrap insulating tape around the water bottle if extra insulation is needed. |
| 5 | Reflective Material | If desired, wrap a layer of reflective material around the water bottle to further reduce heat transfer. |
How to Insulate a Water Bottle with Household Items
To insulate a water bottle using household items, you can simply use materials like an old sock or fabric and secure it with rubber bands or string. This adds a layer of insulation that keeps the liquid inside the bottle cooler or warmer for longer periods of time.
- Old Sock or Fabric
- Rubber Bands or String
- Insulated Lunch Bag
- Bubble Wrap
- Aluminum Foil
Insulation works by creating a barrier between the water bottle and its surroundings, reducing the rate of heat transfer and maintaining the desired temperature of the liquid.
Techniques for Insulating a Water Bottle with Market Items
Insulating a water bottle using market items is an effective way to maintain the desired temperature of your drink for an extended period. Various easily accessible products can be used to achieve this goal.
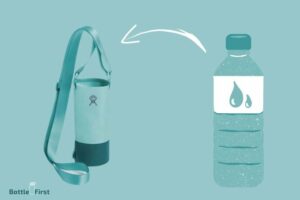
- Neoprene sleeve: These stretchy, water-resistant sleeves provide excellent insulation and a secured grip.
- Reflective insulating cover: Made from reflective material, these covers reflect heat and maintain drink temperature.
- Insulated stainless steel bottle: A double-walled stainless steel bottle has excellent insulation properties.
- Vacuum insulated bottle: These bottles offer the best insulation by eliminating air between the bottle’s layers.
- Wool or fabric covers: DIY fabric or wool covers can provide decent insulation and a custom look for your bottle.
Did you know that vacuum-insulated bottles can keep your drink cold for up to 24 hours and hot for up to 12 hours? Experiment with different market items to find the best insulation solution for your needs.
Benefits of Insulating a Water Bottle for Cold or Hot Beverages
Insulating a water bottle provides numerous benefits, no matter if you’re enjoying a cold or hot beverage.
Consequently, insulation helps in maintaining the temperature of the drink, preserves its taste, and boosts energy efficiency.
- Temperature retention: Insulated water bottles keep cold drinks cold and hot drinks hot for longer periods of time
- Enhanced flavor: Proper insulation preserves the flavor of the beverage by avoiding unwanted temperature changes
- Energy efficiency: Insulated bottles reduce the need to constantly refrigerate/heat drinks, conserving energy and reducing environmental impact
Conclusion
In conclusion, insulating your water bottle is a simple and cost-effective way to keep your beverages at the preferred temperature for longer periods.
Household items like socks, towels, and aluminum foil can be used for insulation, while market items like insulated sleeves and bottle insulators are also readily available.
Moreover, insulating your water bottle not only enhances your drinking experience but also helps you save money by eliminating the need for single-use plastic bottles.
So next time you head out, make sure to insulate your water bottle and enjoy your cold or hot beverage wherever you are.
FAQ
What Materials Can I Use to Insulate a Water Bottle?
Insulating a water bottle can be done using materials such as neoprene, synthetic fabric, thermal blankets, or bubble wrap.
What Are the Benefits of Insulating a Water Bottle?
Insulating a water bottle can help maintain the temperature of the water or beverage inside, reduce the amount of condensation on the outside of the bottle, and prevent bottle contents from becoming too hot or too cold when drinking them.
Can I Put My Water Bottle in the Freezer?
No, freezing a water bottle is not recommended as it could damage the bottle and prevent it from properly insulating your drink.
How Do I Clean an Insulated Water Bottle?
To clean an insulated water bottle, first remove the lid or cap and wash it with dish soap or use a bottle cleaning brush. Rinse the bottle and lid separately, then fill the bottle with warm water and a small amount of dish soap and shake it for a few minutes before emptying it out. Rinse the bottle and lid once again, let them dry, and put the lid back on before using.
What is the Best Material to Insulate a Water Bottle?
There are many materials that can be used to insulate a water bottle. Some of the most popular options include neoprene, polyester, and foam. Each of these materials has its own unique benefits that can make it the best choice for your needs.
Neoprene is a synthetic rubber that is often used in wetsuits. It is very effective at insulating against both heat and cold. Polyester is another synthetic material that is often used in clothing and other textile products.
It is also good at insulating against both heat and cold. Foam is a lightweight material that is often used in packaging and insulation products. It is an excellent insulator against heat, but not as effective against cold temperatures.
What Can I Put in My Water Bottle to Keep It Cold?
Assuming you would like tips on how to keep water cold in a bottle: There are a few different ways that you can keep your water cold in a bottle. One way is to freeze your water the night before you plan on using it.
You can also put ice cubes in your water to help keep it cold. If you are going to be outside in the heat, try putting your water bottle in a cooler with ice packs.
Another way to keep your water cold is to buy a special insulated water bottle that will help keep your water colder for longer periods of time.
How Can I Keep My Plastic Water Bottle Warm?
If you find yourself in a situation where you need to keep your plastic water bottle warm, there are a few things you can do.
First, if you have access to hot water, fill your bottle up about halfway and then top it off with hot water. This will help to insulate the water and keep it warm for longer.
You can also try wrapping your bottle in a scarf or jacket to further help retain heat.
Finally, if you have access to a power source, like a car charger, you can plug in your bottle and use it as a portable heater.
Just be sure not watch it too closely so that it doesn’t melt the plastic!
Water Bottle Insulator
We all know how important it is to stay hydrated, especially when participating in outdoor activities.
One way to ensure you have cool, refreshing water on hand at all times is to invest in a water bottle insulator. These handy devices keep your water cold for hours, meaning you can stay hydrated no matter how hot it gets outside.
There are a few things to consider when purchasing a water bottle insulator.
First, think about what size bottle you want to use. Most insulators are designed to fit standard sized water bottles, but there are also some that are specifically made for larger bottles or even wine glasses.
Second, consider what type of insulation you want. Some materials, like neoprene, provide great insulation but can be bulky and difficult to clean. Others, like stainless steel, provide excellent insulation while being much easier to clean and transport.
Finally, think about your budget. Water bottle insulators can range in price from around $10-$30 depending on the brand and features. However, even the most basic models will do an excellent job of keeping your drinks cold so you can focus on enjoying your time outdoors!
How to Make a Homemade Thermos to Keep Things Hot
Are you tired of your coffee getting cold before you’ve even had a chance to finish it? If so, then you need a thermos! A thermos is great for keeping coffee hot, but it can also be used to keep tea, soup, and other hot beverages warm.
Plus, it’s easy to make your own thermos at home with just a few simple supplies. Here’s what you’ll need to make your own homemade thermos:
-A jar with a tight-fitting lid (coffee jars work well)
-A piece of Styrofoam or other insulation material
-A hot glue gun and glue sticks -Scissors
To start, cut the Styrofoam or other insulation material to fit snugly inside the jar.
Then use the hot glue gun to attach the insulation material to the inside of the jar lid. Be sure to cover the entire surface of the lid so that no heat can escape.
Once the glue has cooled, screw on the lid tightly. And that’s it! Your thermos is now ready to use.
To fill your thermos, simply pour in your desired beverage and screw on the lid tightly. The insulation will help keep your drink hot for hours. Just be careful when unscrewing the lid, as contents may be very hot!
Are BPA Free Water Bottles More Effective at Insulating?
When considering water bottle options, it is essential to check the water bottle bpa-free checklist. BPA refers to a chemical often found in plastic containers that may have adverse health effects. BPA-free water bottles are designed to insulate your beverages effectively, offering better temperature retention and preventing the potential leaching of harmful substances. Choose wisely for a healthier and thermally efficient hydration experience.
Are the Methods to Insulate a Water Bottle the Same as Keeping it Cool in Summer?
When it comes to keeping a water bottle cool in the summer, the methods to keep it cool may not necessarily be the same as insulating it. While insulation can help maintain the temperature, there are additional techniques to consider. Utilizing a cooler bag, adding ice packs, or opting for vacuum-insulated bottles are effective methods to keep water bottle cool during hot summer days.
How to Make a Thermos With a Styrofoam Cup
A thermos is a container that can keep hot liquids hot and cold liquids cold. You can make a thermos with a Styrofoam cup and some basic supplies. What You’ll Need:
-Styrofoam cup
-Hot glue gun
-Scissors
-Ruler or measuring tape
-Pencil or pen
-Piece of aluminum foil
-Rubber band Instructions:
1. Cut a piece of aluminum foil that is slightly bigger than the opening of the Styrofoam cup.
2. Hot glue the aluminum foil to the rim of the cup. Make sure that the shiny side of the foil is facing out.
3. Wrap a rubber band around the cup to secure the foil in place.
4. Your thermos is now ready to use!
How to Make Thermos Flask at Home
A thermos flask is a container with a double wall and an airtight seal that helps to keep hot drinks hot and cold drinks cold. You can make your own thermos flask at home using a few simple materials. Here’s what you’ll need:
– A glass jar with a tight-fitting lid
– A length of pipe insulation (this will act as the insulation for your thermos)
– A roll of duct tape
– Scissors First, cut a piece of pipe insulation that is slightly longer than the height of your glass jar. Cut along the length of the pipe insulation so that you can open it up and fit it around the jar.
Wrap the pipe insulation around the jar, making sure to overlap the edges so that there are no gaps. Use duct tape to secure the ends of the pipe insulation in place. Now, take your lid and screw it on tightly.
Then, wrap more duct tape around the lid to make sure it is airtight. Your homemade thermos flask is now ready to use!


