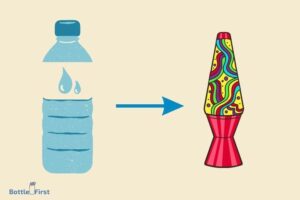
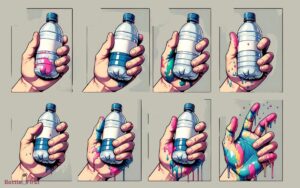
How to Pressurize a Water Bottle? 8 Easy Steps!
Applying pressure to a water bottle can be done by using an air pump or any method that would insert air into the bottle.
Start by ensuring the bottle is clean and dry before filling it almost to the top with water, but leave some space. Fit the air pump to the bottle and start pumping until you reach the desired pressure.
Pressurizing a water bottle involves the adding of air into the bottle to increase its internal air pressure. This process can be achieved by using an air pump, bicycle pump, or any method that aids the input of air into the bottle.
The pressurization changes the bottle’s normal atmospheric pressure to a higher pressure, which could cause it to harden or balloon out, depending on the bottle’s material and quality.
Pressurizing a water bottle is a process that changes the normal atmospheric pressure inside the bottle to a higher pressure. By using an air pump to introduce extra air, the internal pressure of the bottle is increased.
It is crucial to leave enough room for the air when filling the bottle with water, and to note that the outcome may vary depending on the bottle’s make and quality.
8 Steps for Pressurizing a Water Bottle
| Step No. | How To Pressurize A Water Bottle |
|---|---|
| 1 | Ensure the water bottle is clean and dry |
| 2 | Fill the water bottle with water up to the required level |
| 3 | Ensure that the water bottle’s cap is functioning well |
| 4 | Seal the bottle securely with the cap |
| 5 | Shake the bottle vigorously to create pressure |
| 6 | Leave the bottle for a while, letting the pressure build up |
| 7 | Verify the pressure by gently squeezing the bottle |
| 8 | If not sufficient, repeat steps 5 to 7 until the desired pressure is achieved |
Key Takeaway

Five Facts About: Pressurizing a Water Bottle
Understanding The Importance Of Pressurizing A Water Bottle
Pressurizing a water bottle may seem like a small detail, but it can greatly enhance your outdoor experience.
Whether you’re embarking on a hiking adventure, camping in the wilderness, or simply enjoying a picnic at the park, pressurizing your water bottle has several benefits that are worth considering.
Let’s dive into why pressurization is important and how it can improve your outdoor activities.
Pressurization Benefits For Outdoor Activities
Pressurizing your water bottle offers a multitude of advantages that can make your outdoor activities more convenient and enjoyable.
Here are some key benefits to consider:
- Efficient hydration: Pressurization ensures a steady and consistent flow of water, allowing you to quench your thirst quickly and effectively during your outdoor adventures. This is especially important in physically demanding activities such as hiking or biking, where you need easy access to hydration.
- Easy cleaning: With a pressurized water bottle, you can use the water flow to easily clean your hands, utensils, or even small camping gear. This feature can save you time and effort, making your outdoor experience more comfortable and hygienic.
- Portable shower: Pressurizing your water bottle can transform it into a portable shower, providing you with the ability to rinse off dirt, sweat, or sticky substances. It’s a game-changer, allowing you to freshen up during long hikes or camping trips without the need for a traditional shower.
- Emergency uses: Pressurized water can come in handy during emergencies. If someone in your group sustains a minor injury or suffers from heat exhaustion, you can use the water bottle’s pressure to irrigate wounds or cool down affected individuals. This can be a crucial and potentially life-saving advantage in remote outdoor locations.
Why Pressurizing Enhances Water Flow
The increased water flow resulting from the pressurization of a water bottle is what sets it apart from regular bottles.
Here’s why pressurizing enhances water flow:
- Aeration effect: When you pressurize a water bottle, air is forced into the water, creating an aeration effect. This process helps break the water into smaller droplets and allows for a more powerful and controlled flow. As a result, you can enjoy a consistent stream of water that is easier to drink or use for various purposes.
- Overcoming gravity: Pressurization helps overcome the force of gravity, which can sometimes hinder the flow of water from a regular bottle. By pressurizing the bottle, you create an internal force that counteracts gravity, enabling water to flow freely, even when the bottle is inverted or tilted at odd angles.
- Increased pressure, increased flow: With pressurization, the water inside the bottle is subjected to increased pressure. This elevated pressure propels the water through the bottle’s opening, resulting in a faster and more forceful flow. This enhanced flow is particularly beneficial in situations where a quick and efficient extraction of water is required.
Understanding these mechanisms behind pressurization can help you appreciate its importance in optimizing water flow during your outdoor adventures.
Remember, pressurizing a water bottle is a simple yet impactful technique that can enhance your outdoor experience in many ways. From efficient hydration to creating a portable shower, the benefits are undeniable.
So, the next time you grab your backpack and venture into the great outdoors, consider pressurizing your water bottle for a more convenient and enjoyable journey.
Gathering The Essential Materials
Selecting The Right Water Bottle
When it comes to pressurizing a water bottle, it’s important to start with the right bottle.
Here are the key points to consider when selecting your water bottle:
- Material: Choose a water bottle made of durable and leak-proof material, such as stainless steel or bpa-free plastic. This ensures that the bottle can withstand the pressure without any risk of bursting or leaking.
- Size: Opt for a water bottle with a capacity that suits your needs. A larger bottle allows for more pressurized water, while a smaller one offers portability.
- Wide mouth: Look for a bottle with a wide mouth opening. This makes it easier to fill and pressurize the bottle, as well as clean it afterwards.
- Threaded cap: Ensure that the water bottle has a cap with good threading. This helps in creating a tight seal, preventing any leaks during the pressurization process.
Choosing A Compatible Pressurization System
To effectively pressurize a water bottle, you need to use a compatible pressurization system.
Here are some key points to consider when choosing your pressurization system:
- Hand pump: A hand pump is a common and convenient option for pressurizing water bottles. Look for a compact and lightweight hand pump that can easily fit into your backpack or bag.
- Co2 cartridges: If you prefer a more efficient and effortless pressurization method, consider using co2 cartridges. These cartridges provide a quick burst of pressurized air into the bottle.
- Compatibility: Make sure that the pressurization system you choose is compatible with your water bottle. Check the manufacturer’s guidelines or consult with the seller to ensure a proper fit.
Ensuring Safety Measures
Safety should be the top priority when pressurizing a water bottle. Follow these safety measures to prevent accidents or injuries:
- Pressure limit: Be aware of the maximum pressure limit recommended by the manufacturer for your specific water bottle. Over-pressurizing can lead to bottle failure or potential harm.
- Protective gear: Wear appropriate protective gear, such as safety goggles and gloves, when pressurizing the water bottle. This protects you from any potential risks.
- Ventilation: Ensure that you pressurize the water bottle in a well-ventilated area to avoid inhaling any fumes or gases released during the process.
- Release pressure gradually: When you’re done with pressurizing the bottle, release the pressure gradually to avoid sudden bursts or leaks.
Remember to always follow the manufacturer’s instructions and guidelines for your water bottle and pressurization system.
By gathering the essential materials and adhering to safety measures, you’ll be ready to pressurize your water bottle effectively and enjoy the benefits of pressurized water on your outdoor adventures.
Step 1: Preparing The Water Bottle
Before you can pressurize a water bottle, it is important to properly prepare it. This involves a few key steps to ensure the bottle is clean, in good condition, and the cap is secured tightly.
Properly Cleaning And Drying The Bottle:
- Begin by rinsing the water bottle with warm water to remove any debris or residue.
- Fill the bottle halfway with warm water and add a few drops of dish soap.
- Close the bottle tightly and shake it vigorously for a minute to create suds and clean the interior.
- Use a bottle brush to scrub the inside, paying attention to corners and crevices.
- Rinse the bottle thoroughly with warm water to remove all soap residue.
- Leave the bottle open to air-dry completely before proceeding to the next step.
Inspecting The Bottle For Any Damages:
- Carefully examine the bottle for any cracks, leaks, or other damages.
- Run your fingers along the bottle to feel for any irregularities or weaknesses.
- Check the cap to ensure it is intact and free of cracks or damage.
- If you notice any issues, it is advisable to replace the bottle to avoid potential hazards during the pressurization process.
Securing The Bottle Cap Tightly:
- Before pressurizing the water bottle, it is crucial to secure the cap tightly to prevent any leaks or pressure loss.
- Place the cap on the bottle and ensure it is properly aligned with the threads.
- Twist the cap clockwise until it feels tight and secure.
- Give the cap a gentle tug to confirm that it is tightly secured and won’t come off easily.
Remember, properly preparing the water bottle is essential for safe and effective pressurization. By cleaning and drying the bottle, inspecting for damages, and securing the cap tightly, you can ensure a successful pressurization process.
Step 2: Attaching The Pressurization System
Now that you have identified the fitting mechanism, it’s time to connect the pressurization system to the water bottle. Follow these steps to ensure a tight and secure connection:
Identifying The Fitting Mechanism
Before proceeding, make sure you understand the type of fitting mechanism your pressurization system uses. Some common options include:
- Screw-on cap: This type of mechanism requires twisting the cap onto the bottle’s thread.
- Snap-on cap: Here, you need to firmly push the cap onto the bottle until it locks into place.
- Clamp mechanism: This involves using a clamp to secure the pressurization system onto the bottle.
Connecting The Pressurization System To The Bottle
Once you have determined the fitting mechanism, it’s time to connect the pressurization system to the water bottle. Follow these steps:
- Remove the existing cap: Take off the original cap or lid from the water bottle.
- Prepare the pressurization system: Ensure that all components of the pressurization system are clean and free from any debris or damage.
- Align the fitting mechanism: Position the fitting mechanism on the pressurization system to match the thread or opening on the water bottle.
- Attach the pressurization system: Connect the system to the bottle by either screwing it on, snapping it into place, or using the clamp mechanism. Follow any additional instructions provided by the manufacturer.
Ensuring A Tight And Secure Connection
To guarantee a strong and leak-free pressurization, it is essential to ensure a tight and secure connection.
Pay attention to the following:
- Tighten appropriately: If your pressurization system uses a screw-on cap, make sure to tighten it firmly. However, be cautious to not overtighten, as this may cause damage.
- Confirm proper alignment: Double-check that the pressurization system is correctly aligned with the bottle’s thread or opening.
- Test for leaks: Fill the bottle with water (without pressurizing it yet) and gently tilt it to ensure there are no leaks from the connection point. If you notice any leaks, readjust the connection or consider replacing the system.
- Inspect for any cracks or damage: Regularly inspect the pressurization system and the bottle for cracks, chips, or other signs of damage. Replace any compromised parts immediately.
By following these steps, you will successfully attach the pressurization system to your water bottle, creating a reliable and effective setup for your desired purposes.
Step 3: Pressurizing The Water Bottle
Now that you have prepared your water bottle and attached the air pump, it’s time to pressurize the bottle.
This step is essential to create the desired pressure inside the bottle, which will help propel liquid or gases when needed.
Here’s how you can effectively pressurize your water bottle:
Understanding The Pressure Limits
Before you start pumping air into the bottle, it’s crucial to understand the pressure limits for your specific bottle.
Different bottles have different capacities and tolerances, so it’s essential to refer to the manufacturer’s guidelines to avoid exceeding the safe pressure range.
Some key points to keep in mind include:
- Check the maximum pressure limit specified by the manufacturer.
- Ensure that the bottle is in good condition and doesn’t have any cracks or leaks.
- If you are unsure about the pressure limits, start with a lower pressure and gradually increase it while monitoring the pressure gauge.
Pumping Air Into The Bottle
Once you are aware of the pressure limits, it’s time to pump air into the water bottle.
Follow these steps to effectively pressurize your bottle:
- Attach the air pump to the valve on the water bottle securely.
- Begin pumping air into the bottle by using the pump handle or foot pump, depending on the type of pump you are using.
- Pump air steadily and consistently, making sure not to exceed the maximum pressure limit.
- Keep an eye on the pressure gauge to monitor the amount of pressure being built inside the bottle.
- Continue pumping until you reach the desired pressure level or until the pressure gauge indicates the appropriate amount.
Monitoring The Pressure Gauge
While pressurizing the water bottle, it’s crucial to constantly monitor the pressure gauge. This will help ensure that you don’t exceed the safe pressure range and avoid any potential accidents.
Here’s what you need to do:
- Keep a close eye on the pressure gauge while pumping air into the bottle.
- If you notice the pressure approaching the maximum limit, stop pumping immediately to prevent any damage or risk of explosion.
- If the pressure exceeds the safe limit, release some air from the bottle gradually until the pressure gauge reflects a safe level.
- Always err on the side of caution and prioritize safety over achieving high pressure.
Remember, understanding the pressure limits, pumping air into the bottle, and monitoring the pressure gauge are essential steps to pressurize a water bottle effectively.
By following these steps carefully, you can ensure a safe and successful process. So go ahead, pressurize your water bottle and make use of its enhanced capabilities!
Safety Precautions And Maintenance
Handling pressurized bottles safely:
When it comes to pressurized water bottles, safety should always be a top priority. Proper handling and maintenance can prevent accidents and prolong the lifespan of your bottle.
Here are some key points to remember:
- Always handle pressurized bottles with care and caution. Mishandling can lead to leaks or even explosions, causing harm to yourself and those around you.
- Avoid dropping or throwing the bottle, as this can create internal pressure imbalances that may result in leaks or ruptures.
- Keep the bottle away from extreme temperatures, such as direct sunlight or freezing conditions. High temperatures can increase internal pressure, while freezing temperatures can cause the bottle to crack or shatter.
- Do not use sharp objects to puncture or pierce the bottle, as this can compromise its integrity and lead to leaks.
- When opening the bottle, release pressure slowly and ensure that it is directed away from your face or others. Sudden bursts of pressurized air can cause harm or injury.
- If you notice any unusual sounds, bulging, or deformation on the bottle, avoid using it and dispose of it safely.
Regularly checking for leaks or damages:
To maintain the safety and functionality of your pressurized water bottle, it’s important to regularly inspect it for leaks, damages, and signs of wear.
Here are a few things to look out for:
- Check the bottle for any visible cracks, scratches, or dents that could compromise its structural integrity. If you discover any damages, it’s best to replace the bottle to prevent potential accidents.
- Inspect the bottle’s cap or lid for any signs of wear or damage, such as loose seals or cracks. A secure and tightly sealed cap is essential for maintaining pressure and preventing leaks.
- Before each use, conduct a leak test by filling the bottle with water and shaking it gently. If you notice any water droplets or moisture around the cap or seams, there may be a leak that needs to be addressed.
- Pay attention to the pressure gauge, if your bottle has one. Make sure it is functioning correctly and displaying accurate readings. A faulty gauge can mislead you into thinking the bottle is at a safe pressure level when it’s not.
Properly storing pressurized water bottles:
Proper storage can help prevent accidents and maintain the quality of your pressurized water bottle. Consider the following guidelines:
- Store the bottle in a cool and dry place, away from direct sunlight or sources of heat. Excessive heat can cause the pressure inside the bottle to increase, leading to leaks or ruptures.
- Avoid storing the bottle in freezing temperatures, as this can cause it to become brittle and prone to cracking or shattering.
- Keep the bottle upright to prevent potential leaks or spills. If the bottle has a stand or specific holder, use it for stability.
- Store the bottle away from children or pets, as they may inadvertently tamper with it or cause damage.
- Ensure the bottle is not stored near any sharp objects or materials that could potentially puncture or damage it.
Remember, following these safety precautions and practicing regular maintenance will help you enjoy your pressurized water bottle safely and prolong its lifespan. Stay hydrated and stay safe!
Can I Pour Powder into a Pressurized Water Bottle?
Can I pour powder into a pressurized water bottle? Yes, you can. To do so, follow these easy steps for pouring powder. First, ensure the water bottle is empty and clean. Next, remove the cap and find a suitable funnel to fit the bottle’s opening. Carefully pour the powder into the funnel until desired amount is reached. Lastly, securely close the bottle and shake it gently to mix the powder with the water.
FAQ About Pressurize A Water Bottle
How Do You Pressurize A Water Bottle?
To pressurize a water bottle, fill it with air and apply pressure by squeezing or using a pump.
What’S The Purpose Of Pressurizing A Water Bottle?
Pressurizing a water bottle increases the flow rate, making it easier to drink or use for cleaning.
Can Any Water Bottle Be Pressurized?
Most water bottles can be pressurized, but it’s important to check the bottle’s material and design for suitability.
Is It Possible To Over-Pressurize A Water Bottle?
Yes, over-pressurizing a water bottle can cause it to burst or leak. Follow the manufacturer’s instructions for safe pressure levels.
How Can I Safely Depressurize A Water Bottle?
To safely depressurize a water bottle, slowly release the pressure by opening the cap or valve gradually.
Conclusion
Pressurizing a water bottle is a convenient and practical skill to have. By understanding the science behind pressure and employing simple techniques, you can easily pressurize a water bottle at home.
Whether you are embarking on a camping trip, participating in outdoor activities, or simply want to enjoy a refreshing carbonated drink on the go, knowing how to pressurize a water bottle can come in handy.
Remember to choose a suitable water bottle, secure the cap tightly, and introduce a gas source to increase pressure.
It is essential to exercise caution and follow safety guidelines to avoid any accidents or mishaps. Regularly check the pressure levels and release excess pressure if needed.
With a little practice and careful attention to detail, you can enjoy the benefits of a pressurized water bottle wherever you go. Stay hydrated and prepared with this valuable skill in your toolkit.