How to Replace Water Bottle on Dispenser? 10 Easy Steps
Updated on
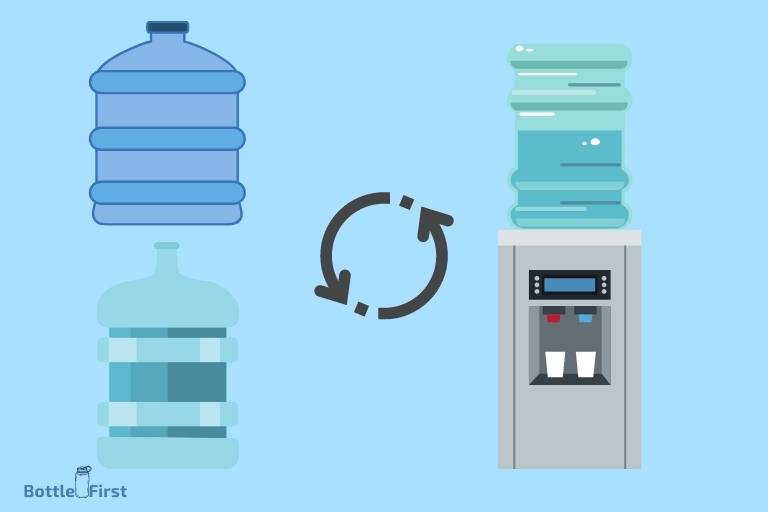
To replace a water bottle on a dispenser, you should first ensure the dispenser is not powered on. Then you need to remove the empty bottle from its position.
After this, open your new water bottle and place it onto the dispenser, making sure it’s properly fitted. Finally, you can switch on your dispenser and enjoy the fresh water.
Water dispensers are convenient tools for providing a constant supply of cold or hot water. Over time, the water bottle in a dispenser will become empty and will need to be replaced.
The procedure is simple and involves removing the existing bottle, preparing the replacement bottle, and installing it.
Always ensure the dispenser is off before changing the bottle to prevent possible mishaps.
Removing the empty bottle involves lifting it straight up and off the dispenser.
Preparing the replacement bottle involves removing any seal or cap from the top.
Properly align the new bottle on the dispenser to ensure an adequate flow of water.
Replacing a water bottle on a dispenser is an easy task that anyone can do. It does not require special tools or professional intervention.
However, it’s crucial to take appropriate precautions such as turning off the dispenser to ensure safety during the bottle replacement process.
10 Steps to Replace a Water Bottle on a Dispenser
Step Number
Action
1
Turn off the dispenser
2
Remove the empty bottle from the dispenser
3
Clean the top of the new water bottle
4
Remove the safety seal from the new bottle
5
Carefully lift the new water bottle
6
Place the new bottle onto the dispenser
7
Make sure it’s properly installed
8
Turn on the dispenser
9
Let the water run for a few seconds to remove air bubbles
Water dispensers are convenient appliances that provide a constant supply of clean, fresh water, but require regular replacement of water bottles.
The process of replacing a water bottle on a dispenser involves lifting, tilting and placement, so it’s important to apply the correct technique to prevent injury or spillage.
Using bottled water for dispensers not only ensures higher water quality, but also reduces exposure to contaminants from tap water.
Care should be taken while replacing the bottle to prevent damaging the dispenser’s water spigots.
Five Facts About Replacing a Water Bottle on a Dispenser
A water dispenser is a device that cools and dispenses water. They are generally broken up in two categories: bottle-less and bottled water coolers. Bottled water coolers are often placed in office spaces or homes where a direct connection to the main water line is not available(Source: https://www.wikipedia.org/).
The task of replacing the water bottle is relatively simple, but it’s important to do it correctly to avoid damaging the machine or causing a spill (source: https://www.homewater101.com/).
Most water dispensers use a 5-gallon water bottle, which can weigh around 40 pounds when full. Therefore, one needs to be cautious while replacing the bottle to avoid physical strain (source: https://www.wikipedia.org/).
Many water dispensers have a spike in the water receptacle that pierces the cap of the water bottle when it’s placed on the dispenser. This system helps prevent water spillage during replacement (source: https://www.livestrong.com/).
Before putting a new bottle in the dispenser, it can be helpful to clean the area where the neck of the bottle will sit. This can prevent the growth & spread of bacteria (source: https://www.hunker.com/).
Why Replacing Your Water Bottle Matters
Importance Of Clean Water For Hydration And Health
Clean water is essential for our overall health and well-being. Staying properly hydrated is crucial as it plays a vital role in various bodily functions.
Here are some key points to consider when it comes to the importance of clean water for hydration and health:
Hydration: Adequate hydration is essential for our bodies to function optimally. Water helps regulate body temperature, lubricate joints, and transport nutrients to cells. It also aids in digestion and helps flush out toxins from our system.
Energy levels: Dehydration can lead to fatigue and decreased energy levels. By ensuring you have access to clean water, you can maintain proper hydration and keep your energy levels up throughout the day.
Mental clarity: Drinking enough water can help improve cognitive function and keep your brain sharp. Dehydration can lead to difficulties in focusing, memory problems, and mood swings.
Immune system support: Water plays a crucial role in supporting a healthy immune system. It helps to transport oxygen and essential nutrients to cells and organs, aiding in overall immune function.
Overall health: Consuming clean water regularly can contribute to maintaining a healthy weight, promoting clearer skin, preventing constipation, and reducing the risk of certain diseases.
The Role Of Water Dispensers In Providing Convenient Access To Clean Drinking Water
Water dispensers offer a convenient and efficient way to access clean drinking water.
Here are some key points about the role of water dispensers:
Easy access: Water dispensers provide a readily available source of clean drinking water, eliminating the need for constantly refilling individual water bottles or relying on tap water.
Cold and hot options: Many water dispensers offer the convenience of both chilled and hot water, making it suitable for various needs, such as refreshing cold drinks or preparing hot beverages.
Hygiene and cleanliness: Water dispensers are designed to maintain the cleanliness and purity of the water they dispense. Most models have built-in filtration systems that help eliminate impurities and ensure the water is safe to consume.
Time-saving: Using a water dispenser saves time compared to traditional methods of obtaining drinking water. With a simple push of a button or lever, you can quickly have access to cold or hot water.
Environmentally friendly: By utilizing a water dispenser, you can significantly reduce plastic waste by eliminating the need for single-use water bottles. This contributes to a more sustainable and eco-friendly lifestyle.
Need For Regular Replacement Of Water Bottles To Ensure Quality And Safety
Regularly replacing water bottles on your dispenser is essential to maintain the quality and safety of the water you consume.
Here are some key points to consider:
Prevent bacterial growth: Over time, water bottles can accumulate bacteria, especially if not properly cleaned. Regularly replacing bottles minimizes the risk of bacterial growth and helps ensure that the water remains safe for consumption.
Freshness: Fresh water tastes better and is more appealing to drink. By replacing water bottles regularly, you ensure that you are always consuming fresh and clean water.
Filter maintenance: If your water dispenser has a built-in filter, replacing the water bottles regularly also means replacing the filter at the recommended intervals. This helps maintain the filtration efficiency and ensures the removal of impurities from the water.
Quality assurance: By following the manufacturer’s recommendations for water bottle replacement, you can have peace of mind knowing that you are adhering to the recommended safety guidelines and maintaining the quality of your drinking water.
Hygiene: Replacing water bottles prevents the accumulation of dirt, dust, and other contaminants that may compromise the hygiene of the dispenser, ensuring that the water remains safe to drink.
Remember, staying properly hydrated with clean water is vital for your health and well-being.
By understanding the importance of clean water, the role of water dispensers, and the need for regular water bottle replacement, you can ensure that you always have access to safe and refreshing drinking water.
So, make it a priority to stay hydrated and maintain the quality of your water by regularly replacing your water bottle on the dispenser.
Assessing The Type Of Water Dispenser
When it comes to replacing the water bottle on your dispenser, it’s important to first assess the type of dispenser you have.
Different types of water dispensers have varying requirements for replacing water bottles.
In this section, we will explore the different types of water dispensers available in the market, factors to consider when choosing the right one for your needs, and understanding the specific requirements for replacing water bottles in each type of dispenser.
Different Types Of Water Dispensers Available In The Market:
Bottled water dispenser: This type of water dispenser is designed to accommodate large water bottles, typically ranging in size from 3 to 5 gallons. It has a top-loading or bottom-loading mechanism for easy bottle replacement.
Countertop water dispenser: As the name suggests, these dispensers are placed on top of a countertop or any flat surface. They are smaller in size compared to bottled water dispensers and are suitable for smaller spaces or personal use.
Wall-mounted water dispenser: These dispensers are permanently mounted on a wall and provide a convenient way to access water while saving floor space. They are commonly found in public spaces such as offices, gyms, and schools.
Direct piping water dispenser: Unlike bottled water dispensers, direct piping water dispensers are connected directly to a water source and do not require manual bottle replacement. They provide a continuous supply of purified water on demand.
Factors To Consider When Choosing The Right Water Dispenser For Your Needs:
Space availability: Consider the available space in your home or workplace. If you have limited space, a countertop dispenser may be more suitable, whereas larger spaces can accommodate bottled water dispensers or wall-mounted options.
Usage frequency: Determine how frequently you will be using the water dispenser. If you have a high demand for drinking water, a direct piping water dispenser may be a more efficient choice.
Budget: Set a budget for your water dispenser purchase. Different types of dispensers come at varying price points, so it’s essential to find one that fits within your budget while still meeting your requirements.
Understanding The Specific Requirements For Replacing Water Bottles In Each Type Of Dispenser:
Bottled water dispenser:
To replace the water bottle on a bottled water dispenser, follow these steps:
Ensure the dispenser is unplugged and the empty bottle is removed.
Clean the bottle collar or cap to maintain hygiene.
Carefully place a new water bottle on top of the dispenser.
Align the bottle collar or cap with the dispenser opening and secure it tightly.
Countertop/wall-mounted water dispenser: Replacement of water bottles on countertop or wall-mounted dispensers depends on the specific model. Consult the manufacturer’s instructions for the correct procedure.
Direct piping water dispenser: Since direct piping water dispensers do not require manual bottle replacement, there are no specific steps to follow. However, regular maintenance and filter replacement are necessary to ensure the quality of the water.
Remember, always refer to the user manual provided by the manufacturer for detailed instructions on replacing water bottles for your specific water dispenser model.
By assessing the type of water dispenser you have, considering your needs, and understanding the replacement requirements, you will be able to replace water bottles on your dispenser with ease.
Watch Video On: How To Replace Water Bottle On Dispenser
Step-By-Step Guide To Replacing The Water Bottle
Preparing The Environment For A Smooth And Hassle-Free Replacement Process
Before replacing the water bottle on your dispenser, it’s essential to create a suitable environment to ensure a smooth and hassle-free process.
Follow these steps to prepare your surroundings:
Clear the area around the water dispenser: Remove any objects or clutter around the dispenser to give yourself ample room to work.
Find a stable surface: Ensure that the dispenser is placed on a stable and level surface. This will prevent any accidents or spills during the replacement process.
Gather necessary tools: Keep a clean cloth or towel, sanitizing solution, and a new water bottle ready for use. Having these items nearby will streamline the process and avoid unnecessary delays.
Checking For Any Signs Of Contamination Or Damage On The Water Dispenser And Bottle
Before proceeding with the water bottle replacement, it’s crucial to inspect both the dispenser and the bottle for any signs of contamination or damage.
Take the following steps to ensure the safety and quality of your drinking water:
Examine the dispenser: Check for any cracks, leaks, or discoloration on the dispenser. If you notice any abnormalities, it may indicate a need for repair or replacement of the dispenser.
Inspect the water bottle: Carefully examine the water bottle for any signs of contamination, such as mold, algae, or unusual smells. If you detect any issues, it’s best to discard the existing bottle and use a new one to maintain water purity.
Safely Removing The Empty Water Bottle From The Dispenser
Once you’ve examined the dispenser and bottle for any contamination or damage, you can proceed to remove the empty water bottle.
Follow these steps to safely remove it:
Switch off the dispenser: Locate the power switch or unplug the dispenser from the power source to ensure your safety during the removal process.
Position the bottle correctly: Lift and position the bottle in a way that allows easy access to the neck.
Unscrew or unlock the bottle: Depending on the dispenser model, twist off the bottle or release any locking mechanism to detach it from the dispenser securely.
Lift and remove the bottle: Using both hands, lift the bottle straight up and away from the dispenser, taking care not to spill any remaining water.
Properly Cleaning And Sanitizing The Dispenser Before Installing A New Bottle
Maintaining a clean and sanitary environment is essential for a fresh and healthy drinking water supply. Before installing a new water bottle, take the time to properly clean and sanitize the dispenser.
Follow these steps:
Empty any remaining water: Ensure that the dispenser is completely empty by draining any residual water into a sink or drain.
Wipe down the interior: Using a clean cloth or towel, wipe down the interior of the dispenser to remove any dirt or residue.
Sanitize the dispenser: Prepare a sanitizing solution according to the manufacturer’s instructions or use a mixture of mild soap and water. Apply the solution to a cloth and thoroughly clean all surfaces inside the dispenser, paying extra attention to the spout area.
Rinse and dry: Rinse the dispenser with clean water to remove any traces of the sanitizing solution. Once rinsed, use a dry cloth or towel to ensure the dispenser is completely dry before proceeding.
Installing The New Water Bottle Securely And Ensuring A Proper Fit
Now that the dispenser is clean and sanitized, you can proceed with installing the new water bottle.
Follow these steps to ensure a secure fit and proper installation:
Prepare the new water bottle: Remove any protective seals or caps from the new water bottle before handling it.
Position the bottle correctly: Align the neck of the new water bottle with the dispenser opening, ensuring a proper fit.
Lower the bottle into place: Gradually lower the new water bottle onto the dispenser, guiding it as it descends to align the neck with the opening.
Secure the bottle: If your dispenser has a locking mechanism, engage it to secure the bottle in place. Ensure that the bottle sits securely on the dispenser without any wobbling or instability.
By following these step-by-step instructions, you’ll be able to easily replace your water bottle on the dispenser, maintaining a clean and efficient hydration system.
Remember to periodically clean and sanitize your dispenser to ensure the continuous supply of refreshing and contaminant-free drinking water.
Maintenance Tips To Keep Your Water Dispenser In Optimal Condition
Regularly cleaning and sanitizing the dispenser to prevent bacterial growth:
Clean the exterior of the dispenser using a mild detergent and water, ensuring all surfaces are wiped clean.
Remove the water bottle and empty any remaining water from the reservoir.
Prepare a solution of equal parts vinegar and water and fill the reservoir halfway.
Allow the solution to sit for 15-20 minutes to disinfect the internal components.
Drain the solution from the reservoir and rinse thoroughly with clean water.
Wipe down the nozzles, spigots, and any other parts that come into contact with water.
Repeat this cleaning process every month or as needed to maintain cleanliness and prevent bacterial growth.
Checking for any leaks or malfunctions in the dispenser’s components:
Regularly inspect the dispenser for any signs of leaks or malfunctions.
Check the water lines for cracks or damage and replace if necessary.
Look for any loose connections or fittings and tighten as needed.
Test the dispenser’s functionality by dispensing a small amount of water and ensuring a smooth flow.
If any leaks or malfunctions are detected, contact a professional technician for repairs to avoid further damage.
Replacing filters and other maintenance tasks to maintain water quality:
Read the manufacturer’s instructions to determine the recommended frequency for filter replacement.
Follow the instructions to remove the old filter and install a new one in its place.
Be sure to reset any filter replacement indicator lights or timers.
Additionally, clean or replace the drip tray regularly to prevent the buildup of dirt and bacteria.
Keep the surrounding area clean and free from dust and debris to maintain optimal performance.
Troubleshooting common issues with water dispensers and their solutions:
Problem: Water dispenser not dispensing water.
Solution: Check if the water bottle is properly positioned, and if not, align it correctly. Also, ensure that the water bottle is not empty and has an airtight seal.
Problem: Water tastes strange or has an odor.
Solution: Replace the water bottle with a fresh one, as the taste or odor could be due to old or contaminated water. Alternatively, clean and sanitize the dispenser’s components as mentioned earlier.
Problem: Water is leaking from the dispenser.
Solution: Check for any cracks or damages in the water bottle, and replace it if necessary. Inspect the dispenser’s seals and gaskets for any wear or tear, and replace them if needed.
Problem: Dispenser is making unusual noises.
Solution: Ensure that the dispenser is placed on a level surface and is not in contact with other objects that could cause vibrations. If the noise persists, contact a professional technician for further evaluation.
Remember to refer to your specific water dispenser’s manual for detailed cleaning, maintenance, and troubleshooting instructions.
By following these maintenance tips, you can keep your water dispenser in optimal condition, ensuring clean and refreshing water for you and your family.
Other Considerations For Water Bottle Replacement
When it comes to replacing the water bottle on your dispenser, there are a few key considerations to keep in mind.
From choosing the right size and type of water bottle to exploring eco-friendly alternatives, let’s dive into some important factors to consider for a successful water bottle replacement experience.
Choosing The Right Size And Type Of Water Bottle For Your Dispenser
Before purchasing a replacement water bottle, it’s crucial to ensure that you select the right size and type for your dispenser.
Here are some key points to keep in mind:
Measure the dimensions: Take accurate measurements of your dispenser’s water bottle compartment to determine the maximum size it can accommodate.
Consider your usage: Assess your daily water consumption to determine the appropriate bottle size. Smaller bottles are suitable for personal use, while larger bottles are ideal for offices or high-traffic areas.
Evaluate bottle material: Water bottles are commonly available in plastic or glass materials. Plastic bottles are lightweight and durable, while glass bottles are more eco-friendly and can enhance the taste of water.
Check compatibility: Confirm that the replacement water bottle is compatible with your particular dispenser model. Some dispensers have specific requirements or proprietary bottle designs.
Options For Eco-Friendly And Sustainable Water Bottle Alternatives
If you’re looking to reduce your environmental footprint, consider these eco-friendly alternatives to traditional water bottles:
Stainless steel bottles: Durable and reusable, stainless steel bottles are an excellent choice for both hot and cold beverages. They are easy to clean and free from harmful chemicals.
Collapsible bottles: Designed for on-the-go convenience, collapsible bottles can be easily folded or rolled up when not in use. They are lightweight and offer a space-saving solution.
Filtered water bottles: Instead of relying on disposable bottles, opt for a water bottle with a built-in filter. These bottles purify tap water on the go, reducing the need for single-use bottles.
Glass bottles with protective sleeves: If you prefer the taste of water from glass bottles, choose options that come with protective silicone sleeves. These sleeves provide added durability and grip.
Where To Purchase Replacement Water Bottles And Dispenser Accessories
When it’s time to purchase replacement water bottles or dispenser accessories, you have several options available.
Consider the following:
Local retailers: Visit local home improvement or kitchen supply stores that carry water dispenser accessories. They may have a selection of replacement water bottles suitable for your dispenser model.
Online marketplaces: Online marketplaces offer a wide range of options, allowing you to browse and compare different brands and sizes. Look for reputable sellers with positive customer reviews.
Manufacturer’s website: Check the manufacturer’s website for replacement parts and accessories. They often offer compatible water bottles and dispenser add-ons that are specifically designed for their products.
Frequently Asked Questions And Expert Tips For A Successful Water Bottle Replacement Experience
To ensure a smooth and hassle-free water bottle replacement experience, we’ve compiled a list of frequently asked questions and expert tips:
How often should i replace the water bottle? It is recommended to replace the water bottle every 4-6 weeks to maintain optimal cleanliness and freshness.
How should i clean the water dispenser before replacing the bottle? Before installing a new bottle, thoroughly clean the dispenser with mild soap and water. Rinse it well to remove any residue or cleaning agents.
How do i prevent leaks when replacing the water bottle? Ensure the water bottle cap is tightly secured and properly aligned with the dispenser’s spout. Avoid overfilling the bottle, as it can cause spills and leaks.
What can i do with the empty water bottles? Consider recycling the empty water bottles to minimize environmental impact. Check local recycling guidelines to ensure proper disposal.
Remember, each water dispenser and replacement bottle may have specific requirements, so always refer to the manufacturer’s instructions for the best results.
With these considerations in mind, you can confidently replace your water bottle and enjoy clean, refreshing hydration from your dispenser.
Can the Steps to Replace a Water Bottle on a Dispenser also be Applied to a Brita Water Bottle Filter Replacement?
The replace brita water bottle filter steps can be applied to a water bottle dispenser as well. Both involve removing the old filter, rinsing the new one, and inserting it correctly. Following the same procedure ensures a successful replacement and guarantees clean, filtered water every time.
FAQ About How To Replace Water Bottle On Dispenser
How Do I Replace The Water Bottle On The Dispenser?
Replacing the water bottle is as easy as following these steps: 1. Turn off the power and unplug the dispenser. 2. Lift the empty bottle out and set it aside. 3. Clean the dispenser’s water tray and reservoir if needed. 4. Place a new water bottle securely on the dispenser. 5. Plug in the dispenser and turn on the power. Enjoy fresh water!
Can I Replace The Water Bottle Myself?
Absolutely! Replacing the water bottle on a dispenser is a simple task that you can easily do yourself.
Just follow the step-by-step instructions provided and you’ll have a fresh water bottle ready to go in no time.
What Size Of Water Bottle Can I Use For My Dispenser?
Most water dispensers can accommodate standard water bottles with a capacity of 5 gallons.
However, it’s always a good idea to check the specifications of your specific dispenser to ensure compatibility.
How Often Should I Replace The Water Bottle On My Dispenser?
It is recommended to replace the water bottle on your dispenser every 4-6 weeks.
This timeframe will ensure that you have a constant supply of fresh and clean drinking water, while also avoiding any potential odors or contamination that may occur over time.
Can I Reuse The Empty Water Bottle?
While some people may choose to reuse water bottles for other purposes, it is generally not recommended to reuse a water bottle for drinking water after it has been emptied.
Plastic bottles can harbor bacteria and may not be as hygienic as a fresh bottle. It’s best to recycle the empty bottle and use a new one for your dispenser.
Conclusion
Replacing the water bottle on your dispenser is a straightforward task that can ensure you always have a fresh supply of water.
By following these simple steps, you can easily replace the water bottle and keep your dispenser functioning efficiently.
First, make sure to turn off the power and remove the empty bottle. Then, clean the dispenser and spout to maintain cleanliness.
Next, place the new water bottle on the dispenser and secure it tightly. Finally, turn the power back on and enjoy clean and refreshing water.
With these easy-to-follow instructions, you can confidently replace the water bottle on your dispenser without any hassle.
So, make sure to stay hydrated and keep your water dispenser running smoothly for years to come by regularly replacing the water bottle.