How to Test Water Bottle? Step By Step Guide!
To test a water bottle, you need to analyze the content of the water for any potentially harmful substances, assess the material of the bottle for any toxic compounds, and evaluate the functionality of the bottle and its design.
Testing a water bottle involves several steps. Firstly, it includes testing the water quality from the bottle, which can be done using a water testing kit.
This kit detects a range of contaminants such as heavy metals, bacteria, and other harmful substances. Secondly, the test also involves examining the material of the bottle itself.
Certain materials like BPA can leach into the water and cause health problems. Thus, it’s essential to confirm the bottle is free from such substances.
Lastly, assessing the design and functionality of the bottle is critical. It should be leak-proof, durable, and easy to clean.
In conclusion, testing a water bottle is a comprehensive process that ensures the water we are drinking is safe and the bottle we are using is durable, practical, and free from harmful substances.
The process includes analyzing the water quality, inspecting the bottle material, and evaluating its overall design and functionality.
Water is crucial for our health, and thus, we should not overlook the importance of using a well-tested water bottle.
9 Steps: Test Water Bottle
| Steps | Description |
|---|---|
| 1. Visual Inspection | Check the physical properties of the water bottle. Look for any cracks, dents, or leaks. |
| 2. Leak Test | Fill the water bottle with water and close the lid tightly. Then, shake the bottle and see if there are any leaks. |
| 3. Material Test | Check the manufacturing material of the bottle. Ensure that it is BPA-free and food-safe. |
| 4. Taste Test | Fill the water bottle with water and drink from it to test if the material of the bottle is causing any change in the taste of the water. |
| 5. Durability Test | Drop the water bottle from a certain height to check its durability. It shouldn’t crack or leak after the drop. |
| 6. Lid Test | Test the functionality of the lid. It should open and close easily and securely. |
| 7. Heat Resistance Test | Fill the bottle with hot water to see if it can withstand high temperatures. This is especially important if you plan to use the bottle for hot beverages. |
| 8. Cold Resistance Test | Freeze the water bottle to check its endurance towards cold temperatures. The bottle should not crack or break. |
| 9. Cleaning Test | Finally, clean the water bottle to check if it can be easily cleaned without leaving any residue or odor. |
Key Takeaway
Five Facts About Test Water Bottle
Understanding The Importance Of Testing Water Bottles
Water bottles are a convenient and essential accessory in our daily lives. Whether you use them for staying hydrated during workouts or simply carrying water on the go, it’s important to ensure that the water bottles you use are safe and of high quality.
Testing water bottles before use is crucial in understanding their suitability for daily use. In this section, we will explore the impact of low-quality water bottles on health and discuss why testing them is so important.
Impact Of Low-Quality Water Bottles On Health
Low-quality water bottles can have several negative effects on your health. It’s essential to understand these impacts to make informed decisions about the water bottles you choose.
Here are the key points:
- Leaching of harmful chemicals: Low-quality water bottles may contain chemicals such as bpa (bisphenol a) and phthalates. When exposed to heat or other factors, these chemicals can leach into the water, making it harmful for consumption.
- Hormonal disruption: Bpa and phthalates are known to disrupt hormonal balance in the body. Prolonged exposure to these chemicals can lead to various health issues including reproductive problems, developmental disorders, and even certain types of cancer.
- Risk of contamination: Poorly manufactured or low-quality water bottles may have crevices, cracks, or uneven surfaces that can harbor bacteria and other microbes. These can contaminate the water you drink and potentially cause illness.
- Inadequate insulation: Some low-quality water bottles may not provide proper insulation, leading to the growth of bacteria or the risk of microbial contamination when storing beverages at the wrong temperature.
By understanding the potential health risks associated with low-quality water bottles, you can make informed decisions about the water bottles you use.
Regular testing is crucial to ensure that the water bottles you rely on are safe, bpa-free, and meet the necessary quality standards.
Testing can help identify any concerns and prevent the potential negative impact on your health.
Remember, your health is important, and choosing the right water bottle is a step towards ensuring your well-being.
Checking For Cracks Or Leaks
Inspecting Bottle Structure
When it comes to selecting a reliable water bottle, it is essential to ensure its structural integrity. Even the smallest crack or leak can ruin your hydration experience and potentially lead to water wastage.
With that in mind, let’s explore how you can thoroughly check the structure of a water bottle to avoid any unwelcome surprises.
Looking For Visible Flaws
Take a few moments to inspect the bottle’s exterior for any visible flaws. Here are some key points to consider:
- Carefully examine the surface of the bottle for cracks, dents, or punctures. Run your fingers along the bottle to detect any abnormalities.
- Pay close attention to the bottom of the bottle, where cracks or leaks are more likely to occur. Look for signs of wear and tear or any signs of weakness.
- Check the bottle’s cap or lid for any signs of damage or looseness. A secure and well-functioning lid is crucial for preventing leaks and spills.
- Inspect the bottle’s seals or gaskets. These rubber or silicone components play a vital role in preventing leaks. Ensure they are intact and in good condition.
By following these visual inspection steps, you can identify potential flaws that may compromise the bottle’s effectiveness.
Making Sure There Are No Leaks
While a visual inspection reveals visible flaws, it’s equally important to check for leaks before trusting your water bottle.
Here’s how:
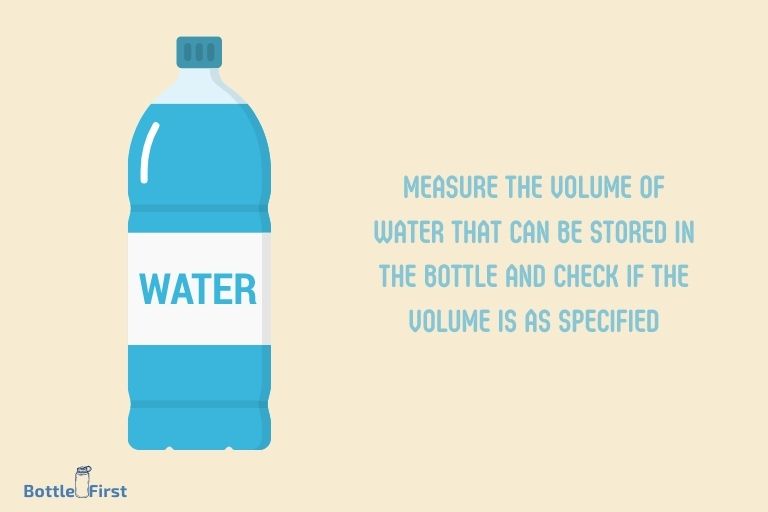
- Fill your water bottle to its maximum capacity or as instructed by the manufacturer.
- Carefully tighten the lid or cap, ensuring it is securely closed.
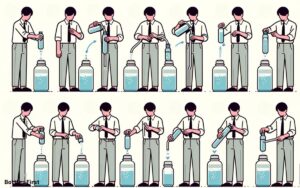
- Holding the bottle upright, gently squeeze it to create pressure inside. Observe if any water leaks from the bottle or if you notice water seeping out through cracks or gaps.
- Turn the bottle upside down and check for leaks once again.
- Tilt the bottle to different angles to mimic movements during transportation or usage. This will help you determine whether the bottle can withstand various orientations without leaking.
Remember, a water bottle should be watertight and capable of retaining the liquid inside, regardless of external forces or positions. By performing these leak tests, you can ascertain whether any leakage issues exist.
By following these simple steps, you can confidently assess the structure of a water bottle and ensure it aligns with your hydration needs.
Remember, a solid bottle structure and leak-free design are key components of a reliable water bottle.
Verifying Labeling And Branding
When it comes to purchasing a water bottle, it’s essential to ensure that the labeling and branding are accurate and reliable.
The information on the label not only helps you make an informed decision but also gives you insight into the authenticity and quality of the product.
In this section, we will explore the key points to consider when verifying labeling and branding.
Scrutinizing Brand Information
- Brand reputation: Take a moment to research and evaluate the reputation of the brand. Look for customer reviews and ratings to gauge their credibility and trustworthiness. A reliable brand will often have positive feedback from satisfied customers.
- Brand history: Consider the brand’s longevity and experience in the industry. Established brands tend to have a track record of producing high-quality products. Look for information about the brand’s mission, values, and commitment to excellence.
- Product description: Carefully read the product description on the label. It should provide detailed information about the bottle’s features, materials used, and any unique selling points. Ensure that the description matches your requirements and preferences.
- Product specification: Check if the label includes essential specifications such as capacity, dimensions, weight, and any additional features. This information will help you determine if the water bottle is suitable for your needs.
- Logo and branding elements: Pay attention to the brand’s logo and other branding elements displayed on the label. They should be clear, well-designed, and consistent across the product line. Any discrepancies or low-quality design may indicate a lack of attention to detail.
Checking For Legitimate Certifications
- Bpa-free certification: Bisphenol a (bpa) is a chemical that can be harmful to health. Ensure that the water bottle has a bpa-free certification to guarantee that it is free from this potentially harmful substance.
- Food-grade certification: Look for a food-grade certification, such as fda (food and drug administration) approval. This certification ensures that the water bottle is safe for storing beverages and complies with specific quality and safety standards.
- Sustainable labels: With increasing awareness about environmental issues, many water bottle brands now emphasize sustainability. Look for labels that indicate the use of eco-friendly materials, recyclability, or support for environmental causes.
- Country of origin: Check the label for the country of origin. Some countries have stricter regulations and quality control measures. While this does not guarantee a superior product, it can provide some assurance about manufacturing standards.
Verifying the labeling and branding of a water bottle is crucial to ensure that you are purchasing a reliable and high-quality product.
By scrutinizing brand information and checking for legitimate certifications, you can make an informed decision and choose a water bottle that meets your needs.
Remember to research the brand’s reputation, evaluate the product description and specifications, and look for certifications that assure safety and sustainability.
Detecting Unpleasant Smells
Water bottles are a convenient and popular way to stay hydrated on the go. However, it’s important to ensure that your water bottle is clean and free from any unpleasant smells.
In this section, we will discuss how to detect and eliminate any unusual or strong odors coming from your water bottle.
Smelling The Interior
The first step in detecting any unpleasant smells in your water bottle is to take a whiff of the interior. By smelling the inside of your bottle, you can quickly determine if there are any lingering odors that need to be addressed.
Here are some key points to keep in mind when smelling the interior of your water bottle:
- Give it a sniff: Take a deep breath and smell the inside of your water bottle. Be mindful of any unusual or strong odors that you may detect.
- Cleanliness matters: Remember to clean your water bottle regularly to prevent the buildup of bacteria and mildew, which can cause unpleasant smells.
- Pay attention to materials: Different types of water bottles, such as plastic, stainless steel, or glass, may have distinct odors. Be aware of any inherent smells associated with the material of your bottle.
- Consider previous contents: If your water bottle has been previously used to store flavored drinks, it may retain some of those scents. Take note of any smells that seem out of the ordinary.
- Investigate the lid: Don’t forget to give the lid of your water bottle a quick sniff as well. Sometimes, odors can linger in the lid or straw, even if the bottle itself smells fine.
By following these steps and paying attention to the smells coming from the interior of your water bottle, you can ensure that your drinking experience remains fresh and odor-free.
Cleaning and proper maintenance are key in preventing and eliminating any unpleasant odors.
Ensuring Clean, Fresh Tasting Water
Keeping your water bottle clean and fresh is essential for enjoying a refreshing drink every time. No one wants to take a sip from a bottle that has an off-putting taste or smell. In this section, we will discuss how you can test your water bottle to ensure clean and fresh-tasting water.
Follow these steps to maintain great-tasting hydration throughout the day.
Filling The Bottle With Water:
When filling your water bottle, it’s crucial to take certain precautions to ensure the water remains clean and pure.
Consider the following key points:
- Fill the bottle with fresh, cold tap water: Using tap water is an economical and eco-friendly choice. Make sure to turn on the cold water tap, as hot water can potentially contain more minerals and impurities.
- Avoid filling the bottle directly from the faucet: Instead, use a clean glass or pitcher to pour the water into the bottle. This helps prevent any potential contaminants from getting into your bottle.
- Clean the bottle before filling it: Rinse the bottle with warm water and mild dish soap, and then thoroughly rinse it again to remove any residual soap. This step ensures that your water stays free from any unwanted flavors.
Tasting For Any Off-Putting Flavors:
After filling your water bottle, it’s important to give it a taste test to ensure that the water is clean and fresh.
Here are some key points to consider:
- Take a small sip and swirl the water around your mouth: Pay attention to any unusual flavors, such as a metallic or plastic taste. If you detect any off-putting flavors, it’s essential to clean your bottle thoroughly before using it again.
- Evaluate the smell of the water: Give your water bottle a quick sniff. If there is any unpleasant odor, rinse the bottle again and allow it to dry completely before refilling.
- Consider using a water filter: If you frequently encounter water with a strange taste or odor, invest in a water filter designed for bottles. These filters effectively remove impurities, enhancing the taste and quality of your water.
Remember, regularly cleaning your water bottle and inspecting for any signs of wear and tear is crucial for ensuring clean, fresh-tasting water.
By following these simple steps, you can enjoy your hydration without any unwelcome flavors or smells. Stay refreshed and stay hydrated!
Determining Bpa And Chemical Levels
Testing water bottles for bpa and chemical levels is crucial to ensure the safety and quality of the water you consume.
With the increasing awareness of the potential health risks associated with certain materials, it’s essential to have the knowledge and tools to determine the composition of your water bottle.
In this section, we will explore two methods to help you assess the presence of bpa and other chemicals in your water bottle.
From researching the bottle’s material composition to using diy testing kits or professional services, we’ve got you covered.
Researching The Bottle’S Material Composition:
When it comes to determining the presence of bpa and other chemicals in your water bottle, conducting thorough research on the bottle’s material composition is essential.
Here are some key points to keep in mind:
- Check the bottle’s label or packaging for information about the material used. Look for indications such as “bpa-free” or “made from food-grade plastic.”
- Look for symbols on the bottom of the bottle, such as the number “7” inside a triangle, which could signify the presence of bpa.
- Some common materials used in water bottles include plastic (polyethylene, polypropylene), stainless steel, glass, and aluminum. Each material has its own considerations regarding chemical composition.
Using Diy Testing Kits Or Professional Services:
If researching the bottle’s material composition doesn’t provide sufficient information, you can turn to diy testing kits or professional services for a more accurate assessment.
Here’s what you need to know:
- Diy testing kits are readily available, affordable, and easy to use. These kits usually come with test strips or reagents that can detect the presence of harmful substances like bpa, phthalates, and lead. Follow the provided instructions carefully to ensure accurate results.
- Professional testing services can offer a comprehensive analysis of the bottle’s chemical composition. They often utilize specialized equipment and techniques to provide more accurate and detailed results. Keep in mind that professional testing services may come at an additional cost.
By researching the bottle’s material composition and utilizing diy testing kits or professional services, you can have a better understanding of the bpa and chemical levels present in your water bottle.
This knowledge will empower you to make informed decisions about the safety and quality of the water you consume.
Remember, ensuring the health and well-being of yourself and your loved ones should always be a top priority.
Evaluating Environmental Impact
Analyzing The Bottle’S Recyclability
When it comes to evaluating water bottles, one significant aspect to consider is the recyclability of the bottle itself.
As an environmentally-conscious consumer, it’s essential to choose a water bottle that can be easily recycled and doesn’t contribute to the growing landfill problem.
Here are the key points to assess the recyclability of a water bottle:
- Check the plastic identification code: Look for the plastic identification code, usually represented by a number from 1 to 7, imprinted on the bottom of the bottle. This code indicates the type of plastic used in the bottle and helps determine its recyclability.
- Focus on pet bottles: Polyethylene terephthalate (pet) bottles, marked with the number 1, are highly recommended due to their high recyclability. Pet bottles can be easily recycled into new bottles, polyester fabric, and various other products.
- Consider hdpe bottles: High-density polyethylene (hdpe) bottles, marked with the number 2, are also a good choice. These bottles are widely recycled and can be transformed into new bottles, plastic lumber, and pipe.
- Avoid difficult-to-recycle plastics: Some water bottles, such as those made of pvc (marked with number 3) or polystyrene (number 6), can be challenging to recycle and should be avoided whenever possible. These plastics have limited recycling markets and often end up in landfills.
- Look for green packaging: Keep an eye out for water bottles packaged in eco-friendly materials, such as recycled cardboard or low-impact ink. Opting for bottles with minimal packaging waste can further reduce the environmental impact.
Assessing The Manufacturer’S Commitment To Sustainability
Besides evaluating the water bottle itself, assessing the manufacturer’s commitment to sustainability is crucial.
A reputable and environmentally-conscious manufacturer should prioritize sustainable practices throughout their entire production process.
Here are the key points to consider when assessing the manufacturer’s commitment to sustainability:
- Research the company: Conduct a quick online search to gather information about the manufacturer’s sustainability initiatives. Look for certifications or partnerships with eco-friendly organizations.
- Check for bpa-free bottles: Bisphenol a (bpa) is a chemical commonly found in plastic bottles that can leach into the water and have adverse health effects. Ensure that the manufacturer produces bpa-free water bottles.
- Investigate the supply chain: Examine whether the manufacturer sources materials responsibly and ethically. A sustainable company should prioritize environmentally-friendly materials and ensure fair labor practices.
- Energy-efficient manufacturing: Determine whether the manufacturer employs energy-efficient practices during the production process. This can include the use of renewable energy sources or implementing energy-saving technologies.
- Product lifespan and durability: Evaluate the durability and lifespan of the water bottle. A longer lifespan reduces the need for frequent replacements, ultimately decreasing the overall environmental impact.
By paying attention to the recyclability of the water bottle and the manufacturer’s commitment to sustainability, you can make a more informed and eco-friendly choice when it comes to choosing your next water bottle.
Can I Test a Water Bottle in Terraria Using the Same Steps?
To test a water bottle in Terraria, simply place water bottle on table in terraria. This will trigger an examination of the bottle’s properties as the game responds accordingly. The same steps can be applied to study diverse objects in the game, enhancing interactivity and gameplay experience for players.
FAQ AboutHow To Test Water Bottle
How Do I Test The Quality Of A Water Bottle?
To test the quality of a water bottle, check for durability, leak-proof construction, and bpa-free materials.
What Are The Common Tests For Water Bottle Quality?
Common tests for water bottle quality include pressure tests, impact resistance tests, and chemical leakage tests.
How Can I Test If My Water Bottle Is Bpa-Free?
To test if your water bottle is bpa-free, look for the recycling symbol with number 1, 2, 4, or 5, as these are considered safe.
How Do I Check If A Water Bottle Is Leak-Proof?
To check if a water bottle is leak-proof, fill it with water, close the lid tightly, and tip it upside down. If it doesn’t leak, it’s leak-proof.
Are There Any Tests For Water Bottle Hygiene?
Yes, you can perform a simple hygiene test by washing the bottle thoroughly and inspecting for any lingering odors or discoloration.
Conclusion
Testing your water bottle is essential for ensuring its safety and quality. By following the simple steps outlined in this blog post, you can confidently assess the integrity of your water bottle and protect your health.
Regularly inspecting for leaks, checking for bpa-free materials, and examining for any signs of wear and tear are necessary precautions to take.
Additionally, conducting a taste test and monitoring for any unusual odors are crucial to guaranteeing that your water remains fresh.
Remember to clean your bottle thoroughly and frequently, using appropriate cleaning methods, to prevent the growth of bacteria and mold.
By being diligent in your testing and maintenance, you can enjoy a reliable and healthy water bottle, promoting your wellbeing and sustainability. Stay hydrated!