Water Bottle Planter Ideas: Find Out Here!
Water bottle planter ideas can be a fun and innovative way to recycle and reuse old plastic bottles. These planters can be used to grow flowers, herbs, and even small vegetables.
Some popular water bottle planter ideas include hanging planters, windowsill herb gardens, and self-watering planters.
Water bottle planters are a sustainable solution to reuse plastic bottles rather than discarding them.
By transforming them into planters, you can contribute to minimizing plastic waste and promoting green living.
They are easy to make and require just a few materials such as plastic bottles, soil, plants or seeds, and some basic tools.
Incorporating water bottle planters into your home or garden is a simple way to add a touch of greenery while also doing your part for the environment.
Whether you decide to hang them from your porch or use them as a herb garden, these unique planters
7 Creative Water Bottle Planter Ideas
| Water Bottle Planter Idea | Description | Additional Materials Required |
|---|---|---|
| 1. Hanging Planters | Cut the water bottle in half, invert the top part in the bottom part and hang it with string. This can be an innovative way to plant your herbs. | String, Soil, Plant Seed |
| 2. Self-Watering Planters | This is done by inverting the top part of the bottle into the bottom part and filling it with water. The plant can then drink water as needed. | Cotton Wick, Soil, Plant Seed |
| 3. Vertical Garden | This involved cutting the side of the bottle and attaching it to a panel in a vertical manner. It can create a green wall effect. | Panel, Screws, Soil, Plant Seed |
| 4. Window Planters | Cut the bottle in half, fill it with soil and place them near the window. This can be used for growing small herbs. | Soil, Plant Seed |
| 5. Bottle Terrarium | This involves cutting the bottle into two and using the bottom part to contain the plant and the top part as a lid. | Pebbles, Soil, Small Plants, Activated Charcoal |
| 6. Seed Starters | Cut the bottom of the bottle, fill with soil and plant the seed. This is ideal for starting seeds before transplanting. | Soil, Plant Seeds |
| 7. Aquatic Plant Holder | Keep the bottle whole, fill with water and plant your favorite aquatic plants. | Water, Aquatic Plants |
Key Takeaway
Five Facts About: Water Bottle Planters
Water Bottle Planter Ideas: Transforming Trash Into Green Treasure
Water bottles are commonly discarded after use, contributing to the growing problem of plastic waste. However, with a little creativity, these bottles can be repurposed into charming and eco-friendly planters.
Not only do water bottle planters add a touch of greenery to your space, but they also provide a sustainable solution to reducing plastic waste.
Let’s explore some ingenious ideas for transforming water bottles into practical and stylish planters.
Environmental Benefits Of Repurposing Water Bottles
Repurposing water bottles as planters offers several environmental advantages. By giving these bottles a second life, we can:
- Reduce plastic waste: By repurposing water bottles, we prevent them from ending up in landfills or polluting our oceans.
- Conserve resources: Using water bottles as planters reduces the demand for new materials, such as ceramic or plastic pots, thus conserving valuable resources.
- Promote sustainability: Embracing innovative ways to reuse materials encourages a sustainable mindset and reduces our ecological footprint.
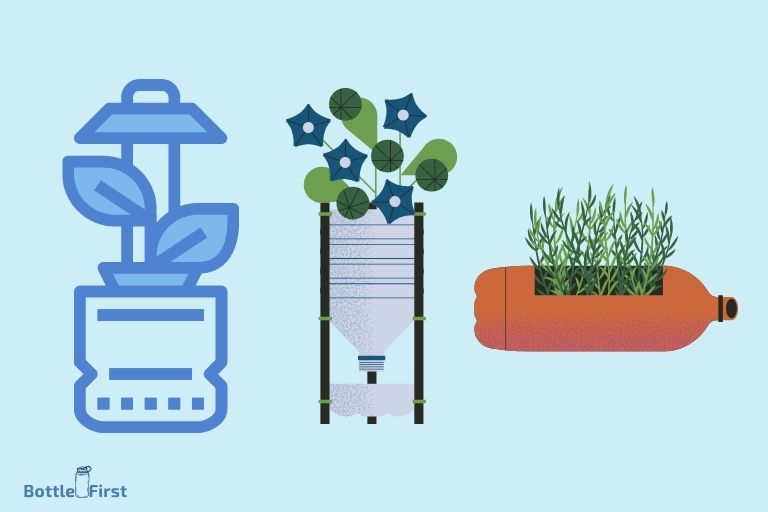
Vertical Water Bottle Planters: Maximizing Space
Vertical gardening is an excellent option for those with limited space. Transforming water bottles into vertical planters allows you to make the most of your available area.
Here’s how:
- Cut the water bottles in half lengthwise.
- Attach the cut side of the bottle to a wall, fence, or wooden frame using zip ties or sturdy tape.
- Fill each bottle half with soil and plant your favorite herbs, succulents, or even small flowers.
- Ensure proper drainage by creating small holes at the bottom of each bottle.
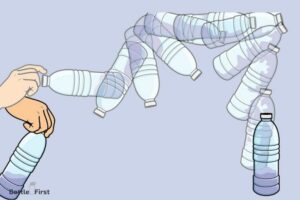
Hanging Water Bottle Planters: A Delightful Display
Hanging planters bring a touch of elegance and natural beauty to any space. With water bottles, you can effortlessly create unique hanging planters.
Here’s a simple guide:
- Use a sharp object like scissors or a knife to carefully cut out an opening on the side of the water bottle.
- Create two or four holes near the bottle’s neck, evenly spaced.
- Loop a sturdy string or twine through the holes to create a hanging mechanism.
- Fill the bottle with a well-draining potting mix and introduce your favorite trailing plants or colorful flowers.
Self-Watering Water Bottle Planters: Nurturing With Ease
Maintaining proper watering for your plants can be a challenge, especially during busy days or vacations. Self-watering water bottle planters solve this problem.
Here’s how to make one:
- Cut a water bottle in half, keeping the top section.
- Invert the top half and place it back inside the bottom half, creating a water reservoir.
- Pierce several holes in the top half, allowing water to slowly seep into the soil.
- Fill the bottom half with water and add your chosen plants to the top half.
- As the soil dries, water will be drawn from the bottom reservoir, ensuring consistent hydration for your plants.
Decorative Water Bottle Planters: Unleashing Creativity
Water bottles can be transformed into eye-catching centerpieces or decorative elements.
Here are some ideas to get your creative juices flowing:
- Paint the exterior of water bottles with vibrant colors or intricate designs.
- Wrap the bottles with decorative twine, ribbon, or fabric to add texture and interest.
- Combine multiple bottles to create unique patterns or artistic installations.
- Personalize the planters by attaching labels or small tags with the names of the plants.
Embrace The Green Transformation!
From small spaces to large gardens, water bottle planters offer endless possibilities for greening your surroundings.
By repurposing these bottles, you not only contribute to reducing plastic waste but also add a touch of natural beauty to your home or office.
So, why not embrace the green transformation and transform trash into green treasure? Start your water bottle planter project today and enjoy the satisfaction of nurturing both plants and the environment.
Remember, Every Small Step Counts In Ensuring A Sustainable Future!
Innovative Water Bottle Planter Designs
Creative Ways To Upcycle Water Bottles Into Functional Planters
Are you looking to add a touch of green to your living space without breaking the bank? Water bottle planters are a fantastic way to bring the beauty of nature indoors while reusing those plastic bottles.
We’ll showcase some innovative and eye-catching designs that can transform ordinary water bottles into functional planters.
Let’s dive in!
Transforming Water Bottles Into Vertical Gardens
- Wall-mounted planters: Attach water bottles to a wooden board in various angles for a unique and artistic display.
- Hanging planters: Create an eye-catching hanging garden by cutting the top off a bottle and adding a string to suspend it from the ceiling.
- Living wall art: Arrange multiple water bottles filled with soil and plants in a grid pattern on a wall for a stunning living wall installation.
Stylish Water Bottle Planters For Small Spaces
- Miniature terrariums: Cut a small opening in the side of a water bottle to create a mini greenhouse perfect for growing succulents or air plants.
- Window sill planters: Attach suction cups to the side of a water bottle and secure it to your window sill, allowing for herbs or small flowers to thrive in limited space.
- Tiered bottle planter: Stack several water bottles on top of each other with the aid of a sturdy rod, creating a cascading effect ideal for trailing plants.
Unique And Functional Water Bottle Planter Designs
- Self-watering planters: Create a self-watering system by cutting out the bottom of a water bottle and inserting it upside down into another bottle filled with water. This allows the plants to absorb water as needed.
- Woven bottle planter: Cut the top off a water bottle and weave together multiple bottles to form a unique woven pattern, creating an intriguing planter that doubles as a piece of art.
- Tabletop bottle garden: Slice off the top portion of a water bottle, flip it over, and insert it back into the bottle. Fill it with soil and plant small herbs or flowers, saving space and offering an aesthetic appeal to your tabletop.
With a little creativity and a few simple steps, you can upcycle water bottles into functional planters that add a touch of nature to your living space.
From vertical gardens to stylish small space solutions, these innovative designs allow you to embrace sustainability while beautifying your home.
So why not give water bottle planters a try and enjoy the benefits of bringing the outdoors inside?
Tips For Successful Water Bottle Planting
Thinking of using water bottles as planters? It’s a clever and eco-friendly way to repurpose these ubiquitous plastic containers.
Not only does it reduce waste, but it also brings some greenery indoors or adds a touch of nature to your outdoor space.
To ensure your water bottle planters thrive, here are some valuable tips:
Choosing The Right Plants For Water Bottle Planters
When it comes to selecting plants for your water bottle planters, it’s essential to consider their specific needs.
Here are a few key points to keep in mind:
- Opt for small plants or those that don’t require extensive root systems.
- Choose plants that tolerate a variety of lighting conditions, as water bottle planters may be placed in different areas of your home.
- Consider plants that are resilient and can withstand periods of neglect, as water bottle planters may require less frequent watering.
Providing Proper Drainage And Irrigation For Optimal Growth
To ensure your water bottle planters thrive, it’s crucial to provide them with proper drainage and irrigation.
Here are some important considerations:
- Create small drainage holes at the bottom of the water bottle to prevent waterlogged soil, which can lead to root rot.
- Use a layer of stones or pebbles at the bottom of the bottle to facilitate water drainage.
- Monitor the moisture level regularly and adjust watering accordingly to prevent overwatering or underwatering.
- Consider using self-watering systems or adding a drip irrigation setup to maintain optimal moisture levels.
Keeping An Eye On Sunlight Exposure
Sunlight is essential for plant growth, even in water bottle planters. Here are a few things to keep in mind regarding sunlight exposure:
- Place your water bottle planters in areas where they can receive adequate sunlight based on the plants’ needs.
- Avoid placing them in direct sunlight for prolonged periods, as the compact size of water bottle planters can intensify heat and burn the plants.
- Monitor your plants’ reactions to sunlight and adjust their location accordingly to maintain healthy growth.
Regularly Monitoring And Caring For Your Water Bottle Planters
Proper care and monitoring are vital for maintaining healthy water bottle planters.
Here are a few tips to keep in mind:
- Check the soil moisture regularly to ensure it stays moist but not waterlogged.
- Remove any dead leaves or debris from the planters to avoid attracting pests and promoting mold growth.
- Prune and trim the plants as needed to encourage healthy growth and prevent overcrowding.
- Pay attention to any signs of plant distress, such as wilting or yellowing leaves, and take appropriate action promptly.
Remember, water bottle planters require a bit more attention than traditional planters, but with proper care and maintenance, they can flourish beautifully in any space. Follow these tips, and you’ll have a thriving miniature garden that will surely impress.
Diy Water Bottle Planter Projects
Water Bottle Planter Ideas
If you’re looking for a creative and sustainable way to add some green to your living space, why not consider diy water bottle planter projects?
Not only are these projects fun and easy to do, but they also provide a great opportunity to upcycle and reuse plastic bottles.
In this section, we will explore step-by-step instructions for creating different types of water bottle planters, as well as various techniques and materials for customization.
Step-By-Step Instructions For Creating Different Types Of Water Bottle Planters
- Start by collecting empty plastic water bottles of various sizes.
- Wash the bottles thoroughly and remove any labels or stickers.
- Carefully cut off the top portion of the bottle using scissors or a sharp knife. The height of the cut will depend on the size of the planter you want to create.
- Make drainage holes in the bottom of the bottle using a heated nail or a drill.
- You can leave the planter as is or paint it with acrylic paints for a personalized touch.
- Fill the bottom of the planter with a layer of small rocks or pebbles to improve drainage.
- Add potting soil to the planter, leaving enough space at the top for the plant’s roots.
- Plant your desired herbs, flowers, or succulents in the planter, making sure to water them regularly.
Exploring Various Techniques And Materials For Customization
- Decorative wrapping: Use jute twine, colored yarn, or fabric scraps to wrap around the outside of the water bottle planter. Secure the ends with glue or double-sided tape for a rustic or boho look.
- Stencils and paint: Apply stencils to the planter and use spray paint or acrylic paints to create unique designs and patterns. This is a great way to add a pop of color to your planters.
- Macrame hangers: Create a macrame hanger using thick cords or ropes to hang your water bottle planters. This adds an eye-catching element to your indoor or outdoor space.
- Vertical wall planters: Attach multiple water bottle planters to a wooden frame or wall using hooks or adhesive strips. This vertical display is perfect for small spaces and can be customized with different colors and plant varieties.
- Recycled materials: Get creative by using other recycled materials to enhance your water bottle planters. Consider adding small trinkets, seashells, or buttons for added texture and character.
By following these step-by-step instructions and exploring various techniques and materials for customization, you can create unique and eco-friendly water bottle planters that will surely impress.
Get your creative juices flowing and enjoy the process of transforming simple plastic bottles into beautiful planters that will breathe life into your home or garden.
Maintaining And Caring For Water Bottle Planters
Water bottle planters are a creative and eco-friendly way to bring nature into your home. Not only do they add a touch of greenery to any space, they also help purify the air and improve overall mood.
However, like any other plant, water bottle planters require proper care and attention to thrive.
In this section, we will discuss guidelines for watering, fertilizing, and pruning plants in water bottle planters, as well as troubleshooting common issues to ensure long-term plant health.
Guidelines For Watering, Fertilizing, And Pruning Plants In Water Bottle Planters:
Watering:
- Check the moisture levels regularly by inserting your finger into the soil. Water the plants when the top inch of soil feels dry.
- Avoid overwatering, as it can lead to root rot. Only water the plants when necessary, and ensure that the excess water drains properly.
- Use room temperature water to prevent shocking the plants.
- Consider using a self-watering system or adding a small pebble tray to maintain consistent moisture levels.
Fertilizing:
- Fertilize the plants once every month during the growing season.
- Use a balanced water-soluble fertilizer and follow the manufacturer’s instructions for dilution ratios.
- Avoid overfertilizing, as it can cause damage to the plants. Remember that less is often more when it comes to fertilizing.
Pruning:
- Regularly inspect your water bottle planters for any dead or yellowing leaves. Remove them promptly to promote the overall health of the plants.
- Prune excessive growth to control the size and shape of the plants.
- Ensure that you use sterile cutting tools to prevent the spread of diseases.
Troubleshooting Common Issues And Ensuring Long-Term Plant Health:
Yellowing leaves:
- Yellowing leaves are often a sign of overwatering or underwatering. Adjust the watering schedule accordingly.
- Inspect the roots for any signs of root rot, such as a foul smell or dark, mushy roots. If present, repot the plant using fresh soil and trim any affected roots.
Wilting plants:
- Wilting can occur due to underwatering or extreme temperatures. Check the soil moisture levels and adjust the watering accordingly.
- If the plants are exposed to direct sunlight, consider moving them to a more shaded area.
Pests:
- Monitor your water bottle planters for any signs of pests, such as aphids or spider mites. Use organic pest control methods, such as neem oil or insecticidal soap, to tackle the problem.
- Regularly clean the bottles and remove any debris to prevent the buildup of pests.
Proper maintenance and care are crucial for the health and longevity of plants in water bottle planters.
By following these guidelines for watering, fertilizing, and pruning, as well as troubleshooting common issues, you can ensure that your water bottle planters thrive and bring beauty to your home or office space.
FAQ About Water Bottle Planter Ideas
How Do I Make A Water Bottle Planter?
To make a water bottle planter, simply cut off the top portion of a plastic bottle, add soil and seeds, and water regularly.
What Plants Are Best For Water Bottle Planters?
Plants like herbs, succulents, or small flowers that don’t require deep roots or much space are perfect for water bottle planters.
Can I Use Any Size Of Water Bottle For A Planter?
Yes, you can use different sizes of water bottles depending on the plants you choose and the space available for your planter.
How Often Should I Water My Water Bottle Planter?
Water bottle planters should be watered regularly, ensuring that the soil remains moist but not waterlogged. Avoid overwatering.
What Are The Benefits Of Using Water Bottle Planters?
Water bottle planters are eco-friendly, cost-effective, and allow you to upcycle plastic bottles. They also help beautify indoor or outdoor spaces.
Conclusion
Water bottle planters are not only a creative and sustainable solution for gardening but also offer a range of benefits. Whether you’re a beginner or an experienced gardener, these diy planters provide an inexpensive and versatile option for growing plants and herbs.
By repurposing and upcycling plastic water bottles, we can reduce waste and contribute to a healthier environment.
The versatility of water bottle planters allows them to be used in various settings, from balconies and windowsills to gardens and schools. Moreover, these planters enable you to personalize your green space, adding a touch of creativity and style.
So why not give it a try and transform your unused plastic water bottles into beautiful and functional planters?
Embrace sustainability, nurture your plants, and enjoy the rewards of a greener and more eco-conscious lifestyle. Start your water bottle planter journey today!