Water Bottle Rocket Diy – 8 Easy Steps!
Making a water bottle rocket DIY is a fun and educational project. It involves using simple materials such as a plastic water bottle, some cardboard, duct tape, and a water pump.
This activity is an excellent way to teach children about physics principles like the relationship between pressure, force, and acceleration.
When making a water bottle rocket, one of the key components is the water pump. This is used to build up pressure inside the bottle which, when released, propels the rocket into the air.
The cardboard is used to form the fins and the nose cone of the rocket which helps stabilize it in flight.
Making a water bottle rocket DIY is a fantastic way to engage children in learning. It demonstrates important principles like force, pressure, and acceleration in a hands-on, exciting way.
Plus, it’s also a great opportunity to teach kids about recycling and reusing materials creatively.
8 Step-by-Step Instructions for Building a Water Bottle Rocket
| Step | Materials Needed | Instructions |
|---|---|---|
| 1 | Bottle, Water, Pump, Cork, Paper, Tape | Obtain all necessary materials |
| 2 | Bottle | Take the bottle and make sure it’s clean and dry |
| 3 | Bottle, Water | Fill the bottle a third of the way up with water |
| 4 | Cork, Pump | Attach the pump to the cork. Make sure the cork fits the mouth of the bottle |
| 5 | Bottle, Cork, Pump | Fit the cork tightly in the mouth of the bottle. The pump should be on the outside |
| 6 | Bottle, Pump | Stand the bottle on its cap and start pumping air |
| 7 | Bottle | Stand back and watch the bottle rocket take off |
| 8 | Paper, Tape | For a more advanced rocket, make a cone out of paper, secure it with tape, and attach to the bottom of the bottle before launch |
Key Takeaway
Five Facts About Building a Water Bottle Rocket
What Is A Water Bottle Rocket?
Explanation Of What A Water Bottle Rocket Is
Have you ever wondered what exactly a water bottle rocket is? Well, wonder no more!
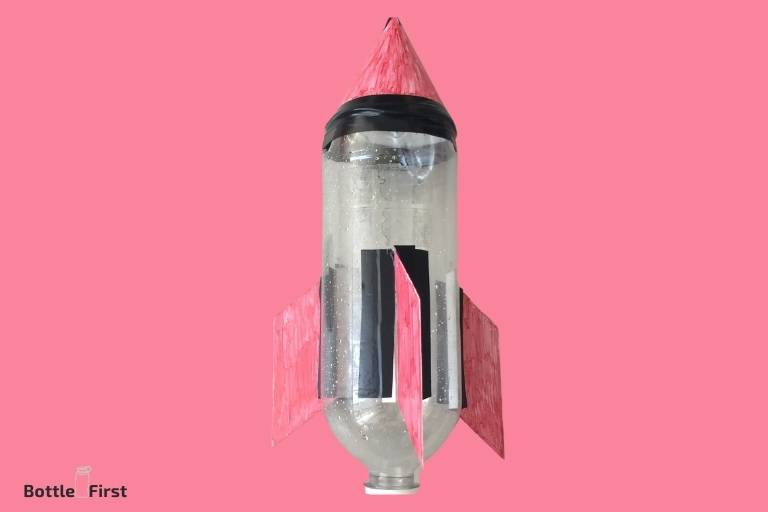
A water bottle rocket is a simple diy project that involves launching a rocket made out of a plastic water bottle into the sky using the power of compressed air and water.
These rockets provide an exciting and hands-on way to learn about physics, aerodynamics, and engineering principles.
Let’s dive deeper into what makes these rockets so fascinating.
Overview Of How It Works
The Basics:
- Water bottle rockets operate on the principle of newton’s third law of motion, which states that for every action, there is an equal and opposite reaction.
- When water and compressed air are combined inside the rocket, pressure builds up, creating a force that propels the rocket upward.
- The air pushes against the water, causing it to rush out of the bottle through a nozzle at the bottom, propelling the rocket into the air.
Step By Step Process:
Rocket preparation:
- Start by selecting a sturdy plastic water bottle and ensure it is thoroughly cleaned to remove any contaminants.
- Create a small hole near the bottom of the bottle to act as the nozzle, using a drill or sharp object.
- Attach fins to the sides of the bottle to provide stability during flight. These can be made from lightweight materials such as cardboard or plastic.
Water and air prep:
- Fill the bottle about one-third to half-full with water. The amount of water can vary depending on the desired launch height and weight of the rocket.
- Compress air into the bottle using a manual pump or an air compressor. The air should be pressurized enough to create a powerful launch but not exceed the bottle’s structural limits.
Launch time:
- With the bottle securely attached to a launch pad or holder, ensure a clear and open outdoor area for launch.
- Release the bottle from the launch pad, allowing the compressed air and water to combine and create the propulsive force.
- Watch in awe as your water bottle rocket shoots up, reaching impressive heights before eventually descending back to the ground.
These diy water bottle rockets provide endless entertainment for curious minds of all ages.
Not only are they a fun activity, but they also offer valuable insights into physics concepts such as forces, pressure, and motion.
So why not gather some materials, assemble your very own rocket, and let your imagination soar to new heights?
Happy launching!
Materials And Tools Needed
To build your own water bottle rocket, there are a few essential materials and tools that you’ll need.
Gather the following items before you get started:
- Water bottle: A standard plastic water bottle will serve as the main body of your rocket. Make sure it’s clean and free from any cracks or leaks.
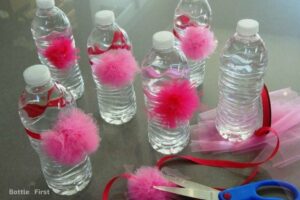
- Cardboard: You’ll need cardboard to create the fins of your rocket. Opt for sturdy cardboard that is easy to cut and maneuver.
- Duct tape: Duct tape will be used to secure various components of your rocket together, so make sure you have a roll on hand.
- Bicycle pump: A bicycle pump will be essential for pressurizing the water bottle, allowing it to launch into the air. Ensure your pump is in good working condition.
- Scissors: You’ll need a pair of scissors to cut the cardboard and tape, so have a sharp pair ready.
Now that you have all the necessary materials and tools, you’re ready to start building your water bottle rocket.
Choosing The Right Water Bottle
Selecting the right water bottle is essential when it comes to building a water bottle rocket. The size and shape of the bottle can greatly impact the rocket’s performance and overall flight.
In this section, we will discuss the key considerations and recommended sizes and shapes for optimal performance.
Considerations When Selecting A Water Bottle For The Rocket
When choosing a water bottle for your diy water rocket, the following factors should be taken into consideration:
- Material: Opt for a sturdy and durable material such as high-density polyethylene (hdpe) or polycarbonate. These materials can withstand the pressure that builds up during launch and reduce the risk of the bottle bursting.
- Size: Larger bottles tend to provide more thrust and better stability. Aim for a bottle with a capacity of at least 1 liter for better results. However, keep in mind that bigger bottles may require more water to achieve the desired launch height.
- Cap: It’s crucial to select a bottle with a tight-fitting and secure cap. This ensures that the water remains inside until launch, allowing for a more powerful expulsion during flight.
- Seams: Check the bottle for any weak seams or irregularities that could compromise its structural integrity. Look for bottles with smooth and seamless designs.
Recommended Sizes And Shapes For Optimal Performance
To maximize the performance of your water bottle rocket, consider the following recommended sizes and shapes:
- Cylindrical: Bottles with a cylindrical shape, such as soda or sports drink bottles, are popular choices for water bottle rockets. Their streamlined design allows for better aerodynamics and improved flight.
- Tapered neck: Look for bottles that have a tapered neck or cone-like shape at the top. This design helps to reduce drag and enhances the rocket’s stability during flight.
- Long and slender: Bottles with a longer and slender shape are preferred as they offer improved stability and better flight trajectory. They also allow for more water to be added, resulting in increased thrust.
Remember, the size and shape of the water bottle are crucial factors to consider when building a water bottle rocket.
By choosing the right bottle, you can ensure a more successful and thrilling rocket launch experience.
Building The Rocket Body
Constructing the rocket body is an essential step in building a water bottle rocket. This section will guide you through the process using cardboard and duct tape, ensuring a sturdy and secure structure.
First, gather the necessary materials:
- Cardboard: Look for sturdy and thick cardboard, such as that from old shipping boxes.
- Duct tape: Use a high-quality duct tape to provide strength and durability to your rocket body.
- Scissors: Have a pair of scissors handy to cut the cardboard into the desired shapes and sizes.
- Marker: Use a marker to outline the shape of the rocket body on the cardboard.
Step-By-Step Instructions For Constructing The Rocket Body Using Cardboard And Duct Tape
- Start by drawing the shape of the rocket body on the cardboard. The most common shape is a cylindrical tube, but you can get creative and try different shapes as well.
- Cut out the cardboard along the marked lines to create the main body of the rocket. Make sure the length is suitable for the height you want to achieve.
- Roll the cardboard into a tube shape, ensuring a tight fit. Use duct tape to secure the overlapping edges. Apply the tape both inside and outside the tube for added strength.
- To create the rocket’s nose cone, cut a circle out of cardboard and make a small hole in the center. Fold the circle to form a cone shape, overlapping the edges and securing them with duct tape.
- Attach the nose cone to the top of the rocket body using duct tape. Make sure it fits securely and forms a streamlined shape.
- Create stabilizing fins by cutting triangular shapes out of the remaining cardboard. The number of fins and their size can vary depending on your preference. Attach the fins to the lower end of the rocket body using duct tape, ensuring they are evenly spaced.
- To enhance the stability of the fins, add additional layers of duct tape both inside and outside the attachment points.
Tips For Ensuring A Sturdy And Secure Structure
- Reinforce the joints of the rocket body using extra layers of duct tape, especially where the cardboard overlaps.
- Apply the duct tape tightly and with firm pressure to ensure a strong bond.
- Cover the entire rocket body with multiple layers of duct tape to enhance its strength and seal any gaps.
- Smooth out any wrinkles or bumps on the duct tape to reduce air resistance during the rocket’s flight.
- Test the sturdiness of the rocket body by giving it a gentle shake and inspecting for any loose or weak areas. Reinforce any vulnerable spots with additional layers of tape.
Building a water bottle rocket body requires precision and attention to detail.
Follow these steps and tips to create a robust structure that can withstand the forces of the launch and deliver an exciting flight experience.
Attaching The Fins
The fin design and attachment method play a crucial role in the stability and flight path of a water bottle rocket.
In this section, we will explore different fin designs and their effects, as well as methods for securely attaching the fins to the rocket body.
Different Fin Designs And Their Effects On Stability And Flight Path
When it comes to fin designs, there are several options to consider. Each design has its own characteristics and can impact the rocket’s stability and flight path.
Let’s take a closer look at some popular fin designs and their effects:
- Standard rectangular fins: These are the most common fin shape and provide good stability and control. They are easy to cut out from cardboard or foam board and attach to the rocket body. The rectangular shape offers decent straight-line flight, but it may not perform as well in terms of aerodynamic maneuverability.
- Delta fins: Shaped like a triangle, delta fins provide excellent stability and greater maneuverability compared to rectangular fins. They are commonly used in high-performance rockets or when you want to achieve more complex flight patterns. Delta fins create less drag and can handle wind conditions better due to their sleek shape.
- Swept back fins: This design features fins angled backward, creating a sleek and aerodynamic profile. Swept back fins reduce drag and improve overall flight stability. They are ideal for achieving higher altitudes and faster speeds.
- Winglet fins: Inspired by the design of aircraft winglets, these fins are long and narrow with a curved tip. Winglet fins offer excellent stability and control throughout the flight. They minimize issues related to spinning or tumbling and allow for smoother gliding through the air.
Methods For Attaching Fins To The Rocket Body Securely
Attaching the fins securely is essential for maintaining stability during the rocket’s flight.
Here are some reliable methods for attaching fins to the rocket body:
- Hot glue: Hot glue is a popular and effective method for attaching fins. Apply a line of hot glue along the base of the fin and press firmly onto the rocket body. Ensure the fins are properly aligned before the glue dries. This method provides a strong bond and is relatively easy to implement.
- Epoxy adhesive: Epoxy adhesive is another reliable option for attaching fins securely. Mix the epoxy according to the manufacturer’s instructions and apply it to the base of the fin and the rocket body. Hold the fin in place until the epoxy sets. Epoxy adhesive offers excellent strength and durability but requires careful preparation and handling.
- Fin mounts: Fin mounts are small plastic or metal brackets specifically designed for attaching fins to rocket bodies. These mounts usually have pre-drilled holes for easy installation. Simply align the fin with the mount and fasten it using screws or bolts. Fin mounts provide a secure and professional attachment method.
- Duct tape: In a pinch or for experimentation purposes, duct tape can be used to attach fins. While not the most durable option, duct tape is quick and easy to apply. However, it is important to reinforce the attachment with additional tape to prevent the fins from detaching mid-flight.
Remember to attach the fins symmetrically around the rocket’s body to maintain balance and stability.
Experiment with different attachment methods and designs to find what works best for your water bottle rocket diy project.
Happy building and launching!
Incorporating The Nose Cone
Water Bottle Rocket Diy: Incorporating The Nose Cone
A key component in the construction of a water bottle rocket is the nose cone. The nose cone has a crucial role to play in ensuring the rocket’s stability and aerodynamics.
In this section, we will explore the importance of a nose cone in aerodynamics and examine techniques for creating and attaching one to the rocket body.
Importance Of A Nose Cone In Aerodynamics
The nose cone of a water bottle rocket serves the following important purposes:
- Streamlining: The shape of the nose cone minimizes air resistance, allowing the rocket to cut through the air more efficiently.
- Stability: The nose cone helps maintain stability during the rocket’s flight by reducing turbulence and preventing the rocket from spinning out of control.
- Enhancing altitude: A well-designed nose cone can help increase the altitude achieved by the rocket due to its aerodynamic properties.
Techniques For Creating And Attaching A Nose Cone To The Rocket Body
Creating and attaching a nose cone can be a straightforward process.
Here are some techniques to consider:
- Material selection: Choose lightweight materials such as cardboard, plastic, or foam that are easy to shape and attach to the rocket body.
- Nose cone shape: Aim for a streamlined shape, like a cone or a rounded tip, to reduce drag and achieve better aerodynamics.
- Construction methods: Various methods can be employed to create a nose cone, such as cutting and shaping the material, molding it with heat, or using pre-made cone kits available at hobby stores.
- Attaching the nose cone: Secure the nose cone to the rocket body using strong adhesive or by creating tabs that can be inserted into slits on the body.
- Reinforcement: To ensure the nose cone stays in place during launch, reinforce the attachment points with additional layers of adhesive or tape.
Remember, while constructing and attaching a nose cone, it’s important to maintain a balance between weight and stability. Avoid using heavy materials that may hinder the rocket’s flight performance.
Incorporating a well-designed nose cone into your water bottle rocket is a crucial step towards achieving better flight performance and stability.
By considering the aerodynamic principles and techniques mentioned above, you can enhance the rocket’s efficiency and maximize its altitude during launch.
So, let’s get creative and start building a rocket that will soar to great heights!
Preparing For Launch
Before you get ready to launch your water bottle rocket, it’s important to take some necessary precautions and choose the right launch site and conditions.
Safety should always be your top priority, so let’s dive into the key points:
Safety Precautions When Launching A Water Bottle Rocket:
- Clear the area: Make sure the launch site is clear of any people or objects that could be potentially harmed during the launch.
- Wear safety gear: Protect yourself by wearing safety goggles and gloves to prevent any eye injuries or burns.
- Keep a safe distance: Make sure to stand at a safe distance from the rocket while launching to avoid any accidents.
- Adult supervision: It’s always recommended to have an adult present while launching the water bottle rocket, especially if you’re a young maker.
- Stability check: Ensure that the water bottle rocket is stable and properly constructed before launching.
- Never aim at people or animals: Always point the rocket towards open space or the sky to avoid any harm or accidents.
Choosing A Suitable Launch Site And Conditions:
- Open outdoor space: Find a spacious and open area like a park, field, or backyard to launch your water bottle rocket. This will provide ample space for the rocket to soar and reduce the risk of it hitting any obstacles.
- Wind conditions: Check the wind speed and direction before launch, as strong gusts can affect the trajectory and stability of the rocket. It’s best to launch on a calm day with mild wind conditions.
- Avoid launching near power lines or trees: Ensure that there are no overhead power lines or tall trees near the launch site, as they can interfere with the flight path and cause damage to the rocket.
Remember, these safety precautions and considerations are vital to ensure a successful and safe launch of your water bottle rocket.
By following these guidelines, you’ll be able to enjoy the thrill of watching your rocket soar high into the sky while staying safe.
Happy launching!
Filling The Rocket With Water
Water Bottle Rocket Diy
Recommended Water-To-Air Ratio For Optimal Flight Performance
The amount of water you fill into your water bottle rocket can significantly impact its flight performance. To ensure optimal results, it is important to maintain the recommended water-to-air ratio.
Here are some key points to consider:
- The water-to-air ratio determines the weight and pressure inside the rocket. Too much water can make the rocket too heavy, while too little water may not generate enough pressure for a powerful launch.
- As a general guideline, a ratio of approximately 1: 3 (one part water to three parts air) works well for most water bottle rockets. This ratio provides a good balance between weight and pressure, ensuring decent flight performance.
- Experimentation is key when finding the right water-to-air ratio for your specific rocket design. You may need to adjust the ratio based on factors such as the rocket’s size, materials used, and launch conditions.
Techniques For Filling The Rocket With Water Without Leakage Or Spilling
Filling the water bottle rocket with water can be a tricky task, as you want to avoid any leakage or spills that could compromise your launch.
Consider the following techniques to ensure a smooth and successful fill:
- Use a funnel: A funnel can help to direct the water flow into the rocket more precisely, minimizing the chances of spillage. Ensure the funnel fits securely into the rocket’s opening to prevent any leakage.
- Slow and steady: Pour the water into the rocket slowly and steadily to prevent overflow or splashing. Avoid pouring too quickly, as it can create turbulence inside the rocket and cause water to spill out.
- Partial filling: Instead of filling the rocket to its maximum capacity, consider filling it only partially. This leaves room for air expansion during flight and reduces the likelihood of water leakage.
- Tilt and fill: Tilt the rocket slightly to one side while filling it with water. This technique allows air to escape through the top opening, minimizing the risk of spillage. Ensure the rocket is held securely during this process.
Remember, practice makes perfect. The more you experiment and fine-tune your filling technique, the better you’ll become at avoiding any leakage or spills during your water bottle rocket launches.
So, have fun and keep launching!
Pumping And Pressurizing
Step-By-Step Instructions For Using A Bicycle Pump To Pressurize The Rocket
Pressurizing your water bottle rocket is a crucial step that allows it to soar through the air. One common method of pumping and pressurizing is using a bicycle pump.
This section will guide you through the process, ensuring you achieve optimal pressure for a successful launch.
Here’s how you can use a bicycle pump to pressurize your water bottle rocket:
- Prepare your rocket: Before you begin, ensure that your water bottle rocket is properly assembled and securely sealed. Check all connections and ensure there are no leaks or loose parts.
- Attach the pump: Find the air inlet valve on your rocket and connect the bicycle pump nozzle to it. Make sure it fits snugly to prevent any air from escaping during pressurization.
- Begin pumping: Once the pump is securely attached, start pumping air into the rocket. Use firm and consistent strokes to gradually increase the pressure inside the chamber. Take breaks between pumps to allow the rocket to stabilize and to avoid over-pressurization.
- Monitor the pressure: As you pump, it’s important to keep an eye on the pressure gauge if your bicycle pump has one. This will help you maintain the optimum pressure range for a successful launch. Aim for a pressure between 40 and 60 psi (pounds per square inch), but always refer to the specific instructions provided with your water bottle rocket kit.
- Safety precautions: While pressurizing the rocket, it’s vital to prioritize safety. Follow these precautions to maintain the proper pressure and avoid mishaps:
- Slow and steady: Pump at a controlled pace, as sudden or excessive pressure can damage the rocket or cause it to malfunction.
- Pressure release valve: Ensure that the water bottle rocket is equipped with a pressure release valve. This valve releases excess pressure if it exceeds the recommended range, preventing the rocket from exploding.
- Protective gear: Wear safety goggles and protective gloves to shield yourself from potential accidents.
- Distance and angle: Always launch the rocket away from people, animals, and valuable property. Aim it at a clear and open space to avoid any potential hazards.
- Check for leaks: Throughout the pressurization process, periodically inspect your rocket for any signs of leakage. If you notice air escaping from joints or connections, stop the pressurization and fix the issue before continuing.
Remember, safety should be your utmost priority when pressurizing your water bottle rocket.
By following these step-by-step instructions and adhering to the recommended pressure guidelines, you’ll be well on your way to launching your rocket successfully and enjoying an exhilarating experience.
So, pump up that pressure and get ready for liftoff!
Launching The Rocket
Proper Launching Techniques To Ensure A Successful Flight
Launching a water bottle rocket can be an exciting and exhilarating experience. However, to achieve a successful flight, it’s important to follow proper launching techniques.
Here are some key points to consider:
- Safety first: Before launching the rocket, ensure that you have a clear launch site, away from people, buildings, and any other obstacles that could be potentially hazardous.
- Fill up the water bottle: Make sure to fill the bottle about one-third full with water. This will provide the necessary weight for propulsion while allowing enough space for air pressure to build up.
- Secure the rocket: Attach the bottle firmly to the launcher, ensuring it is tightly secured to prevent any leaks or premature dislodgement during launch.
- Pump it up: Use a bicycle pump or an air compressor to pressurize the bottle. Pump it up until you reach the desired pressure level, keeping in mind that higher pressure will result in a more powerful launch.
- Countdown and launch: Stand a safe distance away from the rocket and have someone else countdown before you release it. On the count of three, release the rocket by quickly pulling the release mechanism. Be ready for an exciting takeoff!
Tips For Adjusting The Launch Angle And Trajectory
The launch angle and trajectory of your water bottle rocket play a crucial role in determining its flight path.
Here are some tips to help you adjust these parameters for optimal performance:
- Experiment with different angles: Start with a launch angle of around 45 degrees and observe the rocket’s flight. If it isn’t reaching the desired height or distance, try adjusting the angle slightly higher or lower to find the sweet spot.
- Use a launch guide: A launch guide, such as a pvc pipe or a wooden rod, can provide stability and consistency during launch. Mount the rocket onto the guide, ensuring it remains straight and aligned for a smooth ascent.
- Monitor wind conditions: Take wind direction into account when adjusting the launch angle. If there is a strong crosswind, consider aiming slightly off the wind to compensate for its effects on the rocket’s trajectory.
- Adjust the water level: A higher water level in the bottle will result in a heavier rocket, potentially affecting its trajectory. Experiment with different water levels to find the right balance between weight and air pressure.
- Observe and learn: Each launch provides an opportunity to learn and improve. Observe the rocket’s flight carefully and take note of any adjustments that can be made for better results. Keep experimenting and fine-tuning until you achieve the desired flight trajectory.
Remember, launching a water bottle rocket is a fun and educational activity that requires attention to safety guidelines and proper technique.
By following these tips and techniques, you can maximize the chances of a successful launch and enjoy the thrill of watching your rocket soar through the sky.
Analysis And Troubleshooting
Flying a water bottle rocket can be an exhilarating experience, but sometimes, things can go wrong.
In this section, we’ll analyze the flight performance of the water bottle rocket and explore common issues that may arise during launch.
Don’t worry, though, as we’ll also provide you with troubleshooting solutions to help you overcome these challenges.
Evaluating The Flight Performance Of The Water Bottle Rocket
When launching a water bottle rocket, it’s important to evaluate its flight performance to ensure it meets your expectations.
Here are some key points to consider:
- Maximum height achieved: Measure and record the maximum height the rocket reaches during its flight. This will give you an idea of the rocket’s overall performance and can help you make adjustments if needed.
- Stability: Observe the rocket’s stability while in flight. A stable rocket will fly straight and maintain a consistent trajectory. Unstable rockets may wobble or veer off course, indicating the need for adjustments to its design or center of gravity.
- Duration of flight: Note how long the rocket stays in the air. A longer flight duration typically indicates better performance. If the rocket falls quickly or loses momentum prematurely, it may be necessary to make modifications to improve its flight time.
- Landing: Assess the rocket’s landing to determine if it descends smoothly or experiences a rough landing. A smooth landing indicates a well-designed rocket, while a rough landing may signal the need for adjustments to ensure a safer and more controlled descent.
Common Issues And Troubleshooting Solutions
Despite careful planning and preparation, water bottle rockets can encounter a few common issues during launch.
Here are some troubleshooting solutions to help you address these problems:
- Unstable flight: If your rocket is wobbling or veering off course during flight, it is likely experiencing stability issues. To improve stability, consider adding fins to the rocket’s body. Fins provide additional stability by creating drag, balancing the forces and keeping the rocket on a straight trajectory.
- Insufficient thrust: If your rocket fails to achieve the desired height or experiences a weak launch, it may lack sufficient thrust. Check the rocket’s water level and pressure to ensure they are appropriate. Adjusting the amount of water or increasing the pressure can provide the necessary thrust for a successful launch.
- Leakage: Leakage can lead to a decrease in thrust and overall flight performance. Inspect the bottle and ensure a tight seal to prevent any water leakage. Reinforce the bottle’s cap or nozzle if necessary.
- Premature ejection: If your rocket’s parachute deploys too early or fails to deploy altogether, it can result in a quick descent and potential damage. Make sure the parachute deployment mechanism is secure and reliable. Adjust the timing or design of the deployment mechanism if needed.
Remember, building and launching water bottle rockets requires both creativity and problem-solving skills.
By evaluating the flight performance and troubleshooting any issues that arise, you can fine-tune your rocket and achieve thrilling and successful launches.
So get ready, experiment, and enjoy the exciting world of water bottle rocketry!
Measuring And Recording Flight Data
Methods For Tracking And Measuring Flight Distance And Height
One of the most exciting parts of launching a water bottle rocket is seeing how high and far it can go.
To accurately measure and record the flight data, you can use various methods and techniques.
Here are some effective ways to track the flight distance and height of your water bottle rocket:
Plain Paragraph:
- Use a measuring tape: After launching the water bottle rocket, have a friend or teammate hold one end of a measuring tape, while you hold the other end. Measure the distance between the launch pad and the point of landing. This will give you the flight distance of your rocket.
Bullet Points:
- Smartphone apps: There are several smartphone apps available that utilize the phone’s sensors like accelerometer and gyroscope to measure height and distance. These apps can provide accurate data and some even have additional features like recording the launch angle and speed.
- Altimeter: An altimeter is a device that measures altitude and can be used to determine the height reached by your water bottle rocket. Simply attach the altimeter to the rocket and launch it. The altimeter will record the highest point reached and you can later check it to know the height attained.
- Tracking systems: Some advanced rocket hobbyists use gps or radio-frequency tracking systems to measure the flight distance and height. These systems provide real-time data for tracking the rocket’s location and altitude throughout the entire flight.
Keeping A Log For Future Reference And Improvement
Keeping a log of your water bottle rocket’s flight data is not only a fun way to track your progress but also enables you to make improvements for future launches.
Here are a few reasons why maintaining a flight log is beneficial:
Plain Paragraph:
- Assessment and analysis: By recording flight data such as distance, height, and other observations, you can analyze the performance of your rocket. This helps in identifying patterns, trends, and areas that need improvement.
Bullet Points:
- Track progress: A flight log allows you to compare the performance of different launches over time. You can observe how various modifications or adjustments affect the rocket’s flight characteristics and make informed decisions for future launches.
- Identify trends: By documenting flight data consistently, you can identify trends in the rocket’s performance. For instance, you may notice that certain weather conditions or launch angles yield better results, enabling you to optimize your launches accordingly.
- Documentation: Keeping a log helps you create a record of your rocketry journey. It serves as a reference point for future experiments, troubleshooting, or even sharing your experiences with other rocket enthusiasts.
Remember, accurate measurement and recording of flight data, along with maintaining a flight log, not only adds a scientific aspect to your water bottle rocket project but also contributes to the overall learning and improvement process.
So, grab your measuring tape, smartphone, or tracking system, and start capturing those exhilarating moments of sky-high adventures!
Identifying And Resolving Flight Issues
When it comes to launching your homemade water bottle rocket, it’s only natural to encounter a few flight issues along the way.
Whether it’s stability, control, or altitude problems, troubleshooting these issues will ensure a successful launch.
Let’s take a closer look at some potential problems and the necessary steps to address them.
Potential Problems With Stability, Control, Or Altitude:
- Poor stability: If your water bottle rocket veers off course or wobbles during flight, stability could be a concern. Here are a few reasons why this may be happening:
- Center of mass is off: Ensure that the weight distribution of your rocket is balanced, with the center of mass located towards the front of the bottle.
- Incorrect fin design: The fins play a crucial role in stabilizing the rocket. Make sure they are correctly sized and aligned, providing enough surface area to maintain stability.
- Inadequate fin attachment: Double-check that the fins are securely attached to the bottle, as loose or improper attachment may cause instability.
- Lack of control: Sometimes, your water bottle rocket may fail to respond to your control inputs effectively. Consider these potential causes:
- Incorrect launch angle: Launching your rocket at too steep or too shallow an angle can affect control. Aim for an optimal launch angle of around 45 degrees to achieve the best control.
- Loose or damaged launch mechanism: Check that your launch mechanism is securely fastened and in good condition. A loose or faulty launch mechanism can result in compromised control during liftoff.
- Inadequate aerodynamic stability: If your rocket’s shape or design hampers its flight stability, it may be challenging to maintain control. Experiment with different designs and ensure a streamlined body for improved performance.
- Low altitude: If your rocket fails to achieve the desired height or barely gets off the ground, several factors may be contributing to this issue:
- Insufficient water: The amount of water in your rocket directly affects its thrust. Ensure you have enough water for a powerful launch, but avoid over-filling the bottle as it may lead to instability or a premature burst.
- Inadequate air pressure: Insufficient air pressure buildup within the bottle can hinder upward thrust. Make sure your air pump provides enough pressure to generate maximum thrust.
- Improper nozzle design: The nozzle size and shape impact the efficiency of thrust generation. Experiment with different nozzle configurations to optimize thrust and ascent.
Troubleshooting Tips For Addressing These Issues:
Stability:
- Ensure proper weight distribution and center of mass placement.
- Verify the fins’ alignment, size, and secure attachment to the bottle.
Control:
- Launch the rocket at an optimal angle of around 45 degrees for better control.
- Check and secure the launch mechanism to ensure reliable control during liftoff.
- Optimize the rocket’s shape and design for improved aerodynamic stability.
Altitude:
- Confirm sufficient water volume for maximum thrust without overfilling the bottle.
- Ensure adequate air pressure buildup in the bottle by using a suitable air pump.
- Experiment with different nozzle designs to enhance thrust efficiency.
No matter what issues you encounter with your water bottle rocket’s flight, these troubleshooting tips should help you identify the problem and find the appropriate solutions.
Don’t be discouraged by any setbacks—building and launching water bottle rockets is all about learning through trial and error.
So, stay determined, make adjustments, and get ready for some exciting high-flying adventures!
Can I Use the Same Steps for Making a Water Bottle Rocket to Make a DIY Hamster Water Bottle?
Can I use the same steps from a water bottle rocket tutorial to make a DIY hamster water bottle? While the process for creating a water bottle rocket and a hamster water bottle may share similarities, it is important to find a specific diy hamster water bottle tutorial that addresses the safety and needs of your pet.
FAQ About Water Bottle Rocket Diy
How Does A Water Bottle Rocket Work?
A water bottle rocket works by creating pressure when water is rapidly expelled from the bottle, propelling it upwards.
What Materials Do I Need To Make A Water Bottle Rocket?
To make a water bottle rocket, you’ll need a plastic bottle, a cork or rubber stopper, water, a bicycle pump, and fins made from cardboard or plastic.
How High Can A Water Bottle Rocket Fly?
A water bottle rocket can reach heights of up to 100 feet or more, depending on the design and the amount of pressure generated.
Is It Safe To Launch A Water Bottle Rocket?
Launching a water bottle rocket can be safe as long as proper precautions are taken. Ensure you follow safety guidelines and launch in a suitable location.
Can I Reuse My Water Bottle Rocket?
Yes, you can reuse your water bottle rocket by refilling the bottle with water and repressurizing it with a bicycle pump.
Conclusion
Water bottle rockets can provide hours of entertainment for kids and adults alike. Not only are they a fun diy project, but they also offer an opportunity to learn about physics and engineering concepts.
By following a few simple steps, you can create your own water bottle rocket and launch it into the sky.
Remember to choose the right materials, build a sturdy structure, and follow safety precautions. Once your rocket is ready, find an open space and get ready for takeoff.
The thrill of watching your creation soar through the air is truly unbeatable.
Whether you’re a beginner or an experienced rocketeer, the satisfaction of a successful launch is worth the effort.
So grab some friends, gather your supplies, and get ready to embark on an exciting water bottle rocket adventure.
Let your imagination take flight as you explore the world of diy rocketry!