Diy Water Bottle Greenhouse – 9 Easy Steps
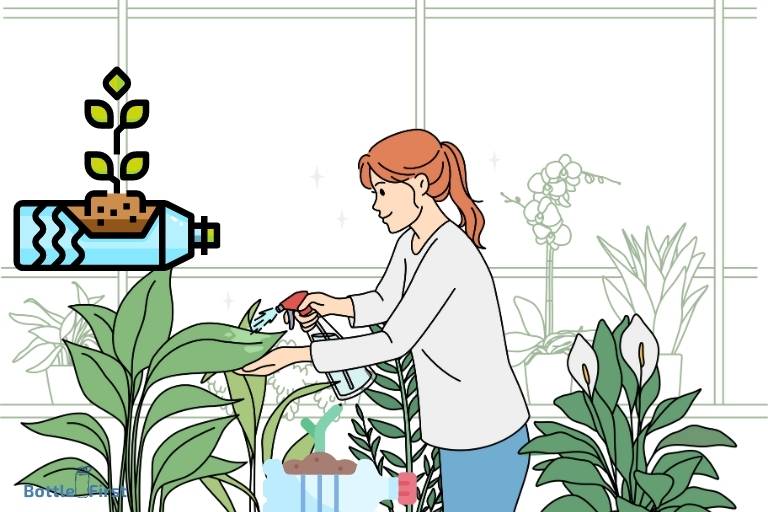
A DIY water bottle greenhouse is a cost-effective, eco-friendly, and fun project that allows you to create a small-scale greenhouse using discarded plastic water bottles.
This project is not only an excellent way to recycle waste, but it also provides an optimal environment for your plants to grow all year round.
A DIY water bottle greenhouse works on the principle of creating a microclimate for plants.
It traps solar radiation during the day, creating a warm environment, and retains this warmth through the night, protecting the plants from cold temperatures.
This creates a perfect environment for plants to grow, regardless of the outside weather conditions.
Creating a DIY water bottle greenhouse is easy. You simply need to collect and clean old plastic water bottles, remove the bottom of the bottles, and stack them on top of each other to create walls and a roof.
Secure the structure with a frame, and you have your own mini greenhouse ready to go. It’s a project that combines creativity, sustainability, and gardening in one.
9 Steps of a DIY Water Bottle Greenhouse
| Step | Instructions | Materials Needed |
|---|---|---|
| 1 | Clean the water bottle | Water Bottle, Soap, Water |
| 2 | Cut off the bottle’s bottom | Scissors or Knife |
| 3 | Choose your seeds | Seeds |
| 4 | Fill the bottle’s bottom with soil | Soil |
| 5 | Plant your seeds into the soil | Seeds, Soil |
| 6 | Water the seeds | Water |
| 7 | Place the top part of the bottle over the bottom | Water Bottle |
| 8 | Place the bottle in a sunny location | |
| 9 | Water regularly and watch as your seeds sprout into plants | Water |
Key Takeaway
Fascinating Facts about DIY Water Bottle Greenhouses
Materials Needed
List Of Materials Required For Building A Diy Water Bottle Greenhouse
Creating your own diy water bottle greenhouse is not only a fun project but also an eco-friendly way to repurpose old plastic bottles.
Before getting started, make sure you have the following materials:
- Plastic bottles: Collect as many plastic bottles as you can. Opt for clear or translucent bottles, as they allow sunlight to pass through effectively. Aim for uniform bottle sizes to ensure stability in your greenhouse structure.
- Scissors or craft knife: You’ll need these to cut the bottles and make the necessary modifications.
- Duct tape or strong adhesive: This will be used to secure the bottles together during the assembly process. Make sure to choose a durable adhesive that can withstand different weather conditions.
- Wooden or metal stakes: Stakes will provide stability for your greenhouse. You can use either wooden dowels or metal rods, depending on what is easily available to you.
- String or twine: This will be used to tie the bottles to the stakes, ensuring they stay securely in place.
- Potting soil or compost: To create an optimal environment for your plants, you’ll need a suitable growing medium.
- Seeds or seedlings: Choose the plants you want to grow in your greenhouse and make sure you have the necessary seeds or seedlings ready.
- Watering can or spray bottle: You’ll need a way to water your plants once they’re inside the greenhouse. A watering can or spray bottle will be handy for this purpose.
Where To Source The Materials
Now that you know the list of materials required for your diy water bottle greenhouse, let’s explore where you can find them:
- Plastic bottles: Collect bottles from your own household, friends, neighbors, or local recycling centers. Check if there are any bottle collection programs in your community that you can participate in.
- Scissors or craft knife: These can be easily obtained from a local hardware store, craft store, or even your own household toolbox.
- Duct tape or strong adhesive: Visit a nearby hardware or home improvement store to find a suitable adhesive. Alternatively, you can also order it online.
- Wooden or metal stakes: Look for stakes at your local gardening store, or repurpose old wooden dowels or metal rods from other items around your home.
- String or twine: You can find string or twine at gardening stores, craft stores, or even in your own storage area.
- Potting soil or compost: Purchase potting soil or compost from a local garden center or nursery. You can also make your own compost using kitchen scraps and yard waste.
- Seeds or seedlings: Buy seeds from gardening stores or order them online. Alternatively, seek out local plant nurseries or community gardening groups for seedlings.
- Watering can or spray bottle: These can be found at garden supply stores, home improvement stores, or even repurposed from old household items.
With the materials in hand, you’re one step closer to building your own diy water bottle greenhouse.
Get ready to embark on an exciting project that will not only benefit your plants but also contribute to a greener planet.
Building The Foundation
As you begin the exciting journey of creating your very own diy water bottle greenhouse, it is essential to start with a strong foundation.
In this section, we will guide you through the process of preparing the area for the greenhouse structure and selecting the ideal location to ensure optimal sunlight exposure.
Preparing The Area For The Greenhouse Structure
Before you begin constructing your water bottle greenhouse, it is crucial to prepare the designated area properly.
Follow these key steps to create a solid foundation:
- Clear the space: Remove any debris, weeds, or plants from the area where you plan to build your greenhouse. This will provide a clean and level surface for the structure.
- Level the ground: Use a shovel or rake to level the ground where the greenhouse will stand. This will help ensure stability and prevent any tilting or unevenness once the structure is in place.
- Weed prevention: To minimize weed growth within your greenhouse, consider laying a weed barrier fabric or newspaper on the ground. This will create a layer that prevents weeds from sprouting and competing with your plants for nutrients.
Selecting The Right Location For Optimal Sunlight Exposure
One of the most critical factors for the success of your diy water bottle greenhouse is its placement in an area with ample sunlight exposure.
Keep the following points in mind when choosing the perfect location:
- Sunlight requirements: Most plants thrive in direct sunlight, so select a spot that receives at least 6-8 hours of sunlight per day. Avoid areas with too much shade or those that are constantly shaded by buildings or trees.
- South-facing orientation: Whenever possible, orient your greenhouse in a south-facing direction. This will allow the maximum amount of sunlight to reach the structure throughout the day.
- Consider nearby structures: Take into account any nearby structures, such as trees or buildings, that may cast shadows on your greenhouse during certain times of the day. Ensure that these obstructions do not hinder the sunlight reaching your plants.
- Wind protection: While sunlight exposure is vital, consider the impact of strong winds on your greenhouse. Position your structure in a location where it will be shielded from harsh winds to prevent damage.
By following these steps and carefully considering the area and location for your diy water bottle greenhouse, you will be well on your way to creating an optimal foundation for your plants.
With a solid base in place, you can now continue the exciting process of constructing your water bottle greenhouse and watch your plants thrive in their eco-friendly haven.
Constructing The Greenhouse Frame
Step-By-Step Guide To Building The Skeleton Of The Greenhouse Using Water Bottles
Are you looking for a fun and eco-friendly way to create your own mini greenhouse? Look no further!
In this step-by-step guide, we will show you how to construct the frame for your diy water bottle greenhouse.
By upcycling plastic bottles, you can contribute to reducing waste while creating a unique and functional greenhouse for your plants.
Let’s get started!
Collecting The Materials
Before we begin, make sure you have all the necessary materials at hand.
Here’s what you’ll need:
- Plastic water bottles: Collect as many empty water bottles as you can. The number will depend on the size of your desired greenhouse.
- Scissors or utility knife: These will be used to cut the bottles.
- Bamboo skewers: These will serve as the support structure for your greenhouse.
- Twine or zip ties: You’ll need these to secure the bottles and bamboo skewers together.
- Soil and seeds: Don’t forget to have some soil and seeds ready for planting once your greenhouse is complete.
Preparing The Bottles
Now that you have your materials ready, it’s time to prepare the water bottles for construction.
Follow these steps:
- Remove the labels: Start by peeling off any labels and cleaning the bottles thoroughly.
- Cut the bottles in half: Using scissors or a utility knife, carefully cut each bottle in half horizontally. This will create two mini greenhouses per bottle.
- Create ventilation holes: With a small nail or sharp object, poke a few small holes in the bottom of each bottle half. These holes will allow for proper airflow and prevent excess moisture buildup.
Building The Frame
With the bottles prepared, let’s move on to constructing the frame of your water bottle greenhouse.
Here’s how:
- Insert bamboo skewers into the ground: Decide on the layout and placement of your greenhouse. Insert bamboo skewers into the ground at equal distances apart, forming a rectangular shape. These will serve as the main support beams for your greenhouse.
- Attach the bottles to the skewers: Take the bottle halves and slide them onto the bamboo skewers, one by one. Align them horizontally, with the bottoms facing outwards and the bottle openings facing up. Secure each bottle in place using twine or zip ties, ensuring they are tightly fixed.
Ensuring Stability
To ensure that your greenhouse frame is stable and secure, follow these additional steps:
- Secure the skewers together: To further reinforce the frame, use twine or zip ties to secure the bamboo skewers together at the corners. This will provide extra stability and prevent the structure from wobbling.
- Double-check the alignment: Take a moment to check that all the bottles are aligned properly and evenly spaced. Adjust them if necessary, ensuring a snug fit.
- Test the stability: Gently shake the frame to test its stability. Make any necessary adjustments by tightening the twine or zip ties.
Congratulations! You have successfully constructed the skeleton of your diy water bottle greenhouse.
In the next steps, we will guide you through adding the finishing touches and transforming it into a thriving space for your plants.
Stay tuned for the next part of our diy water bottle greenhouse series!
Installing The Plastic Covering
Choosing The Right Type Of Plastic For The Covering
Installing the plastic covering is a crucial step in building your diy water bottle greenhouse. The right type of plastic ensures proper insulation and protection for your plants.
Here are some key points to consider when choosing the plastic:
- Uv-resistant plastic: Look for plastic that is designed to withstand uv rays, as it will ensure the longevity of your greenhouse.
- Clear or translucent plastic: Opt for clear or translucent plastic to allow maximum sunlight to enter the greenhouse. This helps plants with photosynthesis and growth.
- Thickness: Consider the thickness of the plastic. Thicker plastic provides better insulation but may be costlier. Thinner plastic is more affordable but may not offer the same level of protection.
- Durability: Choose plastic that is durable and resistant to tears or punctures. This will prevent damage and maintain the integrity of your greenhouse.
- Recyclable materials: If you’re environmentally conscious, consider using recyclable plastic for your greenhouse covering. Look for materials that can be easily recycled after you no longer need them.
Attaching The Plastic To The Greenhouse Frame Securely
Now that you have chosen the right type of plastic for your greenhouse covering, it’s time to attach it securely to the frame.
Proper attachment ensures that the plastic stays in place and provides optimal protection for your plants.
Here are a few steps to follow:
- Measure and cut: Measure the dimensions of your greenhouse frame and cut the plastic sheet accordingly, allowing some overlap for secure attachment.
- Secure the plastic: Use greenhouse clips or a staple gun to secure the plastic to the frame. Place the clips or staples at regular intervals to prevent any sagging or looseness.
- Stretch and tighten: Stretch the plastic across the frame to remove any wrinkles or sagging. This ensures a tight and secure fit.
- Avoid excessive tension: While it’s important to tighten the plastic, be careful not to stretch it excessively. Too much tension can lead to tearing or damage.
- Seal any gaps: Inspect the edges of the plastic covering and ensure there are no gaps or openings. Use a double-sided greenhouse tape or adhesive to seal any areas where the plastic may not be securely attached.
By following these steps, you can install the plastic covering on your diy water bottle greenhouse effectively and ensure the best conditions for your plants.
Maintaining And Monitoring The Greenhouse
Congratulations! You have successfully set up your very own diy water bottle greenhouse.
Now that your plants are happily growing in their new home, it’s important to maintain and monitor the greenhouse to ensure their continued health and growth.
Here are some tips to help you with watering, maintaining proper temperature and humidity levels, as well as monitoring and preventing common greenhouse pests and diseases.
Tips For Watering And Maintaining Proper Temperature And Humidity Levels
Watering your plants correctly is essential for their growth and development.
Here’s how to do it right:
- Water your plants thoroughly, making sure the soil is evenly moist. Avoid overwatering, as it can lead to root rot and other problems.
- Check the soil moisture regularly by sticking your finger about an inch deep into the soil. If it feels dry, it’s time to water.
- Use a watering can or a spray bottle to water your plants gently. Avoid splashing water on the leaves, as it can promote the growth of fungal diseases.
- Consider using a drip irrigation system or a self-watering container for more consistent and efficient watering.
Maintaining proper temperature and humidity levels is crucial for the optimal growth of your plants.
Here are some tips to help you achieve the right conditions:
- During the day, the temperature inside the greenhouse should ideally be between 70-80°f (21-27°c) for most plants. However, some plants may have specific temperature requirements, so it’s important to research the needs of your specific plants.
- Ventilate the greenhouse by opening windows or using fans to regulate the temperature. This will prevent overheating and help maintain a comfortable environment for your plants.
- Monitor the humidity levels regularly. Most plants thrive in humidity levels between 50-70%. Consider using a hygrometer to measure the humidity inside the greenhouse.
- If the humidity levels are too high, you can improve ventilation or use a dehumidifier. On the other hand, if the humidity levels are too low, misting the plants or using a humidifier can help increase the moisture in the air.
Monitoring And Preventing Common Greenhouse Pests And Diseases
Even in a diy water bottle greenhouse, pests and diseases can still find their way in.
Here’s how you can monitor and prevent common problems:
- Regularly inspect your plants for signs of pests such as aphids, whiteflies, or spider mites. Look for discolored leaves, sticky residue, or tiny insects on the foliage.
- Remove any infected or infested plants immediately to prevent the spread of pests and diseases. Quarantine them and treat them accordingly.
- Consider using natural pest control methods like introducing beneficial insects, such as ladybugs or lacewings, or using organic pesticides as a last resort.
- Keep the greenhouse clean and tidy by removing any fallen leaves or debris that could harbor pests and diseases.
- Monitor your plants for any signs of common diseases like powdery mildew or leaf spot. If detected, remove the infected parts and apply appropriate treatments, such as fungicides or organic remedies.
By following these tips, you can ensure that your diy water bottle greenhouse remains a healthy and thriving environment for your plants.
Regular monitoring, proper watering, and maintaining optimal temperature and humidity levels are key to the success of your greenhouse.
Enjoy the rewards of your hard work as you watch your plants thrive and flourish in their green haven!
Can I Use the Same Steps for Building a Water Bottle Bidet for a Diy Water Bottle Greenhouse?
If you’re looking to build a water bottle greenhouse using easy water bottle bidet diy steps, you might wonder if the same steps can be applied. While both projects involve repurposing water bottles, the techniques and purpose differ significantly. Building a water bottle bidet focuses on creating a hygienic cleaning system, whereas a water bottle greenhouse emphasizes creating a small-scale greenhouse using recycled materials. Consequently, separate instructions specific to each project should be followed to achieve the desired results.
FAQ About Diy Water Bottle Greenhouse
How Do You Make A Diy Water Bottle Greenhouse?
To make a diy water bottle greenhouse, gather empty plastic bottles, cut them in half, attach them to each other using duct tape, and arrange them in a desired shape.
Fill the bottoms with soil, plant your seeds, and watch them grow!
What Are The Benefits Of A Water Bottle Greenhouse?
A water bottle greenhouse helps recycle plastic bottles, saves space, and creates a controlled environment for plants to thrive in.
How Does A Water Bottle Greenhouse Work?
A water bottle greenhouse traps heat from the sun, creating a warm environment for plants.
The clear plastic bottles allow sunlight to enter and retain heat, aiding plant growth.
What Plants Are Suitable For A Water Bottle Greenhouse?
Herbs like basil, oregano, and rosemary, as well as vegetables like tomatoes, lettuce, and peppers, are suitable for a water bottle greenhouse.
How Can A Water Bottle Greenhouse Be Maintained?
Regularly check soil moisture, water the plants as needed, and remove any pests or weeds.
Proper ventilation and temperature control are important factors in maintaining a healthy water bottle greenhouse.
Conclusion
Creating a diy water bottle greenhouse is not only a cost-effective and sustainable solution for gardening, but it is also a fun and creative project to engage in.
By repurposing plastic water bottles, we can minimize waste and contribute to a greener environment.
The greenhouse offers the perfect environment for growing a variety of plants and vegetables, enabling us to have fresh produce all year round.
Additionally, it allows us to explore our creativity by experimenting with different designs and arrangements.
Whether you have a small balcony or a large backyard, a diy water bottle greenhouse can be tailored to fit any space.
So why not give it a try? Start collecting those empty water bottles and embark on a rewarding gardening experience that benefits both you and the planet.
Happy gardening!